
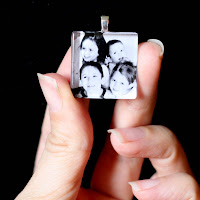
I mentioned that my favorite glass tile pendant is the photo one of my kids.
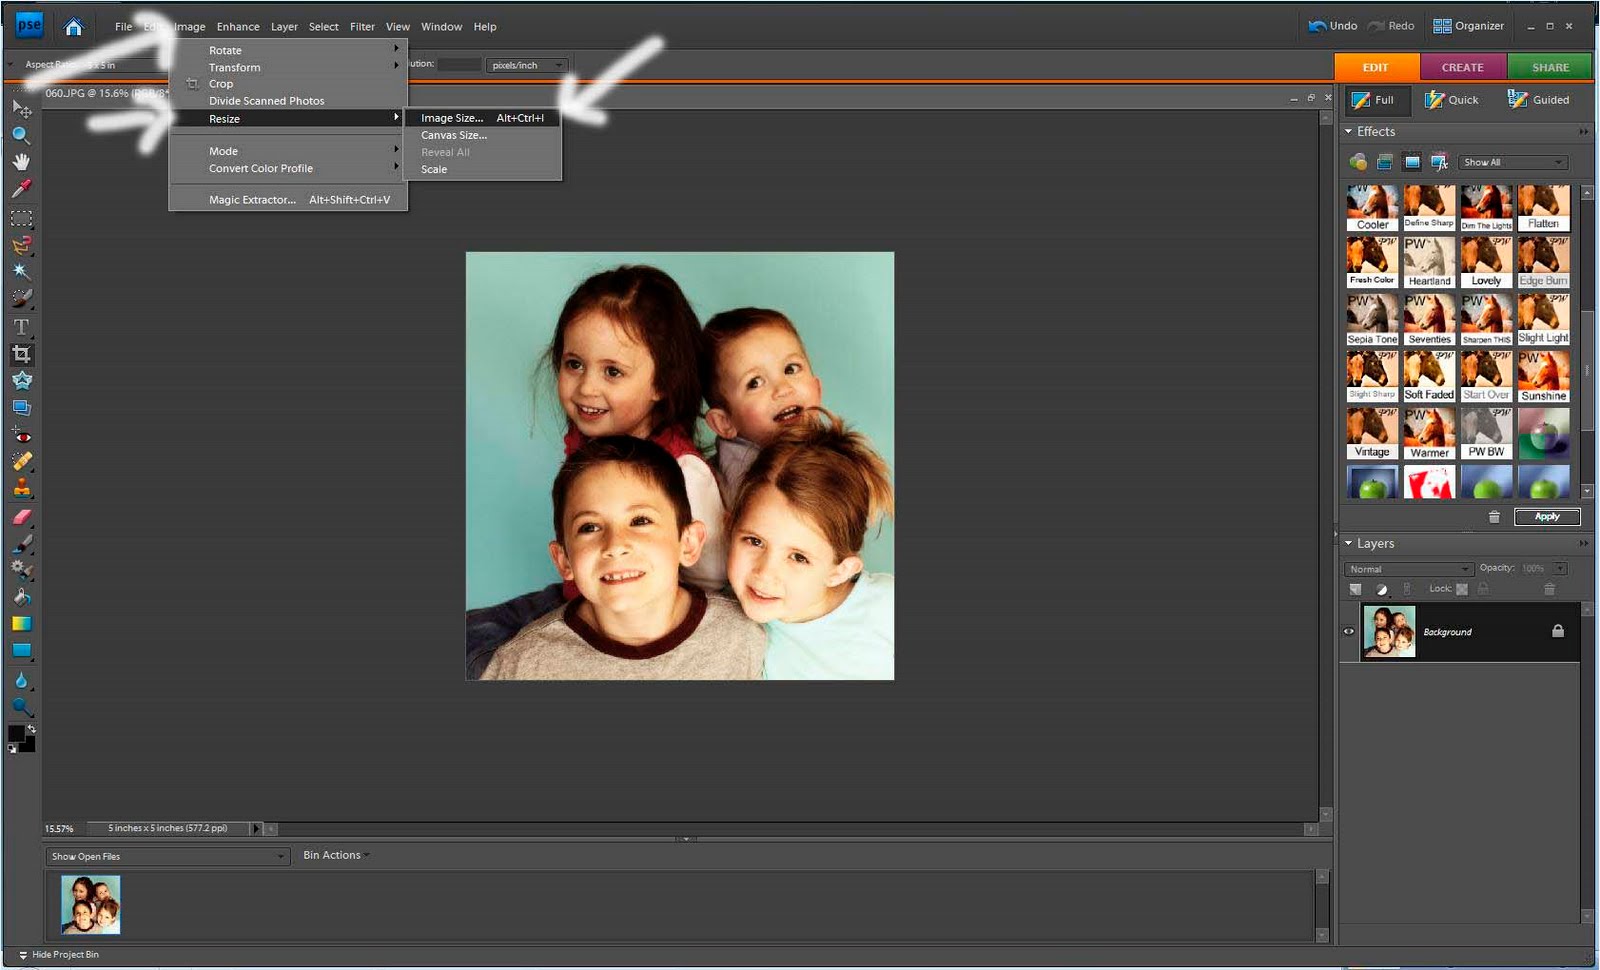
This was not hard at all to do. So here’s a quick tutorial on how to shrink a picture using Photoshop Elements – this is for the Elements newbie, so if you know your way around the program you know that you don’t need this post.
First a quick shout-out to Photoshop Elements – I recently bought version 7 on Ebay for $30 – that’s a minimal price to pay for great editing software. I love “actions” which are things you can download to automatically give your pictures a certain look (let me know and I can do a post on what they are more specifically) and I don’t feel at all that I need the full-version grown-up Photoshop – Elements is meeting all my needs and I’m sure it can do lots more that I don’t even know about.
So open up Elements and the picture you want to use. Tweak your colors to how you want them. Then crop your picture to a square – to do this click the crop tool and then there will be a drop-down box where you can choose 5×5 – that’s a square (equal sides, equal angles – you know). Then drag the box over your picture to how you want it.


I am so loving your tile pendants! Especially with the pictures! Way to much fun! I am here from NFF. think I might just have to follow! Stop by Crazy Daisy sometime, I would love to have you!
Happy Day,
Jasey @ Crazy Daisy
http://www.crazyjayzplace.blogspot.com
Great job. I’m your newest follower from New Friend Friday at The Girl Creative. I love you blog. Can’t wait to read more.
-K
https://mypottyseat.blogspot.com/
Cute! Do you have to print with a laser printer, or will inkjet do? Just want to make sure it won’t smear. Thanks!
Good question on the laser vs. inkjet – I made sure to print on a laser just in case. My laser printer is only black and white, so I just loaded my Word Doc onto a jump drive and took it into OfficeMax and they printed it off in color using their laser jet for less than $1. I haven’t tried an inkjet so I don’t know about the smear factor.
Enjoyed the tutorial, I’m a semi newbie on Photoshop, I too have PSElements7. I don’t know about actions so I would definintly be interested in a tutorial on that. Maybe I use it and just don’t know what I’m doing? I’m self taught.
Just wondering if there is another photo editing program that can be used to do this? I have photo pro something or another I think? Thanks for your help!
What a lovely project 🙂 I love the idea of putting pictures on the tile pendant, fantastic. I’m loving it.
Michaela
collage picture frame
I love the technique you use here. A great way to scale down images.
Ann@ girl jewelry boxes
I make glass tile necklaces and earrings. I have been wanting to do photo ones for two moms that have lost their children. My conflict was getting a photo the right size to fit in and still look good. How did you get this to work with printing it yourself? I was worried that the paper glaze would smear the ink. Thanks!
I didn’t have any smearing issues – I have a laser printer, so maybe that makes a difference? Good luck with yours!
I’ve heard you can put a piece of clear tape on your image before gluing it to the tile to prevent any smearing.
Where can I buy these small glass tiles? And the balls you say you use on the back?
All the info on where to buy supplies is on this post: https://www.sugarbeecrafts.com/2010/04/glass-tile-pendants.html
Hope that helps!
What I need to shrink the photos
Lovely pendants. Thanks for sharing.
Anand recently posted…How To Create Personal Photography Brand
Great works. It will be helpful for any newbie in photoshop elements.
Anand recently posted…How To Create Personal Photography Brand
I’m beginner to photo editing. This article is really helpful for me. Thank you for sharing this informative article a great idea of photo editing.