


this post may contain affiliate links
Remember last year when I went on a pillowcase-dress-making craze? I added to it! Shirred Pillowcase Dress Tutorial

Well recently all the craft blogs have been bombared with shirring (sewing with elastic thread) and I was itching to try it. When a friend called from JoAnns and said “do you need anything while I’m here” I jumped on that – YES, I HAVE to have ELASTIC thread!! (and I just love how sewing supplies get delivered by friends, without me even having to leave the house – awesome!) Now for a project to test out shirring. I thought it would give some body/shape to a pillowcase dress and I thought I was a genius for designing this look. Then yesterday I saw my same dress design – at Walmart. Guess I’m not as unique as I thought – oh well.
Let’s get started on how to make a shirred pillowcase dress.
Shirred Pillowcase Dress Tutorial
You’ll need:
–a pillowcase (bought mine at a yard sale for a quarter – love the lace edging)
–Ribbon or fabric for the tie around the neck and optional band around the bottom
—elastic thread, hand-wound around a bobbin
Tutorial:
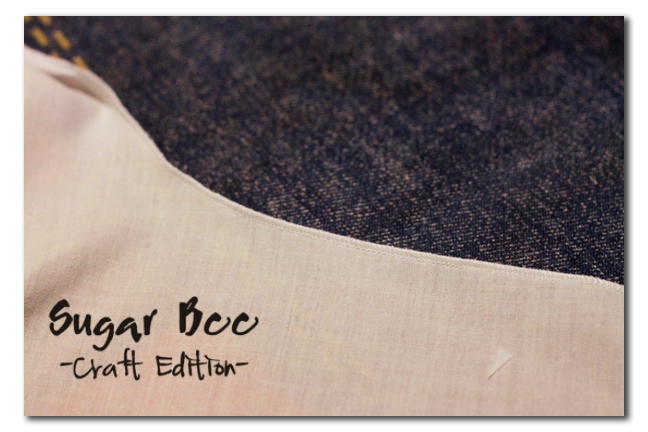
First cut a strip of fabric and sew it into a tube and turn it right-side out – this you will use as the ties around the neck. Or if you have ribbon, you can skip this step. You can make 2 shorter lengths and tie it at each shoulder or one long length and just tie it on one side. You’ll need to finish the ends, or heat-set them if you’re using ribbon. Then set that aside.

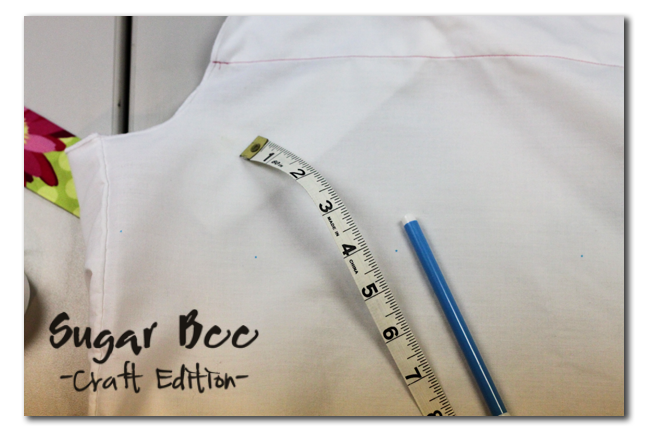
Next cut the top off of your pillowcase – measure your little girl to see how long you want the dress, and cut off the top amount accordingly. I wanted a longer dress this time – usually I aim for about knee-length, but this was more mid-calf. I cut 4-5 inches, but I was using a king-size pillowcase. Then cut armholes in each side as pictured:

Next you can hem the arm hole edges and the top. Or if you’re lucky enough to have a serger, just whip them through it on rolled hem and you’re done.
Fold down the top of the pillowcase on the front and back according to the width of your ribbon/fabric strip. Sew that into place and thread the ribbon/fabric through it. At this point if you were doing a plain pillowcase dress you’d be done – easy, right?
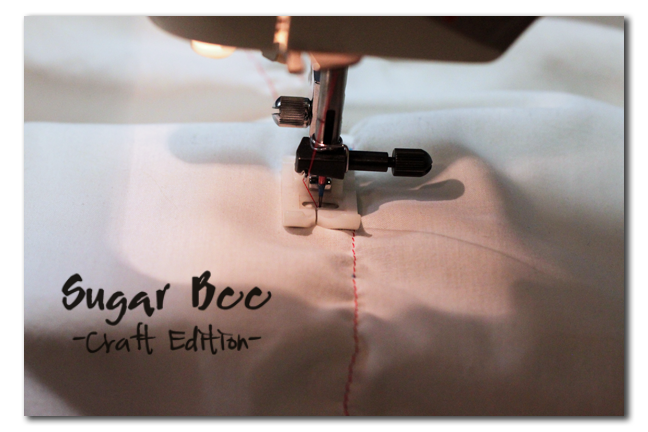
Now, on to the shirring, aka smocking (also EASY! really!) I glanced at a couple of tutorials and then just winged it (I told myself, it’s only a $.25 pillowcase, a mistake will be okay!). First HAND-WIND your bobbin with elastic thread – just as it sounds, using your own two hands, wrap around the bobbin, not loose but not tight.
Mark your first line with dots (can you see them in the picture? – look close) and then sew all the way around until you come back to the beginning.
Then after that you don’t have to mark – just use your previous line as a guide. Sew as many lines as you want. I even made a pattern – single, double, single…
Coming off the machine mine looked a little gathered, but not a ton, like this:
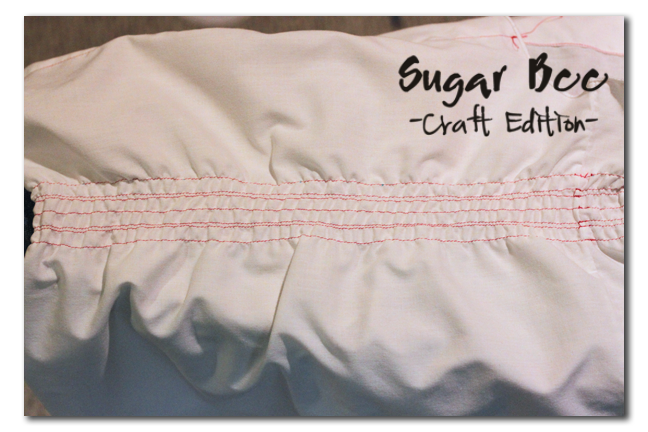
Well then comes the fun – grab your iron and steam your stitches – they will shrink! I wish I would have gotten this part on video – it was so fun to watch. So mine turned into this:

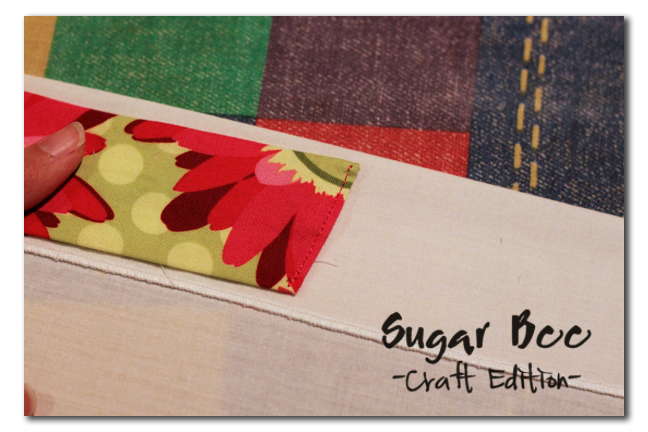
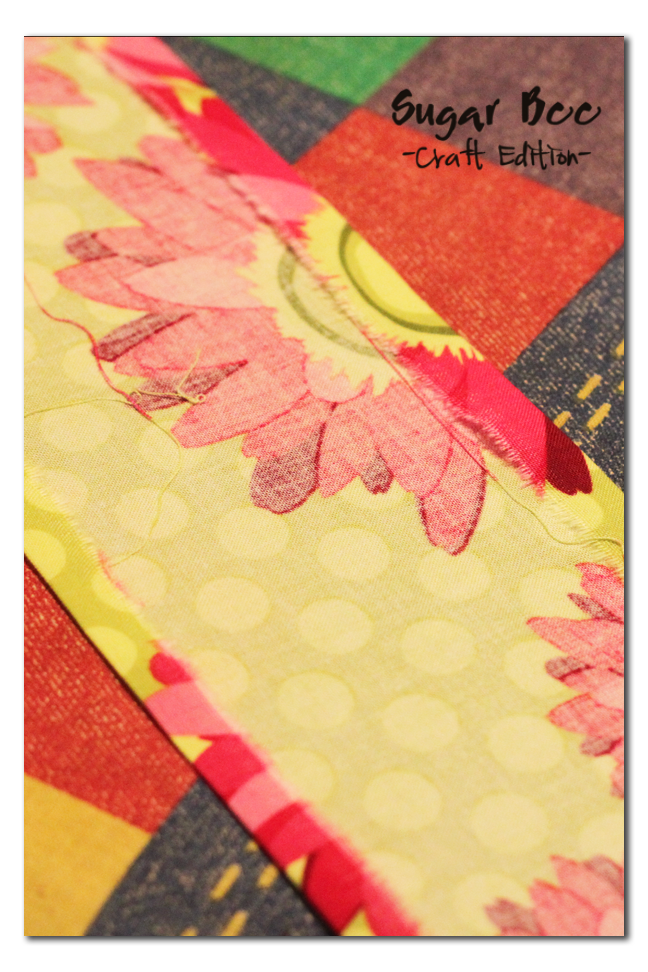
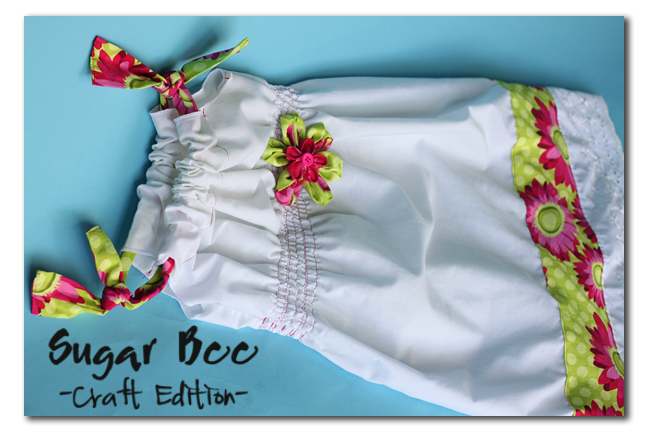
Now, I thought the dress was still a little plain so I added a fabric strip to the bottom – you could also just sew on a ribbon or buttons or whatever – get creative. I turned under a strip of fabric and then sewed it directly onto the pillowcase, above the lace detail.
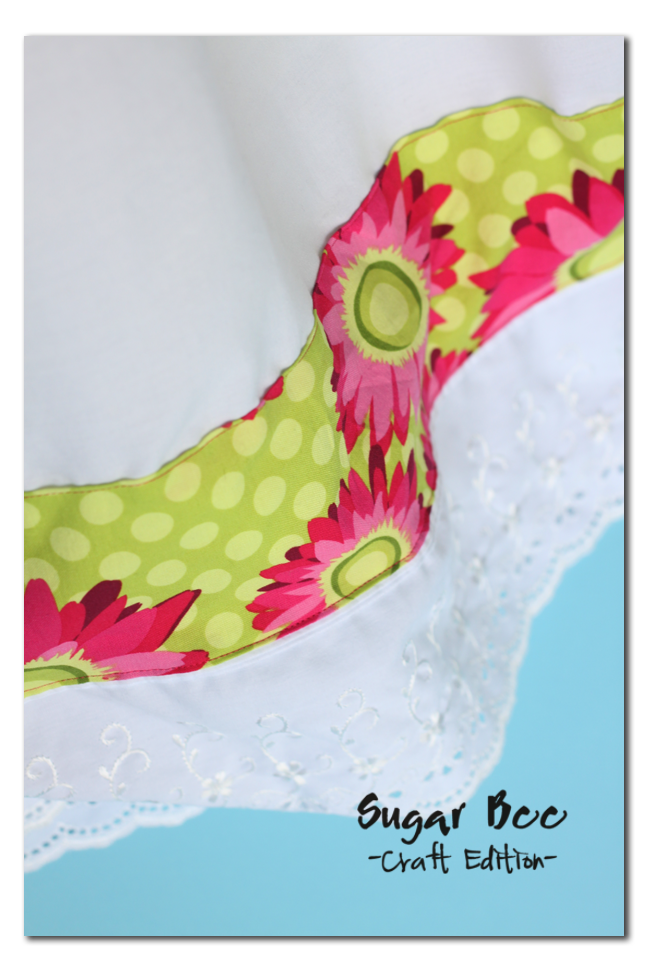
I also added what might be the coolest fabric flower ever – be looking for an upcoming how-to on the making of this little beauty.

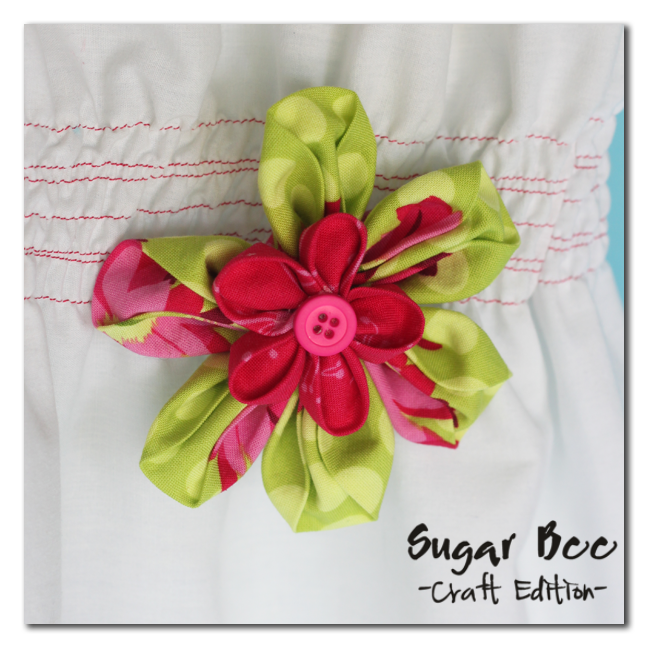
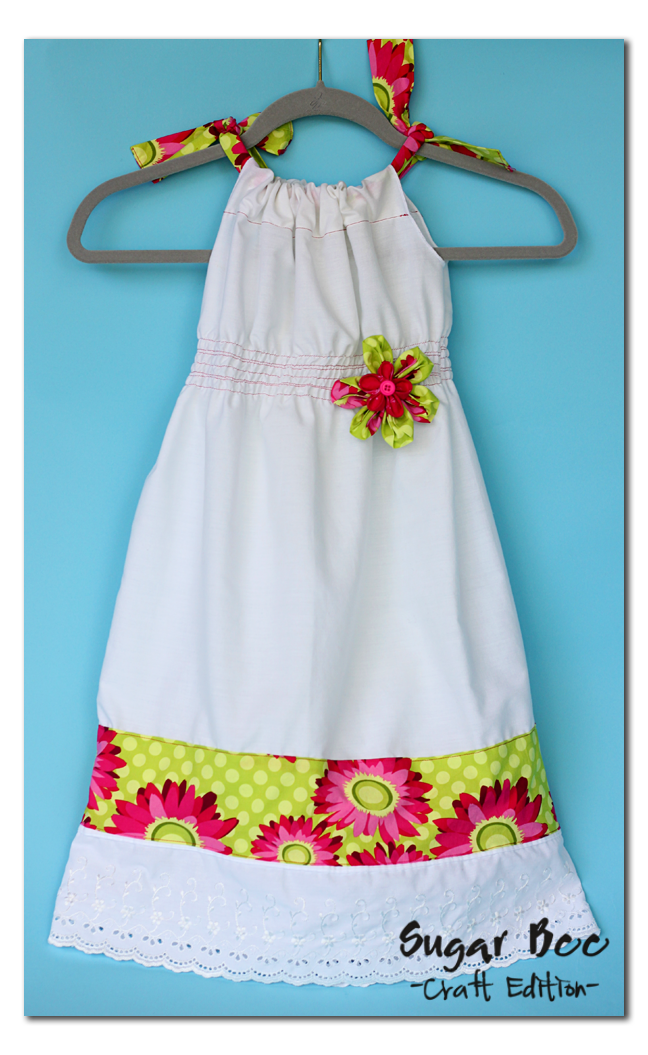
And here’s the dress in action – I LOVE how it turned out! You can see how the front and back are exactly the same except for the flower I tacked on. This whole project took only a naptime. A perfect project for a beginner sewer – go try it!


Hope you enjoyed this Shirred Pillowcase Dress Tutorial!
oooh, PRETTY!!! I linked to your tutorial on Craft Gossip Sewing:
https://sewing.craftgossip.com/tutorial-shirred-pillowcase-dress/2010/05/13/
–Anne
I love it! I love the pillow case dress style with a bit of definition at the waist. Super cute! Thanks for linking to Make It Wear It!
How adorable! I love it!
Coming from Somewhat Simple link party.
Come join me in my very first link party
terelauritsen.blogspot.com
I’ve seen a lot of these pillowcase dresses, but I’ve never seen one that didn’t look like a pillowcase . . . until now. This is adorable! A definite project for me before summer comes! I’m excited to be a new follower!
Who knew pillow case could look so great! Now if they only came in my size
It turned out so cute and this tutorial is a really good one! Good job!
Oh lovely! I just wish my daughter was small again to make these for her! Love your design!
Love the dress! Super cute. And 4 AM. Now that’s dedication to your blog! :o)
Adorable! We’d love to have you post this on our Saturday Spotlight linky party! https://nv-craftenvy.blogspot.com
I LOVE IT, I GOING TO MAKE ONE FOR ME. SO TALENTED
Super Cute Dress! I have a few pillowcases that are just waiting for me to turn into dresses for my little one!
Thanks for sharing!
If I had a little girl I would make that asap!! Following from New Friend Friday 🙂
I’m in love with this idea! How creative!
Found you on New Friend Friday, love the blog!
Katie P
https://www.craftedition.blogspot.com/
love the dress so cute!
That looks GREAT! Stopped by from Gay’s!
Oh, that is just lovely!! YOu did such a nice job. I have a whole stack of pillowcases just WAITING for a tranformation. This has given me the motivation I think I needed. Thank you for sharing!!
katie@ http://www.hipposanddinosaurs.blogspot.com
This is so adorable! And a great tutorial! I would love it if you’d link up to it at my Sharing Time Link Party here: https://heathernow.blogspot.com/2010/05/sharing-time.html
Love this! The bright colors look fabulous with the white, so summery!
I really love this! Too bad I won’t fit into a pillowcase. 🙂 I have never sewed with elastic thread and am a little afraid to try. Is it as scary as it seems? 🙂
Thanks for linking up to Messy Monday. I always look forward to seeing what you will link up.
Dying for the follow up flower tutorial! My oldest is off to Kindergarten in the fall and the little ones still nap so I’m already gearing up for the many crafty things I can do while they sleep…these dresses are a Must Have for us because my middle daughter loves the loose feel of pillowcase dresses but I don’t like how they normally look. You’ve managed to marry her wishes with my taste seamlessly!
That is super cute!!! I love it!
Darling! I am always whipping up pillow case dresses, and due to blogging peer pressure, I’ve been thinking of trying my hand at shirring. I never thought of shirring a pillowcase dress. Good for you!
What a great idea to give it more shape and the flower adds a little sass! 🙂 I love it!
http://www.seaminglysmitten.blogspot.com
Jenny
LOVE IT! I adore pillowcase dresses to begin with but then you added shirring into the mix?!! I have been wanting to tackle elastic thread, but I haven’t given it a whirl yet. Now I must! So cute!!!! Can’t wait to see the flower tutorial.
The flower really pulls this together!
Well done! So nice to try something new and have it work so beautifully. Your little model is adorable.
Very cool. So was it hard to sew with the elastic thread? And it comes in fun colors like that? I think I’m going to have to try it.
found your blog through a link party today ( can’t remember which one). I just recently started sewing more seriously and have enjoyed making things for my kids…next up – pillow case dress! 🙂 Your newest follower.
I’m a new Tuesday Follower! Your site is so cute! To find some great deals and Freebies Visit me at https://www.rockindeals4you.com/?p=3784 and sign up for my newest giveaways!
How adorable! Thanks for linking up to Hoo’s got talent!
I can’t wait to try this!
Awwww that looks so cute.
~L~
Fashion DIY @ AvidAccents.blogspot.com
I love this! Very cute. I almost like this better than the regular pillow case dresses!
That dress turned out adorable!! Thanks for linking @Creative Itch’s “Sew Cute Tuesday”!
Great idea! I have a lot of great pillowcases waiting to be shirred.
How fun! I really need to try sewing with elastic thread. Anyone want to bring me some? LOL! You have cool friends!
Thanks for linking at Lucky Star Lane!
shirring along the waist line is a great idea for adding form to a pillowcase dress and the fabric flower is sooo pretty, but i think the dress is too long for a little girl. the model shots look like a maxidress… i would end the dress with the contrast band as hem.
i love the combination of a whole lot of white with little bits of flowery fabric, very girly without being frilly.
thanks for the tutorial!
Love this! The fabric is fantastic and the flower is so much fun. Thanks for linking up to Tot Tuesdays!
Simply wonderful!!
Bye
Ro
I am not much of a sewer, but you have laid this out so clearly and its so cute…I think I’m going to have to break out the sewing machine! Thanks for the post…and your awesome blog. I look forward to seeing more.
That is adorable!! I love how you used color thread. I will have to try that if I do a shirred dress on white or dark fabric so I can use a colored and contrasting thread. 🙂
This is “sew” cute, such a great variation of the pillowcase dress!
What a great idea!! I love this!!
FYI, shirring and smocking are two different things. They both add elasticity, but only shirring uses elastic thread. Smocking uses decorative embroidery-like stitches with regular thread to hold the pleats in place. 🙂