


Since I added those wall stencils to my kitchen, it motivated me to keep on the spice-it-up vibe. I had leftover fabric from my curtains so I thought I’d make some valances for the small windows over my sink. But I know valances aren’t “hip” – I just didn’t know what else to do. A friend said “why even have curtains at all” – good point! They’re small windows and don’t need curtains. But I really felt that I needed something fabric over there to soften the look of the corner. She suggested a pendant light covered in fabric and I loved the idea – so here’s a quick how to make a fabric covered pendant light.
First, find a drum shade. I found a few that belled out a little, but I wanted a true drum, and small in size so it didn’t overwhelm the corner. I ended up buying a whole lamp from the back-to-college section at target, just to use the shade. I figure I can find an ole shade to put on the lamp later.
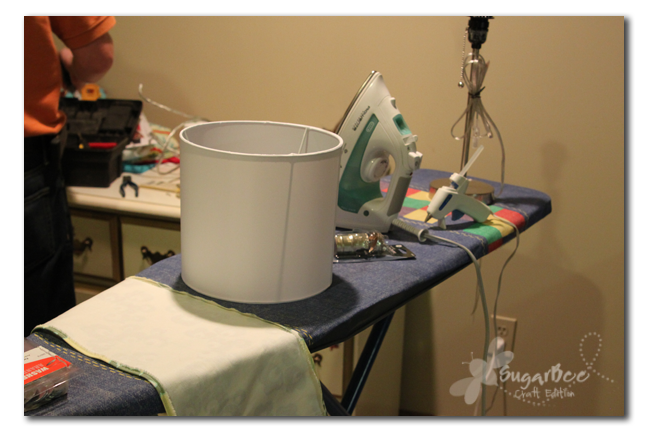
Then cut your fabric to go all the way around. I hemmed one edge and left one raw. With the raw edge, I just folded it and hot glued it to the top of the shade in sections.
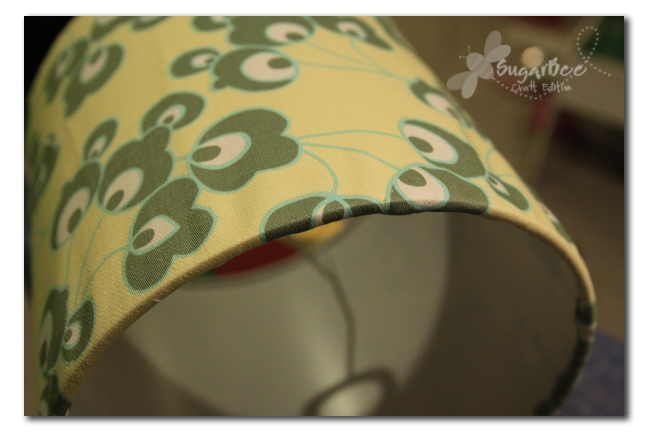
It’s not perfect, but it hangs a little high so people aren’t looking directly at the edge, so I tell myself there’s no need for perfection.

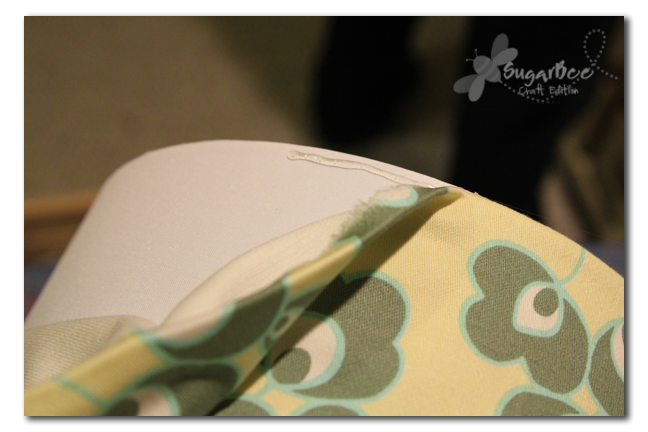
For the bottom edge, since it would be seen a little more if any looked up at the light, I used the hemmed edge. I then wrapped the fabric over the bottom edge of the shade and hot glued it to the inside.
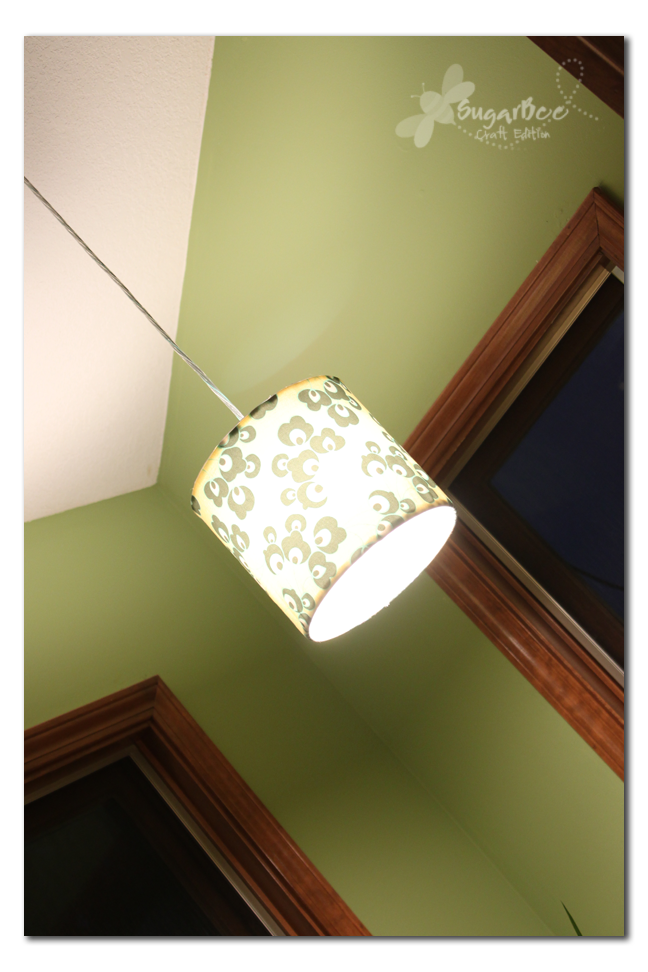
Can you see the difference between the top and bottom – on the top you can see the edge of the lampshade, and on the bottom you can’t.
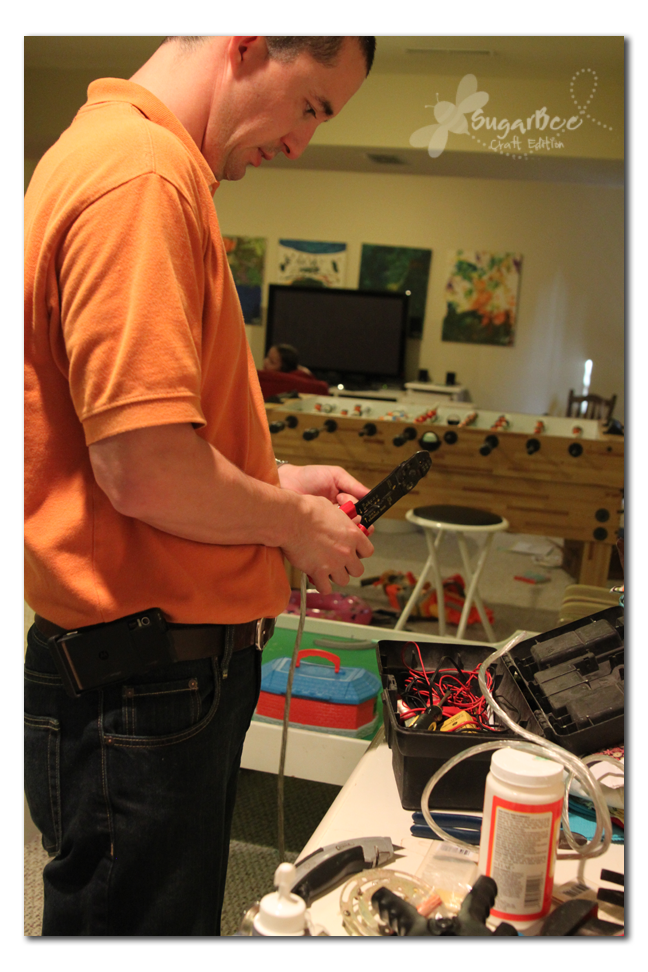
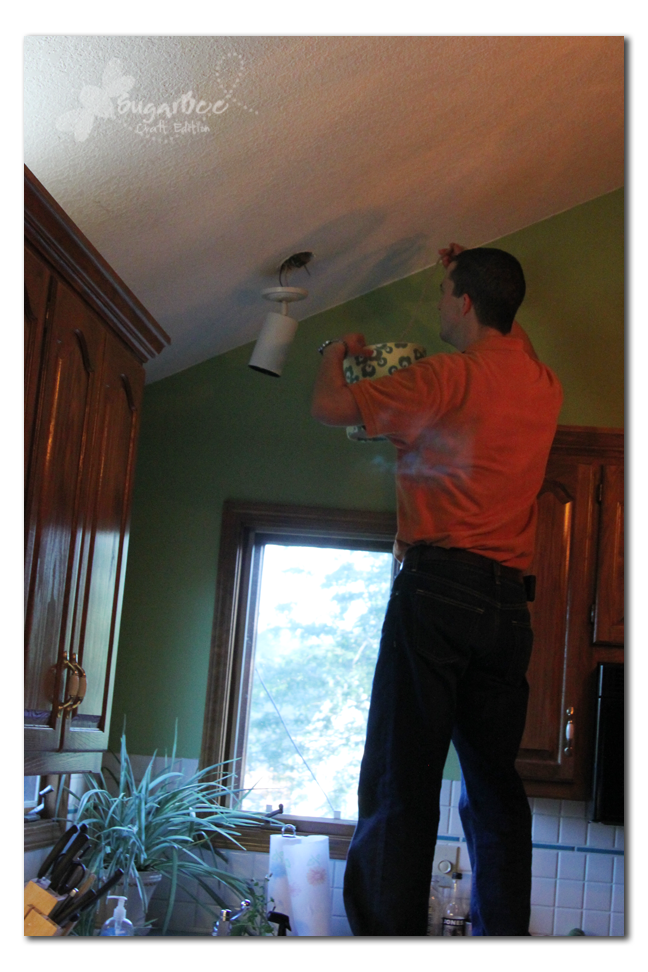
Then grab a hunky husband to do the wiring work, all using stuff he had laying around in the garage. I think it was a simple thing to do, but I wasn’t the one who did the wiring so I can’t give details.
I LOVE how it came out and I can’t believe how dark my corner used to be. This new light gives so much light since the light glows through it instead of just aiming out the bottom – it’s great!! And I love how it looks even when the light is off. Adds the fabric to the corner – without curtains that I wasn’t going to like.

Thanks for joining our blog party over at Sassy Sites! I always love to see the fun blogs and cute stuff that everyone is working on! Come back next Friday… xoxo
Great job on the lamp! It’s beautiful! 🙂
Oooh, I love it! The fabric is wonderful. Great job!
I’d love it if you would link up to my Friday link party! Have a wonderful weekend. https://alittleknickknack.blogspot.com/
It looks really cute! I like the fabric you chose.
This is so great! I have been thinking about doing this, and it looks easier than I thought! Thanks for the inspiration!
It’s really cute. I like the fabric and the fact that you changed at pot to a pendant.
So cute! I’m going to have to try this. Love the fabric.
I just wanted to stop by and let you know that I linked to this post today from the Home & Garden channel at Craft Gossip. 🙂
Your feature will appear in the main Craft Gossip RSS feed, on the main home page and can be found directly here
https://homeandgarden.craftgossip.com/10-pretty-pendant-lights/
If you would like a “featured by” button, you can grab one here!
https://homeandgarden.craftgossip.com/grab-a-craft-gossip-button/