


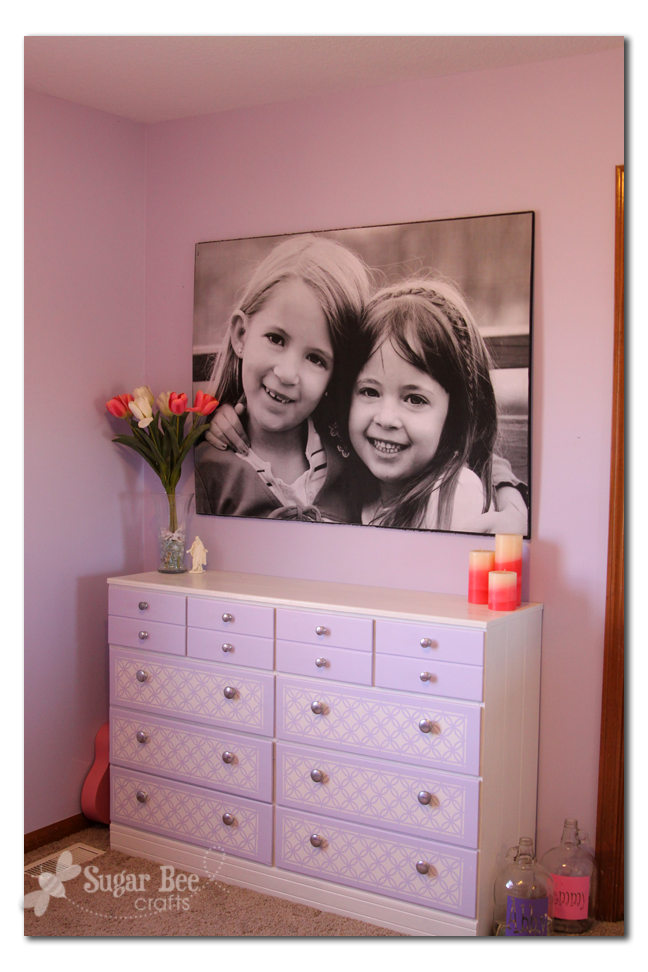
I posted awhile an image that showed off the giant picture I made for my girls’ room – finally, the tutorial is here! It was so cheap – around $13 (that’s $8 for the print, and another $5 worth of an $11 foam board because you won’t need to use the whole board….)
Giant Picture Supplies
–Print in desired size ( I talk about that on down)
–Foam Board in desired size (I used a 4×8 sheet, but these 20×30 ones look great too)
—Spray Glue (that’s the link to the one I used)
—Utility Knife for cutting foam (if you need to size yours down), or I also like using a hot knife like THIS.
Giant Picture Tutorial Step 1: The Picture

I put the image on a jump drive data stick thingy and took it with me to the office store. I’m sure you could email them the image as well.
Then head off to the office store and ask for “the biggest engineer’s print you can make” and hand over your jump drive. Mine is 4 feet by 3 feet, which didn’t seem that big til I hung it in their room and BAM, it’s gigantic, but I’m okay with it. Anyways, it was about $8.
They warned me that it wouldn’t be “photo-quality” – – but hey, for $8, it was good enough for me!
I snapped a quick picture of the picture so you can see the quality — up close it’s not dead-on crisp, but who’s looking that close anyways. And it’s not pixely at all…this is the bangs of the daughter on the right…

Update: Some readers have reported that their office store will no longer do a photo as an Engineer print – I hope that’s not widespread, because these are AWESOME.
Now that you have your picture, you’ll need to put it on something – so I talk about that next…
Click Here for
Giant Picture Tutorial Step 2: The Foam Board
This is awesome. I’m definitely making one for my mantle. Thanks for working out all the kinks for me!
This is so awesome – thanks for the tutorial!
VERY VERY CUTE!! Awesome tutorial!!
Thanks for sharing!!
Love this! So glad you posted the tip about using modge podge because I surely would have tried to use that when I do this!
What a great idea! I love it and definitely dont think it’s too big. It fits perfectly over that dresser!
I LOVE it! Thanks so much for sharing, now I know what I’m going to do with our next family picture! Also, thanks for working all of the kinks out before I learned the hard way 🙂 Sorry you had to deal with that frustration but it looks great!
That looks awesome! I love the size, black and white, and it’s perfect over the dresser! Love!
Mandy, this is a fantastic idea! I wonder how much smaller an ‘Engineer’s Print’ one would have to ask for to get what you would consider a better quality. Do you have any idea of the file size you’d need?
BTW, thank you for making the mistakes so we won’t have to. For of course we would have!! It was nice of you to get the bugs worked out for us!
I LOVE this idea, Mandy! Trying to think of any available wall space I can do it in!!
I LOVE this idea!!! I think this would be a awesome way to display one of our wedding pictures from last summer. It looks so good in the girls room by the way!
LOVE IT! I am going to do this in my girls room! Thanks for all the tips and the goof up heads ups. (ok that sounded weird) Anyway it looks awesome!
oh man!!! I LOVE LOVE LOVE this idea!!! I’m going to make one for my girls playroom!! Thanks so much for sharing!!!
This is so nice!!! I’m off to make one for my kiddos as well. Or maybe now that I’m thinking of it, I will make one out of our wedding day! Or maybe both! LOL!
Love, Olga
Wow, that is AWESOME! And I was just whining away on my little blog about my decorating woes…and now I have some inspiration! Thanks!!
ps- the picture looks wonderful & your little girls are just precious!! =)
I love this! I have an awesome picture of my daughter in mid-air (trampoline) that we’ve been talking about blowing up. She has nothing above her dresser. I think this would be great!! Hope Mine turns out as well as yours!! I definitely would have made the same mistakes and unlike you, I would have given up!! Thanks for sharing!!
I LOVE LOVE LOVE this!!! I have been looking for a cheap way to get a big print, but wanted something bigger than what the photo shops could get me. Thank you so much for sharing!!!
So cool–thanks for the instructions!
Looks great! Thanks for sharing the hints of what not to do to…I would have probably tried to mod podge it..Thanks!
This is so cool. I laughed because last month I spray painted foam and decoupaged flimsy paper with the same results. Live and learn!
suggestion: wrap edges with black paper or cloth tape, using spray adhesive to adhere, instead of painting it. do the edge before placing the image. It would make a more finished looking edge, especially if there is a cut edge.
That i sso cute! Great thinking!
Wow!!! Very cool thank you so much!!
Wow!!! Very cool thank you so much!!
Too Cool! Thanks for sharing!
That’s awesome! I I especially like all the ways you messed up along the way! That’s often how I work too and I like to think it just makes for a better tutorial in the end!
I’m definitely going to try it out. Thanks for sharing! I’ll have to link to your blog from mine. (https://twyste.com)
I’d love to see the back of it to see what you mean about the duct tape and wire. This is a great idea:) thx for sharing!
In love with this! I’ve been trying to find some different ways to make something like this for our wedding photos. I will be pinning this and trying this out:) Thanks for sharing!
Oh my, I LOVE this idea! Thank you for the tutorial!!
I just logged on to Pinterest, and the first thing I saw was this. Someone had pinned it, so it brought me to your blog. I have a huge living room wall, a perfect picture in mind, and an office copy store down the street. Can’t wait to try it. Thank you, and I will let you know how it turns it. (or I will probably blog about it myself. Hopefully I won’t mess it up, although that would make for a more ‘humorous’ post that day for me) but either way, I will try it, and give you credit. Very excited!
Love it! I have to do it!
I love this idea! I saw the picture on Pinterest and just had to pop over and have a look. I wonder if this would work with MDF board too?
Thanks so much for sharing your project 🙂
Nikki
Eveningsong Ink blog
this is awesome! I wonder if you could cut the board a little smaller and “wrap” the print so you don’t even have to paint the edges?? Hmmmmm. Thanks for the idea!!
I hopped on over from WhipperBerry to see this! What a GREAT idea! Thanks so much for the great tips. I want to give this a try!
Walmart does super large prints for a very cheap price too. I’ve been very happy with their Photo center.
I found you on pinterest. This is a great idea. thanks for sharing.
Great idea and instructions. I am curious about the pixel size of the digital file you used for the photo; how large was it?
~Jenny
So excited to try, saw this on Pintrest. Where do you get spray glue? I am not a crafty person, so this is new for me, so thanks for doing all the “what didn’t work too”.
[email protected]
Elmer’s has a spray adhesive in a can. You should be able to find it at any craft store.
Elmer’s has a spray adhesive in a can. You should be able to find it at any craft store.
My favorite part of this post is that you tell me your mistakes! You’ve saved us from the same mistakes. Thanks! Lisa~
LOVE!! I made a similar post with a huge picture of the kiddos. But it didn’t get centered! <- My lesson! haha
Thanks for sharing.
I have always wanted one like this for my daughter’s bedroom. Thanks for sharing 🙂
Holy awesomeness! I can’t wait to make one or two or ten of these! I’m going to try it on foam board (the stuff that’s the same size as bristol board but had foam in between it). Atleast then the edges will be white.
Also, I would like you to know that you weren’t the only one who didn’t know that, that foam stuff couldn’t be painted.
Wow! I wanted to do a big group photo in my office at church of our kid’s group — this will be PERFECT!!!
So amazing! Definitely worth a try for the cost! And I LOVE the stenciled dresser. My daughter’s dressers are older and showing some wear, maybe I’ll give this a try when we revamp her room this spring.
Thank you so much for the tips! I had no idea about the engineering prints! Btw – you can buy black foam core (or foam board) which would save the step of painting the edges if you wanted black edges. I think I’ll spend a tiny bit more and mount it on mdf. Thanks again for the great idea!!
What a wonderful idea! It looks grea! I also learned the hard way about spray pain tand styrfoam. I feel ya on that one!
I love it! But my problem would be getting the photo on the board with no wrinkles!
This is great! We are starting the decorating process for our daughter’s room who is due in April 🙂 I totally want to do this with one of her new born shots! I would also LOVE to know where you got that adorable dresser!! Thanks! [email protected]
This is amazing! Thank you for the tutorial! I will making one in the near future of my 3 boys. Smiles~Beth
Really super cute! But take it from someone in the printing biz, this print will fade in 6 months or less. Take a look at your receipts after a month… the ink is plain dye and on the cheapest bond paper which has no inkjet receiving layer…Better off getting a photo quality print with pigmented or solvent inks from a print company…it will still be cheap but last way longer and look really good after a few months.
Thanks for that helpful FYI. I wonder, would it help to spray it with a spray fixative?
We used this styrofoam board to make decorations at my school last year. The fire marshal made us take them down. Turns out the board is very flammable and releases some kind of toxic fumes if it burns. Maybe not such a good thing in children’s room.
Frustration then success! I tell ya! It looks amazing 🙂 The mod podge can be a doozy at times!
I just joined pinterest & found you oversized photograph & LOVE it!! I loved it so much, I included it a blog post @ http://www.pikldpink.com Thank you!!
This is fabulous and thanks for steering us away from all the problems you could run into. Such a natural and beautiful photo of your girls!
What a gorgeous picture of your girls. Thanks for the tip about the Engineer’s Print–I never knew that!
Oh this is so stinkin’ amazing! Your final product is something you’ll treasure forever, I’m sure! I’ve learned that lesson with Mod Podge too, yuck! I’d love if you’d come and link this up to the Head to Head Showdown, going on right now at http://www.icantstopcrafting.blogspot.com ~Jen
This is fantastic and it looks so good on the wall. Thanks for such an awesome idea. I never cease to be amazed at your creativity.
Love it – should I print a giant pic of me and give to my mom-in-law?! Following along
Kelly
Heckuva good job. I sure apipecrate it.
I really want to make one of these, but I am having a trouble finding a place that will make then as big as yours looks. How big is yours? Where did you have it done?
choward8, I made it bold in the post so it’s easier to spot, but mine is 4 ft by 3 ft and I got it at Office Max or Office Depot, I can’t remember which…
Thanks, I sw the size right after I asked. :/ Office Depot said they wouldn’t go wider than 24in. I will give office max a try. 4X3 is perfect for what I need.
FYI, I have done this before and it didn’t last very long. The picture curls up over time. Save yourself the time and money and just use Mpix and have it professionally mounted on foam core. It’s more in the 50 dollar range for that size, but there no multiple trips to the store and sadness when it begins to curl and wrinkle in a couple months. 🙂
Here via Pinterest! I LOVE THIS! So darling! But so are your girls, so that makes it even better! I think I am going to try this!
Stop by any time! http://www.alliblue.blogspot.com
First off… what a DARLING picture of your girls! I LOVE this idea! Great job and thanks for the tips 🙂
This is awesome…thanks for sharing! 🙂
Adorable! And most great ideas need a couple of hiccups before they come out right 🙂
I’ll be pinning this one! Thanks!
Kim
I had my brother in law blow up one of my son’s pieces of art work and I keep stressing about how to frame it. now I know what to do! THANKS! beautiful girls, btw!
Turned out awesome!! I seen her post too and had an image made last year to make a giant stencil…then never got around to that project because we moved!
Just ordered another one today….I shared this on FB..get job and thanks for the tips…I mostly would have used mod podge:-)
Nice work! I used the same concept from I am Momma to make the subway art on my blog. I used a blank canvas from Michaels (with 50% off it cost around 12.50 for a 2’x3′) and spray adhesive (although that didn’t work like I planned) and then modge podged. I did wrinkle up but it wasn’t as bad when it dried. Check it out!
https://lifeonthebaybush.blogspot.com/2012/01/mother-teresa-quote-subway-art.html
Happy Sunday!
Love it! Found this on pinterest. I’ll pin it and hopefully make one for our playroom! What a great and simple idea!
Jen
athomeinthenorthwestblog.com
Great idea! I love your technique with the duct tape and wire! I will definitely be using that one!
You can make giant color copies cheap if you go to Posterazor It converts your photos to pdf’s that you piece together.
Oh yes my wheels are turning now!
Thank you for sharing!
Cindy
Chalk it up
i love this! but i’m not sure how you did your math. this doesnt equal to be 13$.. but I will be doing it! thanks
$8 for the print, and $5 worth of an $11 poster board. So if you make more than one, it will be $13 each time 5+8=13. But if you only do one then it’s $19 with some extra poster board.
$8 for the print, and $5 worth of an $11 poster board. So if you make more than one, it will be $13 each time 5+8=13. But if you only do one then it’s $19 with some extra poster board.
<3 – thanks making this for a few rooms in the house, can’t wait to see how they turn outt
This is AWESOME!! Thanks so much for sharing. I want to make my own…like NOW! (P.S. I found this on Pinterest.) 🙂
http://www.freestylinbeth.com
I’ve been trying to figure out something to hang over our bed that won’t brain us next earthquake! Thanks!
Love, love, love this! I had no idea you could get inexpensive prints like that, I have paid a lot of $ for photos on canvas for gifts… no more! 🙂 thank you, thank you, thank you!
Hi Mandy, This is a GREAT tutorial. Could I use one of your photos on my blog with a link back to this article?
I’m at staples and they just printed one up for me but their printer makes two large lines trough the image. Where did you go?
I think I got mine at Office Max (either that or Office Depot – I mix them up…)
We are in the process of doing this, but we have a serious issue! We used lightweight spray adhesive by Locktite. The first time we were afraid of damaging the picture, so we just sprayed the painted foam board. We layed the picture on it and started smoothing. It looked awesome. 10 minutes later it’s all wrinkled and bubbling. So we tried again thinking we didn’t use enough spray. We sprayed the back of the image and the foam board. 10 minutes later, the picture looks horrible, and can not be redone as it’s now permanently bonded. How did you avoid this? Which spray adhesive did you use?
I used Elmer’s spray Craft Glue, and sprayed the foam board. Then set the picture on top of it and pressed it into place. I tried not to smooth it too much so it wouldn’t create wrinkles. I had another person help me lay the picture down and we held it pretty taunt. good luck!
I love this giant pic idea. Definitely using it to decorate my house!
Brittany
http://www.prettyonapenny.blogspot.com
So gonna do this!!
Maxwellhouseinteriors.Blogspot.Com
I already made 2 for my home. I made a collage of about 20 pictures of my daughter. It looks great! I also mounted a giant map to a foam board and hung that. Thanks for the tutorial!
PS. I used Office Depot and my huge engineer (little smaller than yours) print ONLY COST 2.85. I was happily surprised!
What a great idea, execution, and explanation of your process; thanks so much for sharing.
These huge prints would be so great for decorating special parties for “threshold” (25th, 50th, etc) parties for anniversaries / b-days. Didn’t read **all** the comments so I don’t know if anyone suggested this: for the edges might you be able to cover it first with black duct tape, and instead of gluing the photo might you be able to use clear contact paper on top of the photo then wrap that around the edges and adhere to the back. I’m going to experiment and I’ll let you know how it turns out!
Robin
happilyhomeafter.blogspot.com
Just a thought, but you could have also just used velco to hold it up, rather than the duct tape/wire. Very awesome tho. I may have to do this with a pic my friend has of her family for a gift for her. I never ever knew about the prints….
thanks!
Love this project! I’ve done the tissue paper photos onto modge-podged canvas, and found it was too difficult to control the photo as I tried to lower it onto the sticky canvas. I laid the photo face down on the table, and then pressed the canvas down onto it. It was easier to control the stiffer canvas than the flimsy tissue photo. The technique I used for that might work for the large photo in this project so that it might not take two people. I can’t wait to make my own large print! Thanks for sharing!
Hey there Mandy, I just made one! How beautiful! Thanks for the tutorial. Gonna make some more..Hehehe! You Rock!
WOW WOW WOW!! This is awesome! Visiting from GERI’s site. Thank you
Just made one! It turned out great! Here are my thoughts/experience. I ordered mine online from Staples, about $5. We couldn’t find the thickness of foam that you used, so we used a 1in. thickness, which I like but was a little trickier to cut. We want to do a smaller picture sometime and just use black foam board. It isn’t something that will last a long time, and you have to be careful not to bump and dent the foam board. But it was pretty inexpensive, and is lightweight so eaiser to manage, and we didn’t need any tools other than a knife, which is good since our townhome does not accomodate powertools. If I wanted it to be something that will last for a long time, I would not have done this project, but for now, this was perfect. Thanks!
If you’re looking for an additional way to make some snazzy wall art, you might try a word cloud. Combined with this tip of yours, a big word cloud poster could make for a really splashy piece!
I really love, love, love this idea!! Now how to decide on a picture.
I’d love to invite you to share this on my Thingamajig Thursday party going on now…https://radcrafter.com/2012/01/thingamajig-thursday-party-11/
Alida
radcrafter.com
What a great idea. So cute for any room. We would love to have you come share this at our weekly link party every Saturday! -The Sisters
https://www.sixsistersstuff.com
Great tutorial! Thanks for sharing! This is super cute! Smiles, Jill
THis is unbelievably cool and makes such a statement for so cheap! I’m all about a project like this – thanks so much for the great instructions!
Wonderful! I hope to make one for our hallway! Thanks for the tutorial!
I am now a fan! I am for sure going to try this!!
Hi!
Thanks so much for sharing this idea! I tried it today and ran into a snag. When I cut my foam board down it looks so raggedy along the edges. I used a regular utility knife and tried cutting it while lying it flat and standing up. Any trick to how you got smooth edges? Thanks!
-jenn
Jenn to cut the board, heat your knife up by holding it over a flame. It will melt the foam as you cut, making a perfectly smooth cut.
great question Jennifer – – I used a box knife thing like shown in one of the pictures, and I scored the edge and then snapped it back. Later, when using my leftover foam and I needed to cut lots of pieces, I used an electric knife, like one to carve turkeys – it worked great.
Hi Mandy – I wanted to let you know I shared a link to this tutorial on my blog. https://momsbyheart.net/10-free-from-office-depot-copy-print-center-idea/
Also Office Depot has a $10 off $10 printable coupon good through 2/14 that works on the poster size prints! Here: https://www.myworkliferewards.com/pdf/promotions/rc/011012_EN.pdf
Thanks again, can’t wait to see how it turns out!
Love this!
Thank you for all the hints and ideas
I just got a coupon from Office Depot
Awesome!! This will come in handy! I do a lot of printing. 🙂
Thank you so much for sharing this! Along with the not-so-perfect trial and error moments. I found out long ago that you can’t spray paint foam…after spending hours (and I mean hours) building a ship for my son’s class project! Many tears went into that life lesson! 🙂 Thanks again!
Thanks so much! I saw this post Monday, bought the supplies & made it last night, and hung up a giant print of my 2-month old last night.
Two things:
1) The ink streaked a bit on the 4 prints I got from Office Depot. It does not look as high quality as yours, as if their ink was low.
2) Instead of the insulation sheet, I used a trifold foam board that was 36″ x 48″ ($5 each). Instead of wire, I used clips ($2.49). That way, I got everything from Office Depot instead of going to Home Depot.
Just pinned this Mandy – looks great! Can’t wait to give it a try!
You are a genius! I’m doing this with one of my wedding photos with our family (us & our baby). SO COOL! Looks spectacular!
Was the photo in “raw” format? How many megapixels is the camera that u used? [email protected]
it’s just a regular jpeg — I have a canon rebel, so maybe a 14 megapixel camera? I can’t remember….
wow, you did a great job and you just about saved my life with the duct tape/ wire tip! I LOVE IT!
A tip learned in art class years ago…you can use black electrical or duct tape to tape around the edges of a canvas…be worth trying to gain the effect you’re looking 🙂
That is so sweet! And I have 2 cute little girls who would very much appreciate it!! bellesbazaar-heather.blogspot.com
I just LOVE it! Wow! What a statement it makes. I shared your idea on my blog at:
https://controllingcraziness.blogspot.com/2012/01/inspiration-for-weekend-3.html
Thanks for DIY-ing and blogging your tips.
Love this. Found it on Pinterest and am now enjoying your blog! I am trying to do these for my daughter’s Sorority house and I thought I followed the instructions but my picture is more pixalated than your and I went only 24 x 36. Do you have any photo tips? I converted to b/w in Picasa. The picture was taken with my Canon Rebel XS and I had the engineer print done at FedEx/Kinkos. The guy at FedEx said my file was too small but when I looked at file sizes it seemed that most of my pictures were about the same size. I’m not sure what to do to make my photos larger files and therefore print better. I appreciate your help on this. It will be an awesome addition to their house if I actually figure this out and get less pixalated results.Thank you so much! [email protected]
hi Marci – – hmm, I’m using a Canon Rebel as well, so it’s not the equipment. Your camera has different settings for quality – maybe check that first. Also when you convert it in Picasa, does it make the file smaller? I wonder if that has something to do with it….
I’m sorry to ask another question about the picture quality, but I just took a file to OfficeMax and had a 48″x36″ made and it was EXTREMELY pixelated. The camera it was taken with was only a 6.1 megapixel and on the “properties” it says it is 240dpi (2000×3008 pixels) but would you be able to check what resolution setting your camera is at? Sorry, I’m not photo pro and don’t want to have to make several mistakes before we get it right!
Hi Aubrianne – – my camera is a 15 megapixel camera, so maybe that’s it? on my picture properties, it says 4752×3168 and 5.69 MB. Hope that helps!
Wow! That is an amazing photo! thanks so much for sharing with the rest of us!
I did this a lot at work and have just a couple options: you can buy black foam core at an art store so you don’t have to paint the foam (trips to Michaels while getting paid for work!). When you apply the print, if you don’t have a buddy to help you can roll the print up, spray the foam core, then align the print and unroll slowly, smoothing out the bubbles as you go!
? About the way you hung this. I did a similar project with large maps, but multiple attempts of duct tape and twine have failed. The twine keeps coming out of the tape and the map falls. What type of wire did you use. Any other suggestions to get my two large maps to stay on the wall
I am going to do this with my 3 kids for my husband for Valentines day! 🙂 Thanks for the tips!
This is so great! Thank u for sharing!! Love your blog too!!
Mandy, This was so great thanks for posting this and sharing. I did one today (ended up closer to 2’x 3′ but it was still very cool. I posted in on pinterest: https://pinterest.com/pin/118782508891731534/
thanks! Jen
Wow, this is awesome! Found this amazing project on pinterest. I hope you don’t mind if I include this in a round up of photo display ideas tomorrow (With a link of course).
http://www.lovelyetc.com
This is a fantastic post…what a fabulous idea, and such helpful information. Sorry you experienced problems…but it helps us out a ton for you to have shared it all. Definitely want to try this out. Do you mind sharing what size you saved your photo in Photoshop? Thanks!!!
You don’t know me, but I love this and I am in the process of trying it. I have problems! I took the film off the styrofoam and then the whole board bowed. Also, the edges are rough styrofoam, so little pieces keep falling off. Is there a different kind of board that doesn’t do this or did you just make do? Also, the film didn’t completely remove, and left print that is visible through the photo. Help!
to cut it, I scored it (deeply) with a mat knife then bent the foam along that line. On a different project with the leftover foam, I used an electric knife(like for carving a turkey) and that worked amazingly!
I didn’t have any problems with taking the film off, so I’m not very helpful with that one – sorry!
I feel like I already commented on this but saw it again on Pinterest and had to come back for another look. Still love it!
Karah @ thespacebetweenblog
I Love this idea and the price – WOW! Thanks for figuring out the do’s and don’t for applying 🙂
Thanks for sharing!!
I just finished this project today. Thanks for posting it. I’m a little lazy when it comes to painting so I took black duct tape and taped that along the edges instead of painting the border. It worked great! Just FYI…and thanks a million again for this awesome project that looks adorable.
Do you think I could just bring in the picture and have them copy it/print it? Or do I need my card?
betsy, you could try that, but the picture scanned won’t be as good of resolution as the digital copy of the image, so I’m not sure if it will come out pixel-y…
I tried this, but when I went to print my picture, it didn’t turn out nearly as good as yours. I asked for the engineers print and they told me it wouldn’t be good quality, but they printed it out anyways just so I could see it, and they were right. It wasn’t good at all. They didn’t charge me, which was nice, but I’d still like to have a large print for cheap. Any suggestions?
hmmmm Whitney, I’m not sure – – maybe different printing machines produce different quality? maybe mine had fresh toner? I’m not sure… maybe lighten up your photo before you take it in, so it has less spots to fill in black??
Thanks for the great tutorial! I had no idea you could do it that cheaply!
Jennifer
For ppl that don’t know MegaPixels. the higher megapixels, the larger the picture can be without it looking like little pixel squares. Since she used a 14mp camera, a 4×3 picture wouldn’t look choppy at all.
3MP at its largest would be a bit larger than an 8×10.
8MP at its largest would be about movie poster size.
Thank you for including the mistakes you made. I would have tried to substitute something but now I’ll just do it exactly how you did.
Office Max nor Staples offered engineer prints so I went to FedEx/Kinko’s! They charged me $4 for a 36″ x 24″. I used pixlr.com to resize my image to 3900 x 2400 pixels, it worked great. Great quality! Now I just have to adhere to my foam board (office max $7). Wish me luck!
I am going to do a bunch of photos for my daughter’s graduation party. thanks!
I noticed that jugs you have on the floor. I need one of those. Where did you get them?
Not sure if anyone else had this idea but I would try using colored tape around the edges to give it a frame and smooth finish. Black tape would give you the same basic look that you have. I will be trying this as a gift.
Thanks for the idea and the tips you gave us.
Absolutely LOVE this!!! Colorizing it with pastels after you mount it might work if you’re feeling artsy (I like color!) Thanks a million
I’ve made 3 of these now and LOVE them! Just wondering if anyone else has had problems with bubbling hours after it was done!?!?! We smoothed out all bubbles and hours later we found one that came back – we tried to fix it but it would tear the picture if we pulled it off. I did one for my mom and hours later she had A LOT of bubbles and it doesn’t even look good on her. I’m not sure what I’m doing wrong! Help!!
Tonya
pastel coloring sounds like a great idea!!
I haven’t had any trouble with mine bubbling, but I’ve only done this one so far…maybe less glue? I’m not sure….
rachael – – I got the jugs from my mom who got them from someone else – I blogged about them here: https://www.sugarbeecrafts.com/2010/02/money-jugs.html
Girl! you are the BOMB!!! Thanks for sharing this! I’ve always admired the look but was intimidated BUT now I WIll do it! Thank you again for taking the time to show me!!!
I used a similar technique to hang photos in my house. I just LOVE large prints and I love the look of not having a frame.
I use black foam core found at Michael’s or you can get larger scale pieces at an independent art supply store. We just use spray adhesive (they even make a photo mounting spray) on the foam. Lay the print over it. My husband also waits to cut the print to exact size on the foam core until after it is adhered and sits overnight. Then he uses T-square or metal ruler to make sure he doesn’t cut into the print.
The real trick we have found for not getting bubbles in it and for having the photo not start to come up around the edges after awhile: use a rolling pin and roll over the print a few times after you put it on the foam core. This makes it adhere more smoothly.
By using the black foam core your edges already look nice. No need for the extra step of painting or cloth tape. 🙂
i am doing this today!
What a fun decor piece! I am excited to find out that you can buy that big of a print and that big of a foam board for such a small amount. Great tutorial and tips! Can’t wait to try it out!
This is really cute. I work at office depot and have some advice for mounting the picture. (we do them all the time at the store) It makes the whole task soooo much easier if you leave the board bigger than the picture until after it’s glued down. Next lay the picture on the board where you want to glue it, lift one of the shorter edges and spray a light layer of spray adhesive and smooth the picture over it. Once you have that side done the picture will stay in place and you can lift from the other side and work in small sections to glue and smooth until you’ve reached the end of the picture. Then trim the board around the picture. It took me forever to find an easy way to mount large pictures by myself and this method works for me every time. Also we offer the service in store for around $3.99/sq. foot. It’s a little pricey but worth it for some people.
has anyone considered/tried using a paper preserving spray on these prints (Krylon Preserve it or similar)? with a few people mentioning that the print wont last long, i wondered if the spray would do the trick. Also, to try and reduce the issue many have mentioned with bubbles, i though double sided tape might suffice. Has anyone tried this method? I will be attempting this project but cutting the print into 3 panels, and wrapping the print around the sides! I hope it will look as nice as yours! One more idea for hanging, large 3M command picture hanging strips. They are a strong velcro, and it should be able to hold the weight of foamboard, plus no hole in the wall!!
I just did this project and it turned out great! I will be talking about it on my blog tomorrow and will be linking back to this tutorial- thanks for sharing, Mandy!
Amanda
It’s an Easy Life
I can’t wait to do this with a picture of me and my sisters for my mom for Mother’s Day! Thank you so much for the amazing idea.
Out of curiosity, approximately how long does this project take?
This is beautiful!! I am surprising my daughter with one of her and her baby for Mothers Day!!
This is beautiful!! I am surprising my daughter with one of her and her baby for Mothers Day!!
Hi – loved your tutorial and plan to use it for my daughter’s wedding this fall whereas the jumbo prints we had been looking at from websites were hundreds of dollars. Just wanted to share a few tips I’ve found handy when dealing with some of the issues you mentioned (I always feel, what good is knowledge if you can’t share it). To prevent the wrinkles from Mod Podge in paper, after I spread it on the surface, I squeegee the surface with an old credit card or plastic hotel card key to get as thin a layer as possible. Then I let it sit for a minute to achieve a tackiness as the water evaporates. I don’t know how well it would work for a large area but it works remarkably well on sheet size pieces of paper. You cannot reposition however. Then smooth out with another credit card to make sure you have no bubbles. If you are using an inexpensive paper, spray lightly with a hair spray to seal the paper, and this helps prevent wrinkles and bubbles. I watched a demo at a museum on French decoupage and such simple things made a big difference in the final product. Can’t wait to try this and journey through your blog for more craft ideas. Thanks so much!!!
This comment has been removed by the author.
I got some prints printed- the middle size- and they had a huge thick line through them. Right through my kids faces! They said the engineering prints are designed for blueprints, so they quality isn’t going to be stellar. They were nice enough to print me the smaller size and not charge me for the bigger ones. I am going to go pick them up today, can’t wait!
I am currently doing this project and I can’t wait til it’s finished! One tip- cutting styrofoam can be tricky. If not done right, it cuts uneven and messy because it so easily shreds. To cut a clean line, take a serrated knife (like a steak knife) and run it across a candle to wax it. Then cut slowly across the board. It is so much easier!
I made this for my mom’s mother’s day gift. Should I use some kind of spray gloss over the picture? Or will that mess the picture up? Please email me at [email protected]
I just made this and This turned out awesome!
Thank you for the time you put into this tutorial –including all the “Don’t DO’s”! My daughter will love this project for her children!
I was just thinking of doing this. I want to use multiple photos, and make a giant collage. any tips? Should I make the photo layout, take a photo of that and then have the print made?
if you want to make a collage, I would create it as one image in a photo editing program, then print that image off as an engineer’s print – good luck!
THANK YOU for the tutorial and all the information. i used this printing technique to make decorations for my daughter’s birthday party. They were SO cheap I got big impact on a low budget. I did discover that you can order online through staples so you don’t have to take a jump drive into the store. I wrote on my blog and discussed a few other technical things about image size and how to get 2 images that are 3×2 instead of one at 4×3. I linked to you in my blog post since you inspired the idea. https://lydiaburchett.blogspot.com/2012/06/staples-engineering-prints-are-fabulous.html
Thanks again!
I had everything lined up to do this amazing project. Uploaded my pic to OfficeMax, went to pick it up & they accidentally printed it on the large photo quality paper. Well their mistake was my win, because I got the print for $3!!!! So now the plans have changed. I’ll be trying to score a large vintage frame that needs some love. Great project!
I can’t wait to try this! I have seen a couple similar ideas on Pinterest but using wood boards in earthquake land seems dangerous! I like the foam board idea!
I had my prints made at SAMs club. They turned out great! My only problem was that the wire on the back did not hold with duct tape. Fell within minutes. Love the idea and pictures look great but if anyone has a better simple solution for hanging please post. I was thinking sticky tac that teachers use.
Hey Amy — try those Command Strips – – I used them with a different foam board (after I tried sticky tac) and they worked great
Thank you so much for posting this! I had to share with you that I was showing my four-year-old son what I was going to make for his room, and he said he wanted a picture of the girls because they have pretty smiles.
Erin
Just an idea I have for hanging…. The 3M Velcro works wonders on foam board. One piece on the back of the pic and one on the wall. 🙂
Question…I have four posters (Picasso’s black and white bullfight) and I want to hang and frame them. I am thinking this same mounting might work for my posters. My question is, how does the edge look? I was thinking (if i do this) of painting the side/edge orange for a pop of color…so does the edge look ok after you cut it that the orange would be a nice touch? Any tips, comments or suggestions welcomed!! Thanks! Great idea!! Colleen
I painted mine – it’s a little jaggety on the edge – you could also wrap the edge with colored duct tape. Good luck!
I just saw this on Pinterest. I haven’t read through all these comments, but if someone hasn’t already, I recommend using Self Adhesive Foamboard. it comes in white and black in sheets as large as 40 x 60. it’s a simple peel and stick process! you can find it at places like AC Moore, Hobby Lobby and such.
It’s beautiful! I LOVE foamboard! For hanging my foamboard creations, I normally hot glue on multiple sawtooth picture hangers… works like a charm!
Would it work for a smaller size? Thanks for the idea and info :))
Good tutorial but a decent lab will do one of these for about $40. It’s called foam core block mounting. We get them done for wedding fairs because they are cheap and light and look great.
If you are going to do it yourself the peel and stck foam core is probably the way to go.
Ugh!! So frustrated with this project! First, I went to home depot, got the foam board, wouldn’t fit in my car so I had to leave it there, to home and get our jeep (my fault). Well, then today I go to office max (credit card machines were down) and the lady was a complete idiot. They don’t do engineering prints anymore but she said they did something else. After about 25 minutes or her switching out papers in the printer she plugs my USB in and says “Oh, we can’t do photos on this one. I thought you meant a blue print”. Ugh! Since michaels was next door I went there to get the black foam board (to make it easier, ha!) and they don’t have anything bigger than 2 foot by like 3 foot. Ugh!!! So, I called Kinkos and they said they can print but it’s $10 for the print and about 35 minutes from where I am. I’m on my way there now and they BETTER be able to do it. SMH!
I was just wondering if the Mod Podge reacted to just the particular foam board you used or if it made a difference that I used acrylic paint first before using decoupage.
I purchased several Dollar Store thin, white foam boards many years back for a display and painted them all (back and front) with acrylic paint. I then coated them with Elmer’s Glossy Decoupage (front and back) and then followed up by using the decoupage to adhere multiple inexpensive photo prints. Once that was dry I used the Elmer’s Glossy Decoupage over the prints as well to protect them and to keep them from pulling away. That was over six years ago and those cheap prints still look as bright today as they did when I first mounted them. They’ve been stored in a garage that gets really hot and really cold but no visible damage.
Your lovely project has inspired me to try the same thing with a single, much larger print. The materials are cheap enough that I won’t get heartburn if it crashes and burns.
Mod Podge does great with photo prints – I’ve used it several times over photos. The “engineer’s print” is a print on thin photocopy paper, not photopaper. For me, it wrinkled up the minute I got mod podge on it… if you get it to work, I’d love to hear about it!
Hi Mandy, I followed your tutorial and linked back to you on my blog, thanks!
https://ourchanginghome.blogspot.com/2012/07/engineer-prints-meet-lalaloopsy.html
I just finished my pictures! (I actually mounted 4 posters -Picasso’s black and white Bullfight posters) I went to Home Depot where a wonderful associate cut my foam board to size for my 4 pics. Then I painted the edge with a terracotta orange from the craft store. After it was dry, I glued them on. The spray was super sticky so, I put a small spray of glue in the center of the board, centered the pic, then sprayed it secure. It was much easier than spraying the entire thing at the same time. With this adhesive, you really only have one chance to get it right, once it’s down, it’s not coming up pretty…It looks so sharp…the black and white pics with the orange edge…love! Thanks for the inspiration, 4 22×28 frames with mats would have cost me hundreds, no matter how many coupons I could scrounge up!
I loved this tutorial, and if I may add something, I glued the picture first, then trimmed the styrofoam away. It does not take two people and is simple and accurate.
What a great idea! Thanks so much for sharing!
THANK YOU for sharing your ‘oops’ moments! It would be JUST like me to think I could do those things too. Thank you for sparing me the time and agony of messing up and trying to figure it out for myself!
Thanks! I can’t wait to try this!
Beeutiful!!! 🙂 I especially loved how you used duct tape and wire to hang up the picture!
Just an FYI from a graphic designer who has used her fair share of spray mount. Spray both the back of the item to be mounted and the mounting surface. Wait for these to dry, I know this sounds a little crazy but stick with me. Then apply a thin coating of windex. This will allow you to adjust and readjust the image until it is perfect. The soapiness gives it the adjustability, but the amonia evaporates allowing contact between the sticky surfaces. So, dont dilly dally, you have to stick it quick! Once in splace gently squeegy down the image and it is set.
Has anyone tried adhering the two pieces together in this way:
spray the back of the picture, lay it picture side down on the floor. spray the front of the foam board. then push the board down to the back of the picture… flip it over use a rolling pin?
Of is this paper so thin that it would go through and stick to the floor?
Thanks for the tutorial. I am sure I would have made all those mistakes 😉
I just came back from a trip to Europe and wanted to print some of my pictures to display. I was originally going to do canvas but it was so expensive. I saw this idea on Pinterest and you SAVED my day! I printed 2 pictures through Staples (you can send the pictures online and they will have it ready for you to pick up!). When I picked up the engineering prints, I was floored by how clear the pictures were! I was talking to the guy and he suggested that they mount it on poster board and laminate it for me. I figured that would be so much easier than if I did it–Staples did the job for only $13 (FOR 2!!) and they are gorgeous!! Thank you SO much for this idea and introducing me to engineer prints. You rock!!!
Likewise found this post and off I went to Officeworks (I live in Melbourne Australia) and they sell foam self adhesive board and do A0 size prints, now I have a fantastic family photo in large scale thanks to your brilliant post! Thanks so much!!
Thank you so much!!!! I can’t wait to get to staples in the morning. WOW!!!
Thanks so much for hooking up at our Best of the Best Link Party, I love this idea and am pinning it!
Love, love, love this!!! I’ve been looking for a way to do a big print that I wouldn’t have to sell my children to pay for. Laura stopping by from Real Momma and the Best of Your Best Blog Hop!
Love this! Thanks for sharing. I found it via Pinterest and recently got my own engineering prints done!
Sarah (https://ournextgreatadventure.wordpress.com/2012/07/27/picture-perfect/)
Update!!! My pix came out GREAT! Of course Home Depot didn’t have the foam board used here; I used a thicker version which had a foil backing. Not a problem when I found an adhesive that works on foil. However what I didn’t do was trim the white border from the print. Made the pix look unfinished. So to fix that I’ve gotten some smooth textured duct tape (Gorilla). An since I painted the edges black, I’m hoping by using the tape to hide the border & create a thick edge/frame with the tape. I’ll post the outcome (good or bad). Thank you again for this awesome DIY project.
I tried to order one through Staples but they want $47.99 for a black and white photo engineer print. Then I did it online at Office Max and it said $3.90. However, I just got a phone call from Office Max saying that price was only for the black and white line drawings and if I wanted the black and white photo engineer print, it would be $35. What am I doing wrong????
I have the same question!!! I was all ready to do 4 photos and then they told me it would be over $100 to print!!
Hi Elle – – don’t get the “photo” print – you just want the basic engineering print – I’ve never heard it called a “line drawing” but I guess that’s one way to refer to it. Good luck!
I work at Office Max. As of about 18 months ago many stores did away with our actual engineering printers when the lease ran out. We now have only the large format color printer to do large prints. Per our policy no “photos” can be printed at the engineering price. The only prints that qualify for engineering prints are actual engineer style prints ie. House plans, line drawings etc.
Any photos whether color or black and white start at $5.99 sq ft. You are actually getting much better quality as well, better paper, better print etc. The engineering prints are on thin 20# bond and will fade over time.
I’ve had so many people think I was totally lying to them about the price, because they have seen this post. Like the lady who posted above about office max and the person being an idiot…lovely how we become idiots when we have to tell a customer no. 🙂
First of all we really appreciate this post and tutorial! We live on such a tight military budget so this was perfect. Second I featured your tutorial on my blog for Pinned it, Made it Mondays with Countey Girl at Home. Some folks couldn’t believe the price so they were happy to know how inexpensive this print really is. I won’t be mounting mine, instead the girl will write messages on the print, then I will laminate it. Anyhow, heres the post https://pendletonprimitives.blogspot.com/2012/08/pinned-it-made-it-monday-giant-picture.html and I made sure to link back to you. Please message me if you find any descrepencies [email protected]
~Christina
The problem I had with Office Max is they said they would not print a photo as an engineer print. So I am looking for other options as well now 🙁
OMG this is awesome. I worked on mine last night. I actually did a black and white engineers print in Corpus Christi, Texas at Office Depot. It was $19 but I figured where else can I print something so humongous for this price. I went then to Lowes to look for styrofoam. They didn’t have the one big whole piece so I got three (actually they sold 5 pieces for $10) so I put these three together and made on huge piece. To attach them together I tried glue between them, but didn’t work. The best way was to glue paper at the edges where they connected, that kept them together (did it on both sides). I had no problem with attaching the photo to the foam with the spray glue. I started in one corner and slowly glued part of the foam and rolled out the picture accordingly. It looks awesome! I am painting the edges with acrylic brown metallic color and I love it. I was debating on looking for some kind of crafty carton paper (brown) that looks nice enough for me to glue it on top of the picture on the edges as if it would be a picture frame, but I am not sure if that would ruin it or make it look cheap. I am so excited though for this idea, I am actually thinking on printing a wedding picture for my friends who celebrate one year wedding anniversary and giving it to them as a present. I might make those just a tad bit smaller, maybe 2×3 instead of 3×4 sizes. Thanks for the idea, it is awesome!!!
Bummer not in my small town they don’t have the printer needed for this project….
Yeah, I recently had an engineer print as well….well, they yelled at me at Staples, and sent a message to corporate because ‘this isn’t allowed’. They said it can only be actual blue prints. I was not happy, and neither were they. Ugh
I sat here and read every post thus far and I wanted to say to you, Mandy, that you’re awesome for keeping up with all the comments! I’ve commented on many things that the author said they keep up with and in reality, they never return. So kudos to you for sticking around and helping everyone! 🙂 Oh, and AWESOME idea! I am totally going to do this!! 🙂
Perhaps the print can be wrapped around the edge of the foam and stapled or pinned to the back to eliminate the need for any painting?
What brand or type of spray mount did you use?
Thanks!!
Found you on Pinterest… thanks for posting your bloopers so we can all learn how not to do it how to do it better 😉 It looks AWESOME!
UPDATE – – I have gotten this done at Office Depot and Office Max – one place it was $8 for the print and the other it was $6. If it’s an Engineer Print it shouldn’t cost much – it’s printed on super cheap paper, not photo quality paper. Good luck!
I just took my photo up there and they said that an “Engineers Print” is like a blueprint and it CAN come in color – however its $39.95 not $8 andd their roll of paper is only 24″ so it can be any length but only 2ft high
I made my kids a poster board memory board (like a big scrapbook page on a poster board) and could NOT figure out who to get it to hang on the wall within a budget ($50-$150 for a frame that size). We went and bought the board and it went up perfectly. LOVE it! I’ll be happy to email you a picture if you want one.
fabulous! you can buy foam core at an art supply store that has black edges so you don’t have to paint the sides!
Just a tip – if you want to bond anything to blue (sometimes pink) foam, use 3M Super 77. Spray both surfaces and let it dry for a bit, the stick them together. It’s super sticky, so you only get one try!
Works on just about anything, including foam, and will let you laminate foam into thicker chunks for sculpting.
i linked your tutorial to my blog. Thanks for the great idea!!!
https://milkandmargs.blogspot.com/
I have huge 2 story living room walls. This is an awesome idea with the right picture!!! Thank you so much for this!
It looks fantastic! Can’t wait to give it a try. May I ask, how heavy is the foam board?
I pinned this post a few months ago, and loved looking at your blog. then today, while blog-surfing I came across your blog again. And I still love it! I decided I needed to become a follower so I can keep up on all of your cute ideas!
thanks for sharing!
Rachel
https://moresisterstuff.blogspot.com/
I know you did this a long time ago, but I have a question. How did you get the foam even on the edges? Could you have wrapped the picture over them to make them smooth?
Thanks,
Nan
I’m not sure that you can wrap the picture around the edges unless you wrap the picture like a present. A better option if you want super smooth edges would be to cover the edges in duct tape or something similar. Good Luck!!
You could wrap the edges before putting the picture on, using a pretty tape or even paper.
Great tutorial! Thanks for sharing & I can’t wait to try it myself!!
Amanda @https://www.myendlessdesigns.blogspot.com
Where did you go to get the “Engineer” Print? What Store?
I have gotten one made at both Office Depot and Office Max – both were great.
I did this project for one of my favorite b&w wedding portraits… it turned out amazing!!! I wish I could post a picture in the comments. Thanks so much for the idea… however- I went and picked up my engineering print at Staples then took it right next door to Hobby Lobby and had it mounted to a foam board for like $15!! He mounted it AND cut it out, and told me to use a 40% off coupon from my iPhone. I bought a plastic hanger for like $1.50. My total cost with everything was under $25 and I all I had to do was pick it up! So happy 🙂
Love affordable big portrait prints, I have to try it for my kids bedroom, thanks!
when you say that using mogpog it was to wet for the paper…was the picture on paper because it was so big it was printed on paper.. I’m not doing prints that big so mine will be an actual photos will i still need to do the spray glue or could i use mogpog or will it still not work on the Styrofoam. [email protected]
I’m sooo bummed! I took my file to Staples and their printer puts a large white line down the left side that they can not fix (I think they should get an new printer!) and when I went to Office max they refused to print as a engineering print because to takes to much ink. but would gladly print me a super large photo for $40.00!
But I have had large posters printed at Short run Posters before and they are only $2.00 plus shipping so I’m going try there next.
https://www.shortrunposters.com
Someone may have already told you this, but you have maaaaany comments now & it will take forever to read them to check, but you can use latex spray paint on Styrafoam. The only one I’ve ever used is Krylon H2O latex spray paint & it’s awesome. Thank you for the tutorial, can’t wait to get my photo on my wall.
Any suggestions on cutting a smooth line- mine tore, came out very messy and jagged with box cutter.
Best tips for cutting a straight, smooth line? I use a box cutter and it was jagged. Not pretty:(
Here’s a thought. With all the wonderful designs and colors of Duck Tape out there. Couldn’t one use Duck Tape to tape the edges and adhere it to the board? Thus eliminating the use of glue. I think I’ve found my weekend project. =}
mandy the office store have caught on =( i have been trying to make an engineer print from many sites but they have blocked jpeg ie no more photo uploads
Hmmm – – that will be a HUGE bummer. Try putting the image on a jump drive and walking it into the store. Or maybe saving your image as a different type of file??
How did you make the frame for the photo with the blue frame?
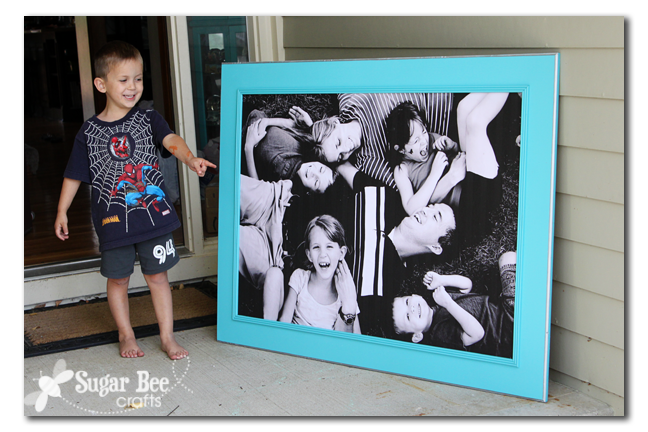
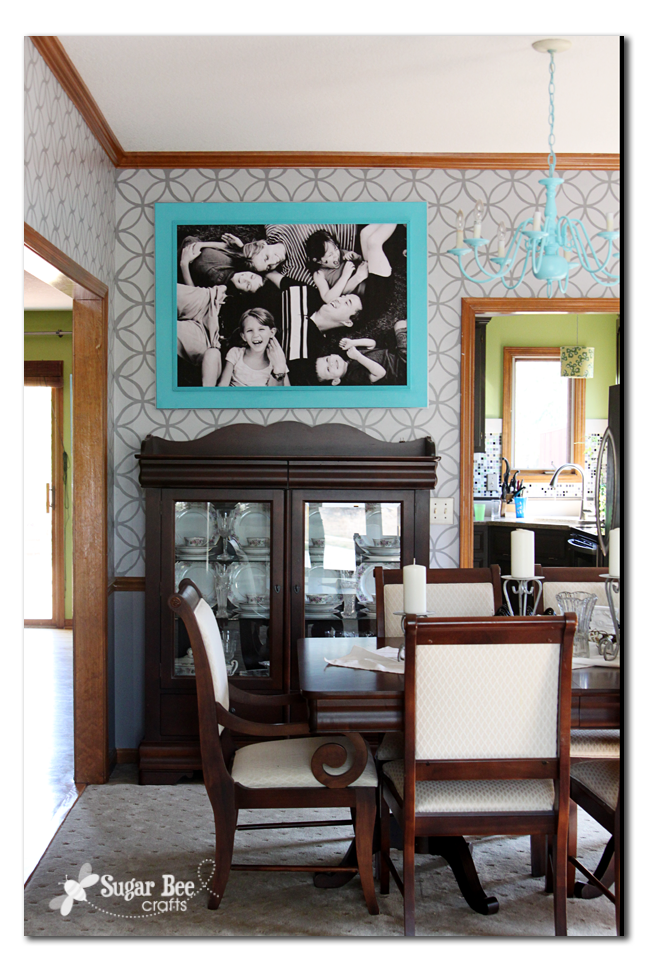
You can find the post about the blue frame one, with those details, here: https://www.sugarbeecrafts.com/2012/08/giant-picture-for-cheap-take-2.html
Couldn’t you use wallpaper glue, which is designed to let you move the paper around. Or could you laminate the picture first, or use pins to hold it on.
This is so cool! Thanks for all the hints and feedback. I really LOVE your blog. Keep the ideas coming!
I just called Staples location in the MN metro area and they gave me a huge spiel about how they are no longer going to be doing photos because that is not what the printers are made for. She said they have had lots of costly repairs and damage because of this large fad. Crazy! I’m not going to lie I sent my online order to a different location… 🙂
Also, I did try these at Fedex but the actual photos turned out extremely dark, and it really struggled with grayscale.
Thanks!
I just ordered my print from Staples today as well, they just emailed me to let me know that it was going to be poor quality. I used a 12 mp camera, hopefully it won’t be that bad. But I am extremely nervous, because I really want this to work! This was also the second Staples I went to, the first telling me that he would not print a photo that large for me for only $6, like it was money coming out of his pocket! Then he proceeded to print out a picture to ‘show’ me what it would look like and it came out horrible! After all that (lol) my question is how did your come out? Thanks in Advance! and thank you Mandy for this AMAZING tutorial!!!
so crazy the hoops you’re having to go through! I have a Canon Rebel DSLR camera, and mine came out fine – not pixely at all. It’s not super super crisp in the details, but you can’t really tell when you’re looking at it. I hope it works out for you.
Where did you get the wallpaper for your dining room? I love it!
It’s not wallpaper – I painted it!! I blog all about the stencil here:https://www.sugarbeecrafts.com/2012/09/dining-room-stencil.html
I really love it!
UPDATE: Staples has finally caught on to this fad and has stopped the use of these printers for photos or even word art (subway art, etc). They gave me a lecture about how the machines are only made for thin blueprint lines, and the photo printing is causing huge wear on their machines, massive ink use, etc. I guess when we felt like the price was too good for a huge print, we were probably right. Darn! I have to admit that Fedex/Kinkos did do one for me last night, but Im guessing it won’t be long before others stop this too. 🙂
I wouldn’t have personally know that you can’t spray paint styrofoam. I actually sometimes like pictures to be in black and white instead of color. It gives the picture more of a unqiue look.
-Zane of ontario honey
Has anyone ever tired using Canvas for this project. You could spray paint it Black and then put your adhesive on it then the picture. I am making a project similar to this but with 4×6 prints that I had printed up in black and white and then I use double sided tape on the pictures to hold them in place and then Mod Podging them on.
Hi I am trying to do this for a huge picture of my boyfriend playing football i am on the office max online print center and I don’t see anything about a engineer print! hellpp please 😉
I’m not sure – I know some people had uploaded it online. I actually had it on a jump drive thing and walked that into the store and handed it across the counter and explained what I was looking for – – Good Luck!
I am so glad I found this! My hubby and I plan to do this for our house and for gifts. We had planned on doing Mod Podge, I was wondering where you found spray glue and what brand or where you got craft glue? I am excited but after reading some comments worried about for sure finding a office store that will agree to do it and not try to charge more.
The Spray Glue was just Elmer’s (I think) and you can find it in any craft store or the craft section at Walmart. Good luck!
My neighbor suggested using modge podge on the print surface to give it texture. I haven’t really used modge podge before. I know in your blog you said when you tried to use it as glue it wrinkled but what about on the surface? email me at [email protected]. Thanks!
Got my print from Staples without issue. My neighbor suggested I use modge podge to give it some texture. I haven’t really used modge podge before but I know you said not to use it as glue. What about on the surface after the pic has been glued to foam board? Would it still wrinkle?
Email me please at [email protected]. Thanks!
Love this and can’t wait to try it! My suggestion for the back of the board is to use the 3M Picture Hanging strips they are great! Looking forward to creating one of these….now to pick a picture…hmmm
This is awesome! I could totally see doing a big print like this and mounting it behind an old window. Shabby chick white would be beautiful. Thanks for sharing your work!
this is amazing! im so glad i found this and you took the time to post! thank you~
is there a way to protect the photo? or is your photo just open?
mine is just open — I looked into getting a piece of plexiglass to cover it, but it was pricey and not worth it to me
I was really looking forward to this project! Sadly I didn’t work for me… first off the foam is beyond hard to cut!! Picture that was printed looked faded. I am just really upset!!
I was really looking forward to this project! Sadly I didn’t work for me… first off the foam is beyond hard to cut!! Picture that was printed looked faded. I am just really upset!!
I was really looking forward to this project! Sadly I didn’t work for me… first off the foam is beyond hard to cut!! Picture that was printed looked faded. I am just really upset!!
Quick question that I’m not sure you’ll be able to answer. If I purchase an 8X10 photograph from Etsy, can I bring it to Staples and have them make an engineering print of it? First, I’m not sure if they will make a print from a print or if it has to be on a jump drive. Second, I’m not sure if they will let me make a copy of a photo taken by someone else. Any insight anyone can offer would be great. Thank you!
thank you, my daughter and I just did this and we love it. THANK YOU for sharing your mistakes…it saved us 🙂
Love this!! I’m motivated to do this for my daughters and their babies!! Thanks for sharing! Glad to have found your blog!!
I’m a photographer, and I LOVE this idea! I just hope that the people at Office Max didn’t get a hold of this thread and up the prices of their engineer print! 🙂
I ordered a oversized photo online and could NOT find a frame that would fit so I tried this and it looks kinda wavy/lumpy underneath. What did I do wrong? I used Mod Podge and now my print is good and stuck? Is there anything I can do to fix this?
I bought an oversized photo online and tried this technique since I could NOT find a reasonably priced frame. It turned out kind of lumpy/bumpy looking and since I used Mod Podge, the photo is good and stuck. Is there anything I can do to fix this? My photo was almost $130! 🙁
I love, love, love this idea and have told so many of my friends and family about your blog! I’ve attempted 2 prints, having some of the issues mentioned in the comment section above, like cutting the board (8 foot long board, called insulation sheathing board) and my print actually sticking to the board.This idea is great but, I’m having issues with the print actually sticking to the housing insulation board from Lowe’s. I painstakingly pulled off almost all of the clear plastic from the board, used black craft paint on the edges, and have used TWO separate adhesive sprays by Loctite, a General Performance Lightweight Bonding repositional adhesive spray and a High Performance Middleweight Bonding High Initial Tack spray adhesive, both over $8 a can. Both sprays have failed to hold the print and each morning, my prints have rolled off the board and are laying on the floor! And after placing the prints and hanging the board, the board seems to “curl” and not stay flat on the wall. HELP! What am I doing wrong? When I position the print on the board, press out all the bubbles, and press down the paper really well, it really seems to be stuck on the board, even almost tearing at the corners if I try to pull up the paper—but 12 hours later, it’s literally rolled off. My first-time project has made me feel like a failure 🙁
Hi Sarah – – when cutting the board, I used an electric knife (like what you use to carve a turkey) and that worked really well for me. To stick the print to the board, I’ve just been using basic Elmer’s Spray Glue, found in the craft section of stores. I have had to use plain glue sticks occassionally if the corners come up, but I haven’t had the problem of the whole print coming off. My foam board has a slight curl to it, but not much. If you don’t want a curl, you can mount the photo to a board like I did here: https://www.sugarbeecrafts.com/2012/08/giant-picture-for-cheap-take-2.html
I’m sorry you’ve had trouble with the project!
Well you are scaring me a little…lol I just finished mine and I am hoping it stays glued down 🙁 I used 3M General purpose 45, it was glued down instantly. I bought it at Home Depot for $5.97 and it says on the can that it is photo safe. I also used black duct tape around the edges hoping it stays stuck down on the board as well! Hope this helps and hope it stays glued down!
ok just finished my picture, I don’t have a picture of it yet as I have not hung it. I have to say it was soooooo easy thanks to your tutorial. I did cheat and I bought black duct tape for the edges!!! It looks awesome. I used a photo from my dad’s 75th birthday party so it has almost my whole family, well at least 26 of us! I paid $7.14 with tax for the print at Staples. It was funny the guy ask me if it was a Pinterest thing…lol Went to Home Depot and got the board for $9.47. I have to say I was a little scared gluing the print down by myself but I just did it in little strips at a time. The whole thing took me about 30 minutes thanks to all of your do’s and don’ts so really thanks again for the great tutorial!!!
Great idea. I suggest instead of painting the foam’s edge. Cut the foam piece smaller by 2 inches all around so a total of 4 inches smaller width and height. Then wrap the print around the sides and tape on back side, similar to how you would gift wrap a box. In the art world this is done with canvas on wood frames, they call it gallery wrapped.
I just had a print made at Office Depot, but the lady said she had to charge me for a colored engineer print because it was in gray scale (?!)I paid $17. I was kinda irritated that it wasn’t cheaper, because if I screw up this paper, I’m out $17! I need this to go perfectly!!
I just had a print made at Office Depot, but the lady said she had to charge me for a colored engineer print because it was in gray scale (?!)I paid $17. I was kinda irritated that it wasn’t cheaper, because if I screw up this paper, I’m out $17! I need this to go perfectly!!
Would it look bad if I chose to laminate it instead of mounting it on a board and add two grommets (one on each top corner) then used ribbon or wire to hang it? (That can be done @ Office Depot)
I’d love to see how it looks finished like that – I’ve never thought to laminate it…
Love this! I did this about 8 years ago with a pic I took in Italy. I put it in one of those inexpensive metal frames for a large poster (with plexi glass rather than real glass). My engineer print is still holing up great after 8 years. I haven’t had it in direct sunlight, so that might be the reason. It does seem to be turning a bit sepia, which I don’t mind at all… still looks great!
Is there any way to make it look glossy? I just got my print back today and it’s awesome but I’d love to put a clear coat of some type on it…
I’m not sure how to make it glossy — I’d be careful with a clear coat based on my experience with the Mod Podge -the paper gets too wet too easily because it’s pretty thin. If you figure something out, let me know!
beautiful pictures! super tute!
gail
It looks so good! I would love to make a large portrait of my whole family and hang it our living room. I also found your great idea on Pinterest!
I had trouble getting the engineers print too – office depot said they wouldn’t do a picture as an engineer print even though i said i was fine with black & white and not photo quality. office max quoted me $3.90 but when i emailed my picture in with the price i was quoted someone called and said they won’t do pictures as engineers prints either but since someone quoted me wrong they would do it this time. fedex kinkos said they would do it but it was a dollar or 2 more so i just went with office max and didn’t get more info from kinkos. i went to hobby lobby and paid $5.99 for about a 1/4 inch foam board that was 30×40 (my pic was 24×36 printed with a white boarder). i used a box knife and cut my foam board (eyeballed it, but probably to about 22×34) and since i wanted the wrapped canvas look i just laid the foam board on top of the picture and put weight on it so i could pull the paper tight and wrapped the edges around and taped them – got rid of the white boarder and looks like a wrapped canvas! then i taped wire on it like you did! thank you so much for this idea! we can’t afford to have a huge nice canvas or print done right now but i was able to do this project of a picture of our wedding rings for our living room and it’s perfect! 🙂
i had the same problem as Elle, i went to staples and they said the engineer print was only for drawings and could not do photos did you have any issues with ordering it as an ‘engineer print’? 🙁 REALLY want to do this project!!
I did this for less than $2 at Staples and it turned out GREAT!!! Thanks so much for this post!
I Love this! I work at Staples and I’m really suprised they won’t let yal print your photo on an engineering print. We do it all the time! (of course you do need a high quality photo or it will turn out horrid) But a “line drawing” is basically blueprints. I have the perfect photo for this and will have mine printed tomorrow.
I’ve tried this 3x on 18×24 size and the photos are way too grainy. The clerk at Staples adjusted the photos and they still didn’t turn out good. Did you change the pixels, if not what was your final pixel size? Your photos are very clear so I am wondering what I am doing wrong. THANKS
Hmmm, I’m not sure. I didn’t adjust the pixels or anything. I have a DSLR camera, maybe that’s the difference?
I just wanted to say I loved your idea of giant pictures so much I put some up in my house. If you’d like to see a picture of how mine turned out go here: https://pinningwithpurpose.blogspot.com/2013/05/giant-wall-pictures.html. I sent everyone to your site for the tutorial. Thanks a million! I am in love with my pictures!
any1 know if the quality would be any good if the pic was taken from an iphone? not sure how many megapixels but its a 4s..
This would be perfect for a grad party to put a senior picture on! Thank you so much for posting, I can’t wait to try it.
Just did the print. Although mine looks blurry and almost like a photocopy i have a new Nikon d3200 and do professional photography on the side. It’s nice just not as crisp as i would have hoped
Just did the print. Although mine looks blurry and almost like a photocopy i have a new Nikon d3200 and do professional photography on the side. It’s nice just not as crisp as i would have hoped
Doest it have to be a Black and white photo?
Hi Caitlyn – – the engineer prints only come in black and white – that’s why they’re so cheap. You can start with a color picture, but it will print in grayscale. Good luck with it!
I work in a print center in Michigan and a print that big will cost you at LEAST 40 bucks, at the very cheapest.
I just got back from staples and my engineer prints did not turn out anything like yours. 🙁 I’m going to try FedEx or office depot now. Did you get yours done at staples? Are they still doing it?
I don’t have a staples close by, so I had one done at Office Max, and one done at Office Depot – – I’m wondering if your store needed more toner in their printer or something…. good luck with it!
Just ordered my 2×3 engineering print online through Staples.com. It was only $3.39 with tax here in Canada! 4×3 was not available online, but 2×3 is plenty big enough for me! Thank you so much for letting us know about it. Instead of doing a board behind it, I will us trim boards nailed around it.
I’m definitely going to check with my local office store about the print! If they won’t, we have several photographer studios that do in-house prints and can do any size, mount, etc. so I’m sure I can find someone! 🙂 My husband works in a polystyrene/polypropylene factory so I have access to large, flat pieces of foam! Now, the only downside is that I need more walls since mine are full….
I tried this at an Office Max in MN and they said the same thing, $35. Must be a new policy. A line drawing is the same as an engineer print. They wouldn’t do a photo or subway art.
I’ve gotten a poster size good quality print from Costco for $12.
That is a cute and lovely project 🙂
Roopini recently posted…Reuse Six Pack Bottle Carrier
I really appreciate this post. I have been looking all over for this! Thank goodness I found it on Bing. You’ve made my day! Thank you again
glad you found it!! it’s one of my favorites 🙂
Thanks for this great post! I found it a looong time ago but failed to pin it! So glad I found it easily last night and today I got my print from Staples for only $1.83! Its only an 18″x24″ because I didn’t wan’t a huge one – yet. It turned out great, gonna mount it on black foam board! Thanks again!
at Photojojo.com you can order engineering prints as well. 🙂
thanks for the wonderful idea and tutorial
Hi there! Just wanted to thank you for your tutorial. I used it for my daughter’s first birthday party and received rave reviews! I posted about it here (and made sure to give you all the credit!): https://www.firesidedreamers.com/details/. We’re just down the road in Topeka, so I love following you and knowing we’re practically neighbors! Take care and thank you again 🙂
I have a brand new canvas still in the plastic someone was throwing out. Can I use the engineer paper on the actual canvas? If so what kind of glue would you use for a canvas?
I’d try it! ya never know. I would try the spray adhesive glue, because it’s not too wet. Good luck with it!
Un gran trabajo, me encanta los tutoriales como el que nos muestras aqui
Mandy, found you at Brittany Bullen’s post and glad I did. Love your stuff. I have always wanted to do one of these, but never gotten around to it! Thanks for the great tutorial and tips!
Elizabeth recently posted…Learning to Say No, Nah, Uh-Uh, Nope! Version 2.0
you should for sure make one!!
thank you for the tutorial