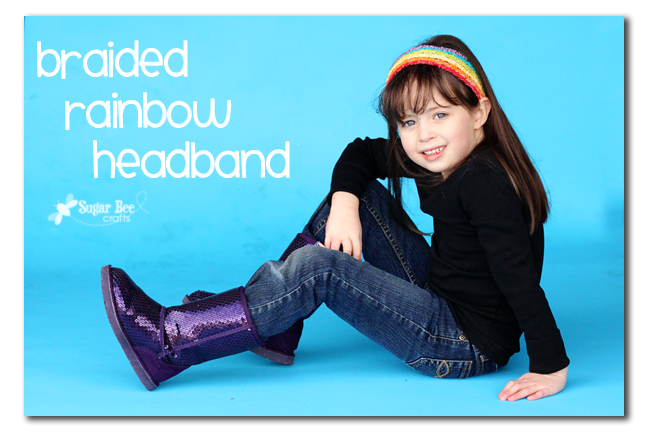
We are in love with this Rainbow Braided Headband. And best of all – it’s easy to do! Let me tell you all about how to make it…
It’s like a cross between the No Sew Braided Headbands, and the Braided Headbands, only with lots of strands instead of just 2. Let me show you…
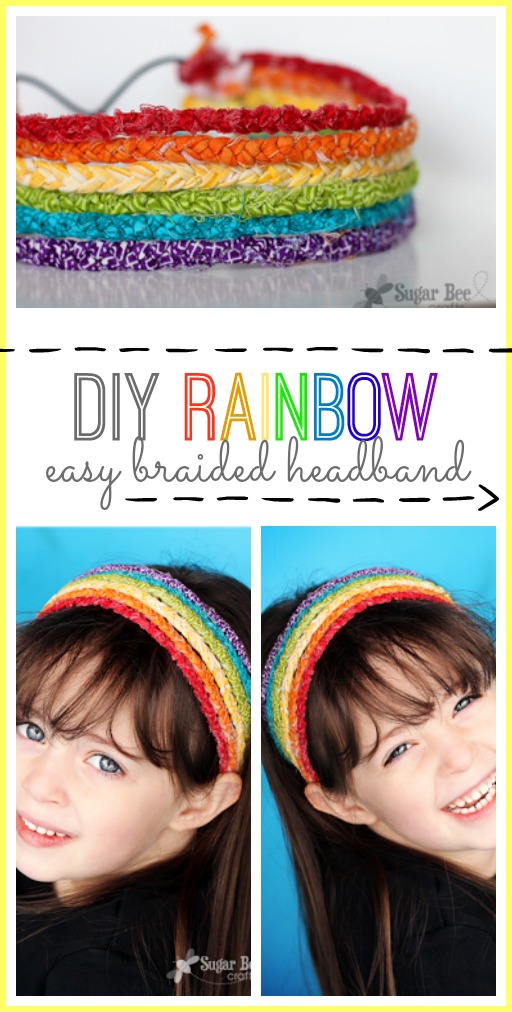
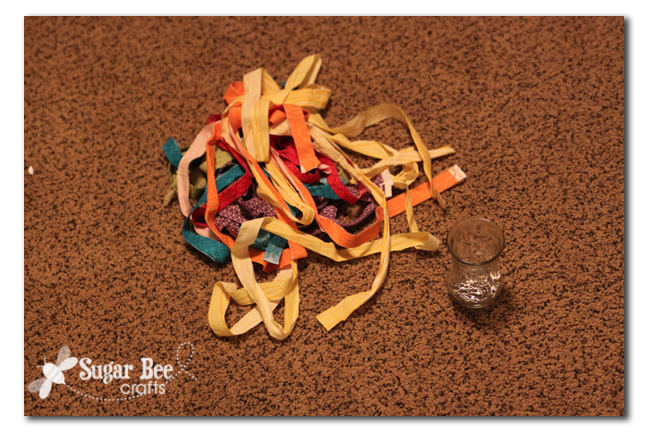
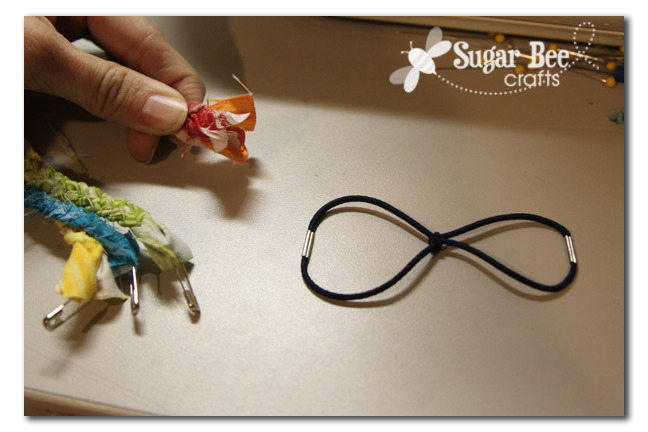
First, you’ll need strips of fabric in every color of the rainbow. Because there will be so many braids, cut the strips small so they’ll be small braids. Mine are about 1/2 wide and 44 long because I just cut them across the width of the fabric – they didn’t need to be that long. You’ll 3 strips of each color.
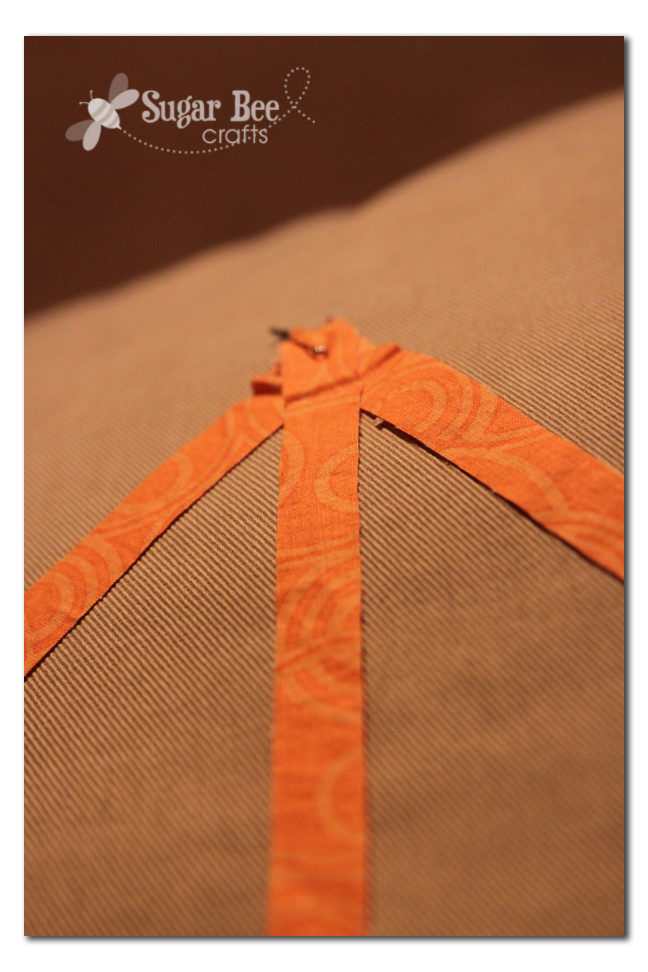
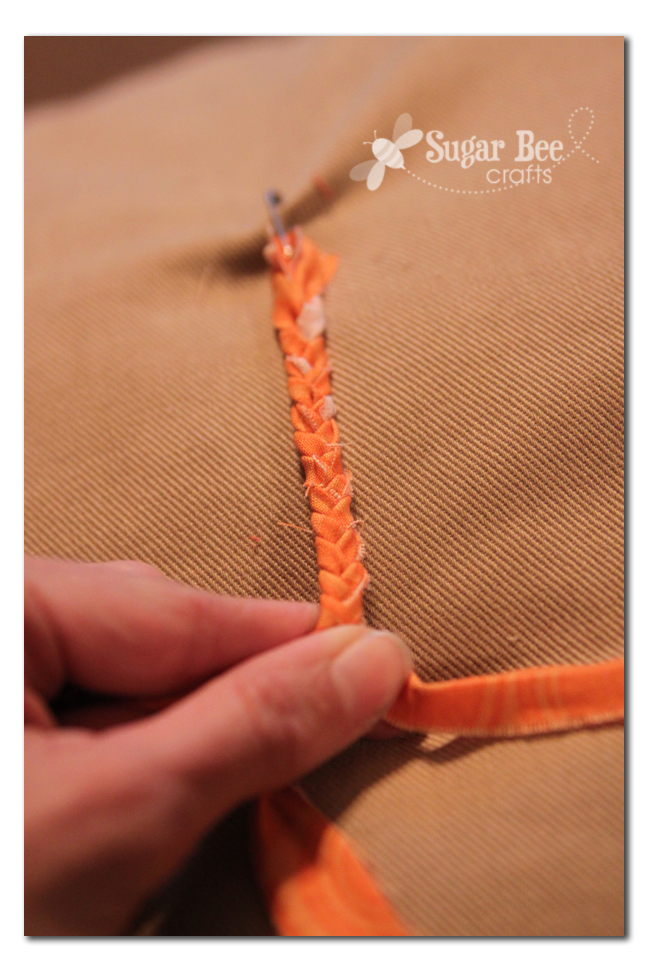
Next, grab those 3 strips of one color, safety pin the ends together on a pillow or something, then start braiding. I tried to keep my braid pretty tight. Braid it til it will span your head from behind each ear – like you try it on to see if it’s long enough.
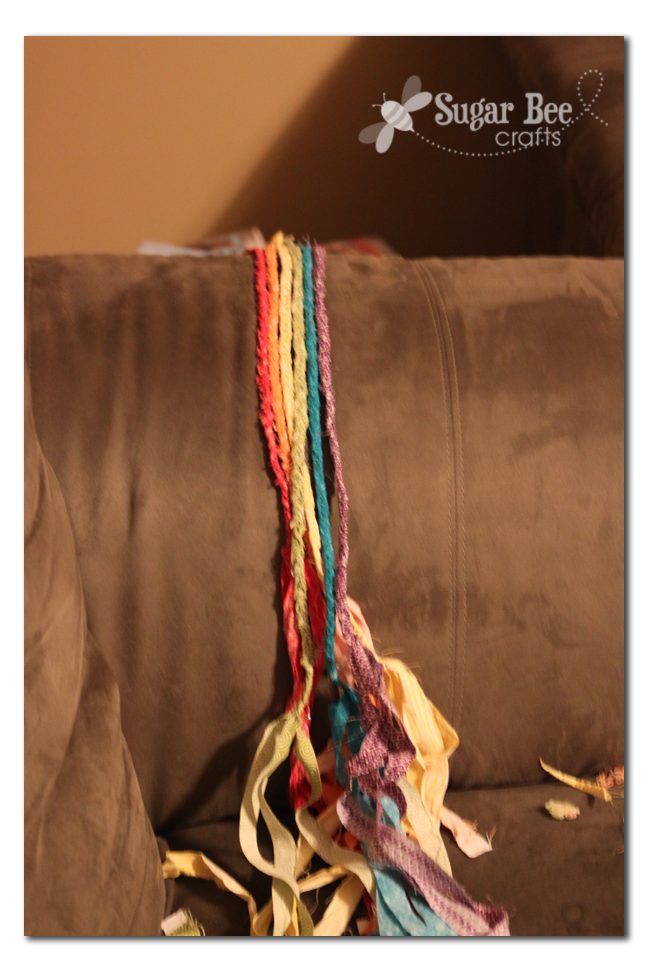
Now, do that for all the colors. This will take you longer than you think, so put on a good movie to pass the time….
Now, on to assembly – – take 2 ponytail doers and loop them inside of each other to tie them together, like this:
Now, fold the ends of all the braids over the rubberband – make sure they’re in color order – sing the song if you need to (red, orange, yellow, green, followed by blue, indigo and voilet, it’s a rainbow song for you)
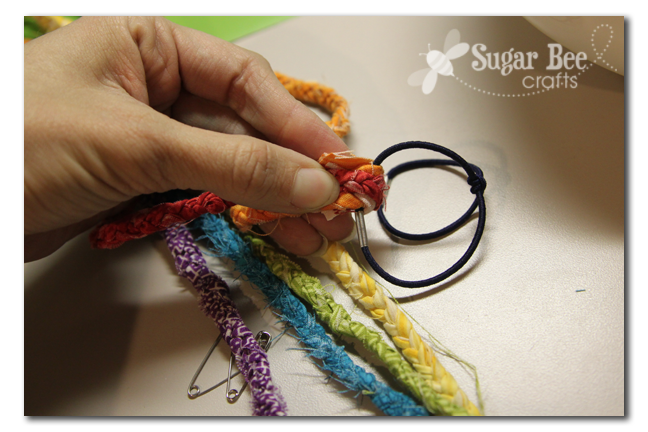
And then sew (slowly! it’s thick!) them in place. It’s hard to see where I sewed, but use your imagination and draw a dotted line between the two white arrows – that’s where I sewed. Then clip any excess fabric ends.

Now, try it on to see how long to make it, then repeat with the other end the sewing thing. You can kind of see the ends in this picture:
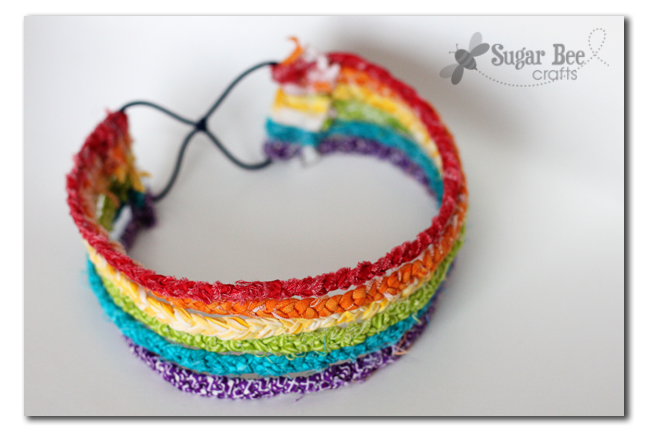
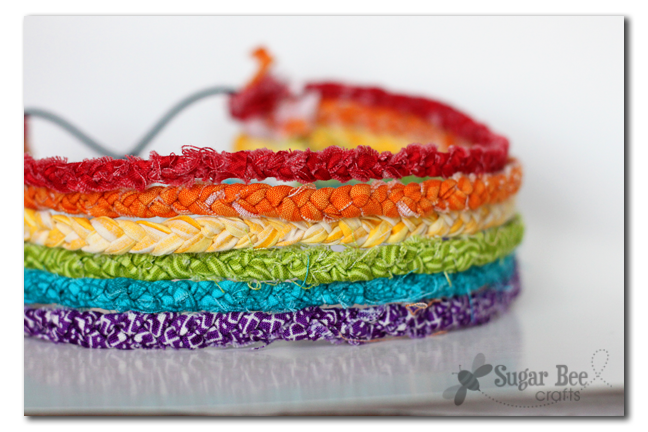
I love the braids all stacked – so fun!! I think it’s because I love the bright rainbow colors. I think I might have to do a rainbow week on the blog because I love them so much….
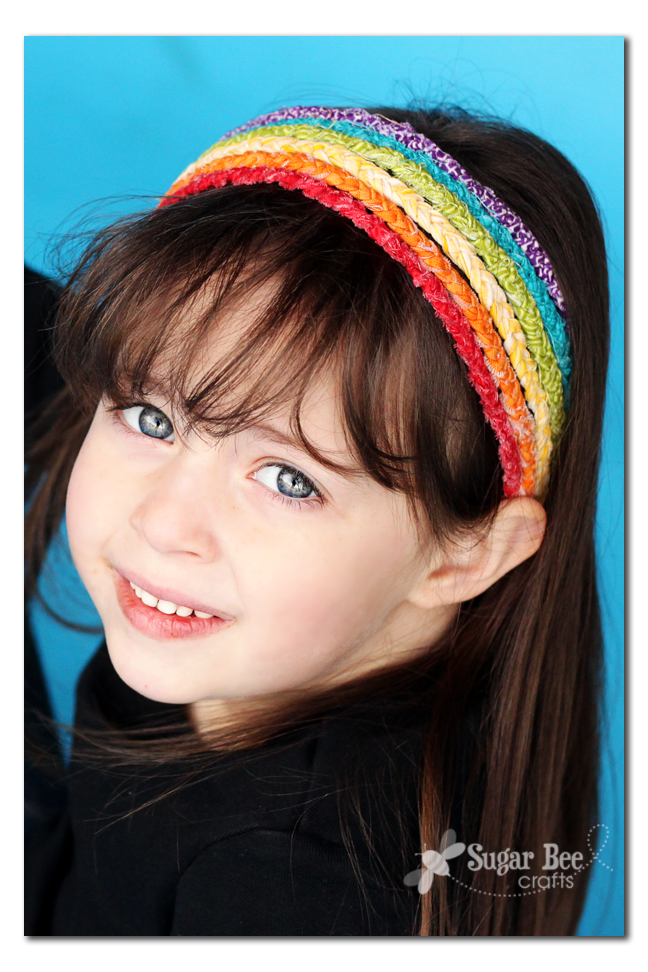
I got some great pictures of my preschooler modeling, so of course I have to show that off:

And here you can see more of a side view of the headband:
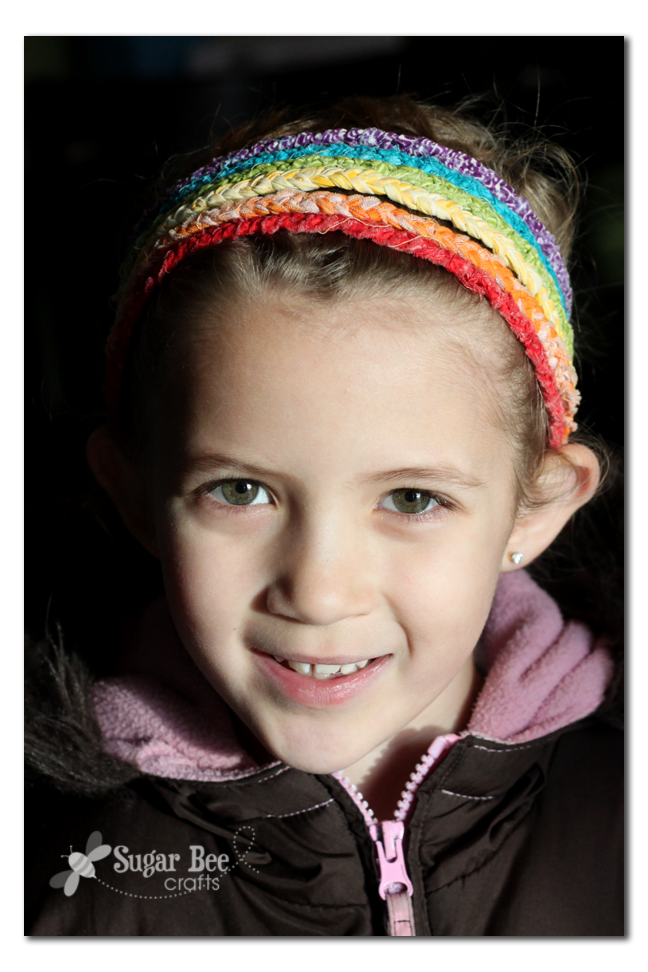
And her sister noticed the new headband before school the next day and HAD to wear it – – I love when they actually like the things I make 🙂
So anyways, this is so doable – go make one!!

This is super cute Mandy!!
Too cute! This would be really cute as an ombre headband too, you should try it!
This would be a great project for my daughter to do!
super cute
I had to LOL at the rainbow song. My kids love it and sang it for weeks after the first time they heard it on “Cat in the Hat”.
It does look super cute!
LOVING this! Doing it tonight, in fact! Thanks so much for sharring tutorials for everything you make. Good luck this week…I’ve already voted. 🙂
Super, super cute mandy!! XO
They remind me of those friendship bracelets children used to make =D
this turned out so cute!
marissa
https://raegunwear.blogspot.com
What a cute idea! Megan
Adorable, colorful headband & perfect model!
-caroline @ c.w.frosting
Richard
Of
York
Gave
Battle
In
Vain
that’s how we were taught the colours. I can only assume that Richard lost his battle…we Brits can’t help our battles 😀
Seriously creative and so cute!! So many color combo possibilities. Now, if I can just get my toddler to leave a headband in. 🙂 Thanks for sharing!!
This is super cute! What a great idea.
Jeanna
dramaqueenseams.com
Great idea! Have you heard the They Might Be Giants “Roy. G. Biv” song? Good rainbow color learning over there too. I might need to make one of these for myself one rainy day. thanks for sharing@
jess @ tupelocreative
would love it if you could share this on my link party
Natasha xx
http://www.serenityyou.blogspot.com
would love it if you could share this on my link party
Natasha xxx
http://www.serenityyou.blogspot.com
just gorgeous!!!!
thanks for sharing on Serenity Saturday!
Can’t wait to see what you link up later today!
Natasha xxx
I made one of these and posted about it here. It’s such a fun accessory!