


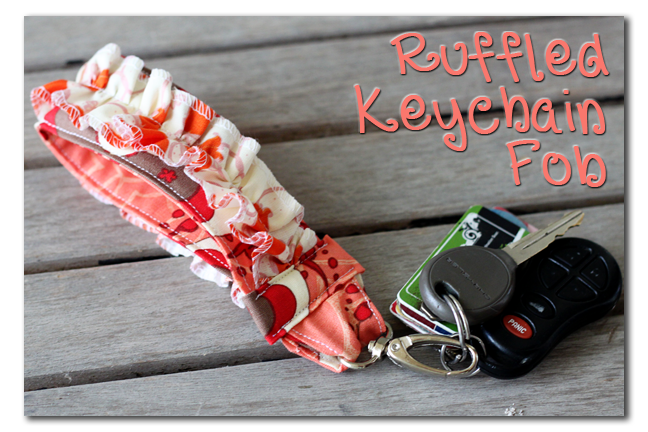
I have been making these quite a while and always sell out of them when they’re listed in my Etsy Shop (I should probably stock that someday….)

I’ve been meaning to make a tutorial, and I finally kicked myself into gear. THAT’s why there was no post this morning – I was anticipating a rare Saturday Tutorial post. What, you didn’t even notice that I didn’t post this morning.. hmm. 🙂
So, on to the tutorial…
You’ll need a keychain clip thing – I don’t know what they’re called, but I think you can buy them in the “notions” section. Then you’ll need 2 coordinating fabrics and some fusible fleece.

Cut one piece of ruffle fabric approximately 2 inches by 24 inches. Cut the piece of fusible fleece about 1 inch by 10 inches. If you don’t have fusible fleece, you can use regular fleece or flannel or anything to make it a little thick. Cut one piece of the main fabric 1.5 inches by 5 inches. Then cut 2 pieces of the main fabric about 2 inches by 12 inches. Then one one end cut the curves like shown below:

Iron the square-ish piece into a narrow strip – fold up about 1/2 inch, iron it, then fold down about 1/2 inch and iron it, to give 2 nice edges:

Turn under the edges of the main pieces – the curves are a little tricky, but just work slowly. Iron the fleece onto one of them:

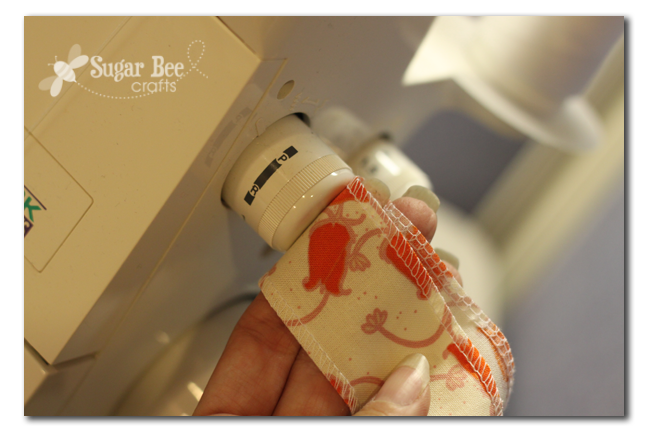
Grab your ruffle piece and finish the edges. You can hem them. I used my serger set on “P” – – it’s like a not-so-dense rolled them:
Then sew down the middle and gather the strip. I talk about gathering on the Ruffled Hairclip Post. It should be long enough to go from the end to where the curve starts:

Sew the ruffle down to the main fabric:

Then sew the two pieces of main fabric together along the side seams that you had turned under. Be sure not to sew the ruffle down at the edge:

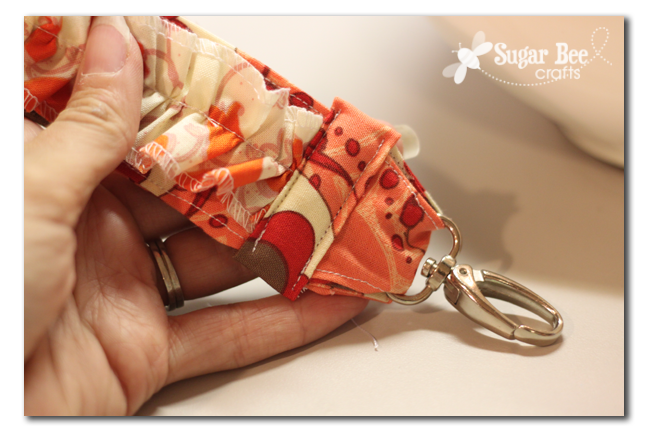
Alright, ready to assemble – – put on the clip thing, in the curve area, then fold it up like so:
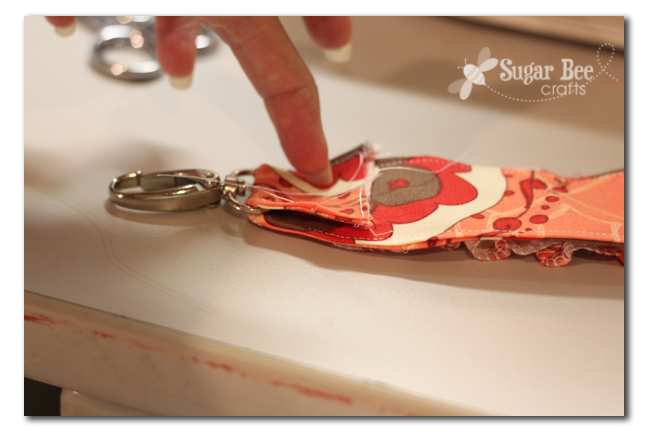
And then fold the other end so it slightly overlaps – – my finger is in the way because I am bad at using pins – I just sew and go. Anyways, zig zag over that seam to hold it in place:

Now, to make it look pretty, take the strip you made and wrap it around – tuck the end under itself to made a finished edge:

Then sew along the top and bottom edge of the strip – you can see my stitching below:
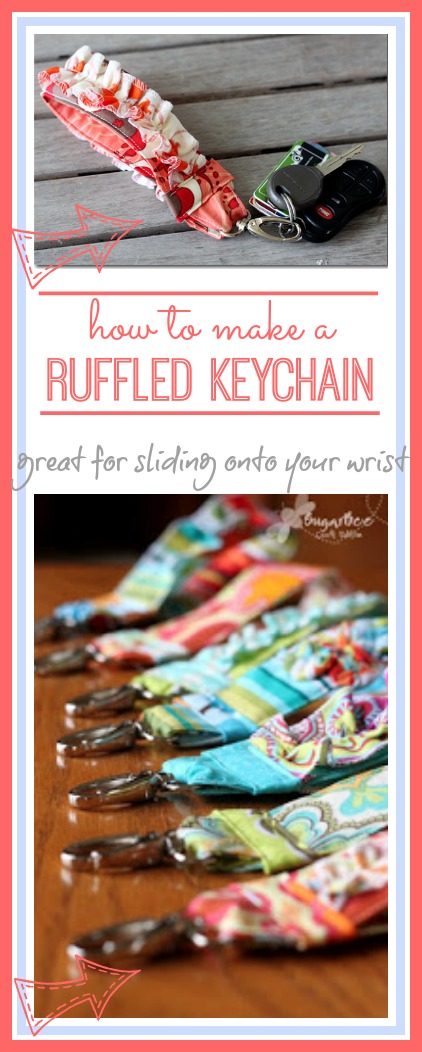
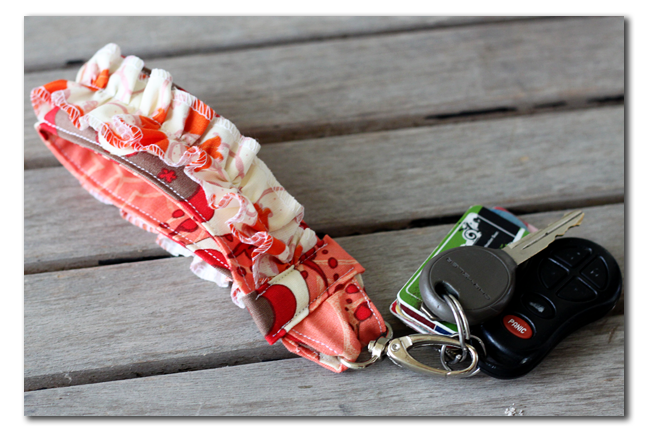
That’s it!! I have one of these and I LOVE it!! I can just slip it on my wrist and hold my keys that way when I run into the store, library, etc. It’s also easier to find when I chuck it into my purse then just a small keychain.

This is a fun quick project – – – go make yourself one!! You can do it!!

I really love this! Thank you so much for sharing!
Christina
[email protected]
I really love this, thanks so much for sharing!!
xo, Jersey Girl
hairsprayandhighheels.blogspot.com
These are so cute! I would love it if you would join my very first link party and share some of your fabulous ideas at https://mommyssweetconfessions.blogspot.com/2012/08/sundays-sweet-confessions-first-link.html
I absolutely LOVE this!!! I have a lanyard that I have kept my keys and a phone pocket on. It’s clunky and annoying. I’ve wrapped it around my wrist, but again it’s clunky and annoying. I almost bought one of these the other day, but now I don’t have to!!! I can make it to lookk how I want it to look…and I even have the material! Thanks for posting!!!
I love this project. I want to make one of my own, just pinned it. ;o)
Great sewing project! This is on my must make list and added to my pin board for future sewing projects.
I know that our readers will love it, too. If you get a chance we would love for you to link up this craft at our weekly Bowdabra Showcase. https://bowdabrablog.com/2012/08/04/saturday-showcase-craft-projects-13/
yes! Time for you to restock so I can order one!
Ellie
Where did you get the clip? I love this!!
Kaitlin – I make a lot so a bought the clips in bulk on ebay – – but you can find them at JoAnn’s or wherever – good luck!
Just wanted to let you know you were featured at https://mommyssweetconfessions.blogspot.com/2012/08/sweet-confessions-sunday-link-party-2.html. See you at this weeks party!
This is so cute…I need more cute in my life and am always loosing my keys. May have to make one soon!
Thanks for sharing on Show & Tell at SNAP!
xoxo, Tauni
This is so cute…I need more cute in my life and am always loosing my keys. May have to make one soon!
Thanks for sharing on Show & Tell at SNAP!
xoxo, Tauni
This is so cute…I need more cute in my life and am always loosing my keys. May have to make one soon!
Thanks for sharing on Show & Tell at SNAP!
xoxo, Tauni
What a great idea for back to school! This looks so simple and easy and I look forward to giving it a try. Thanks for sharing :-]
LOVE these!!! So where do you attach them on your bags? I used to have a neato key fob thingy on my purse but alas–no longer.
I normally just throw them in my bag, so I don’t clip them anywhere – – but I do where them on my wrist when I need to – just love it!
Such a super-cute idea! I’m so glad I found you on Ahalogy – can’t wait to try this!
Where do you find those great fabrics for the keychains?? Is it a certain fabric line?? I love those fabrics and the combination of the fabrics.
Thanks
Carla
Hi Carla! I think a lot of that is fabric from Amy Butler – I lover all her lines!
Me too, she has great fabric lines. There are not copies of the pattern pieces are there? Whaen you make the pattern piece for the main piece, how do you make sure the indented parts are even- is there a trick for that?? Thanks again!!
I just folded the pattern in half lengthwise and cut the curves so that when I unfolded it they matched. Good luck!
So I know this post is 2 years old, but maybe you’ll remember. 🙂 The keychain clip do-dad…is the opening 3/4″? I just bought a couple of them, but the opening is 1″. I’m just wondering if I’ll need to make the little side indentions or not. Is your finished fob about 1″ wide? TIA!
that sounds about right! i think it’s about 1 inch wide finished
I love this tutorial and I will definitely make one or maybe a few. Can you tell me where I can get the clips to go on bowties, I want to make them but not sure where to find the clips. Thanks
sorry, I’m not sure where to get bowtie clips – maybe try searching on Ebay? good luck!