


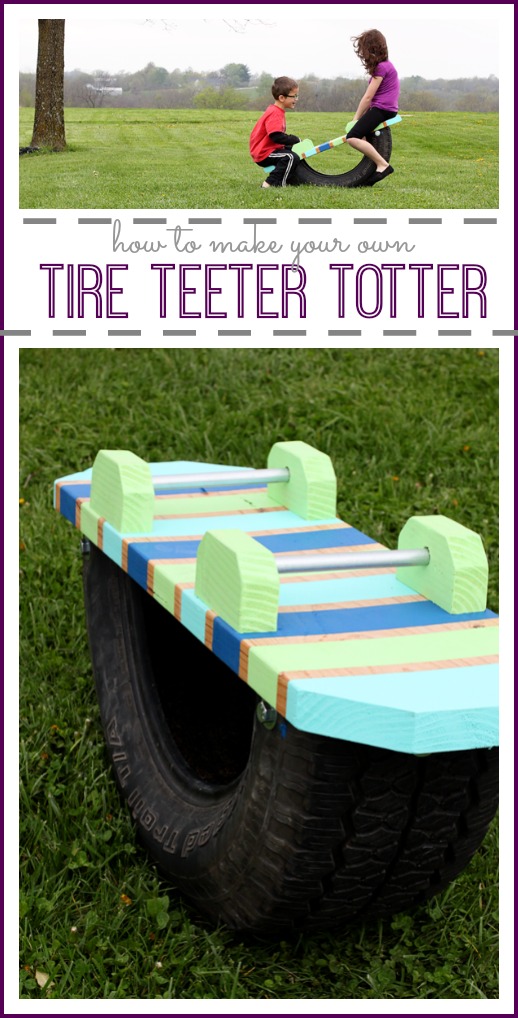
 Did you know Earth Day is this Wednesday?? It’s got me (and everyone) thinking about reusing and recycling, and I just love today’s project for that – a Tire Teeter Totter! Yes, just an old tire given a new life. I really love how it turned out (and so do my kiddos!) Just a used tire, some scrap building supplies, and we were set!
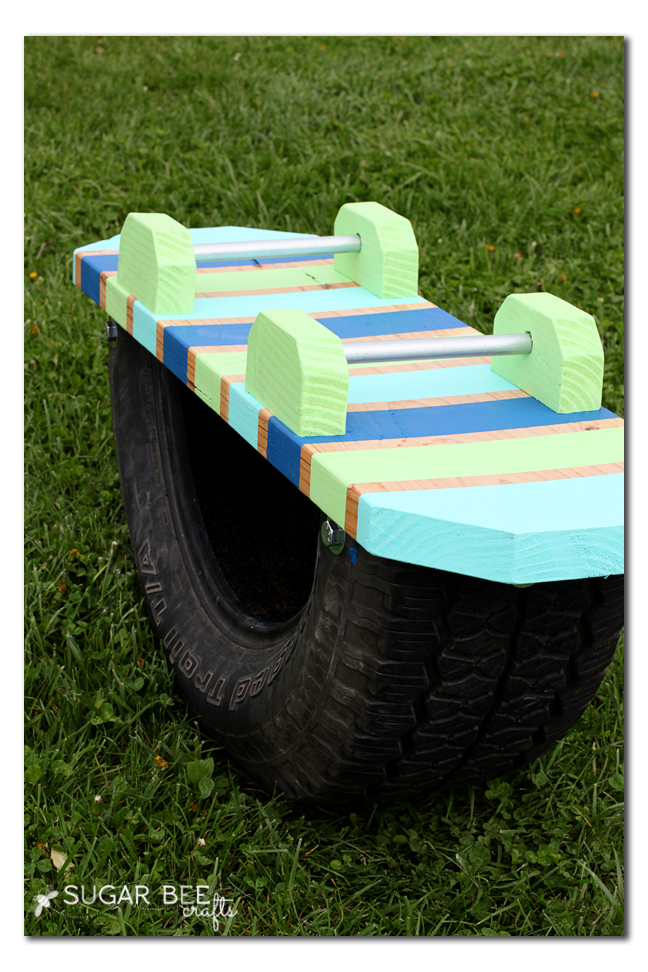
See, super awesome!
How to Make a Tire Teeter Totter
We had all the supplies for this project, except for the giant bolt screws, on hand. And except for the tire, but we were able to grab that from Discount Tire (you can get an old tire to use in a recycle project at no cost). So the whole project was virtually no cost.
Tire Teeter Totter supplies
For this project, we used a pretty big tire, but I don’t think that was necessary. In fact, I think the rugged tire was probably a little harder to cut through (reinforce steel cable rim) than a regular tire, so when I make another one, I’ll grab a smaller tire.
For this project you’ll need:
–recycled tire
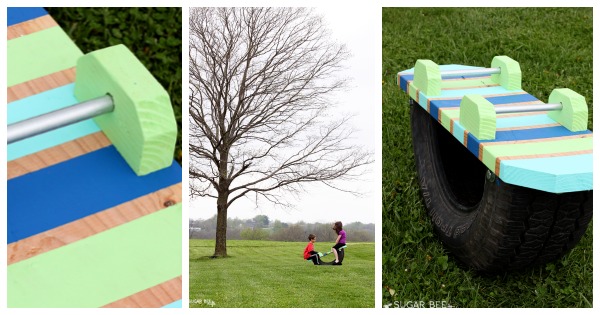
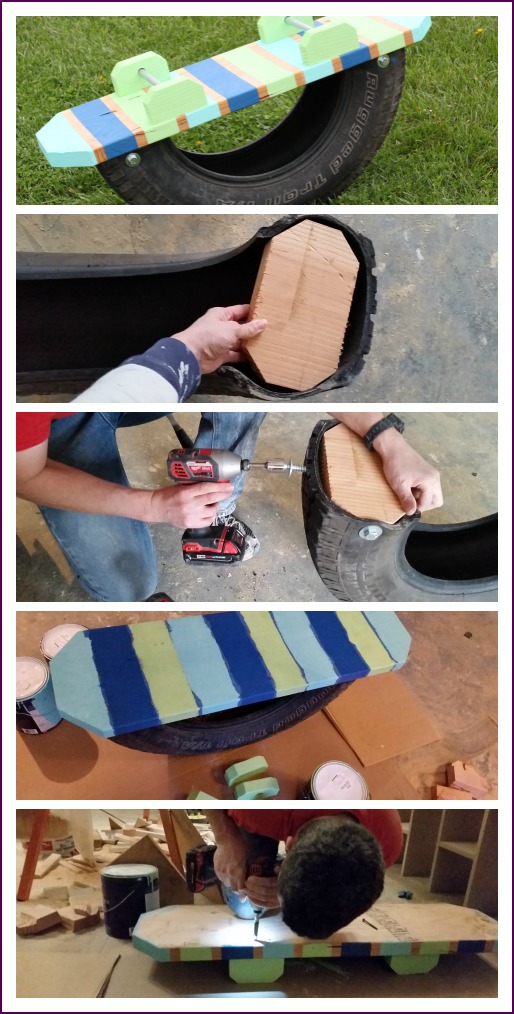
–scrap wood (our board was about 10 inches wide and in length it extended over the tire on each edge maybe 4 inches – this is totally up to you how big the board is) – also, scraps for the handles and tire blocking
–electrical conduit pipe (we had some left over from our railing we built) – this is super cheap and can be found near the electrical stuff
–6 bolts with washers
–optional: paint (I used paint we had on hand, leftover from the kids’ rooms, but you could also leave it plain)
Tire Teeter Totter Tutorial Instructions
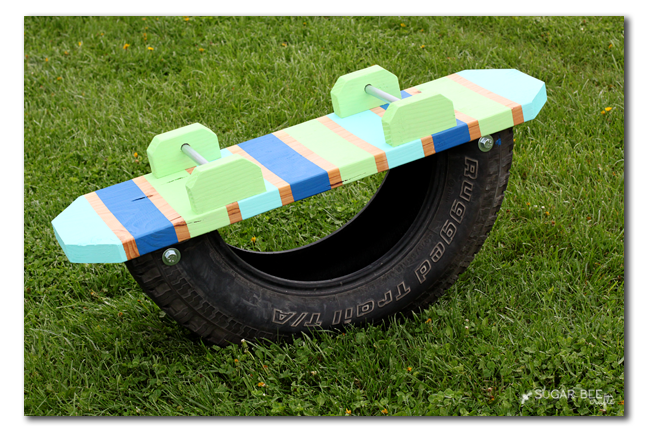
Let’s dive right in! First up, cut the tire. We used a saws all, and it takes lots of muscle (I couldn’t have done it myself) – –
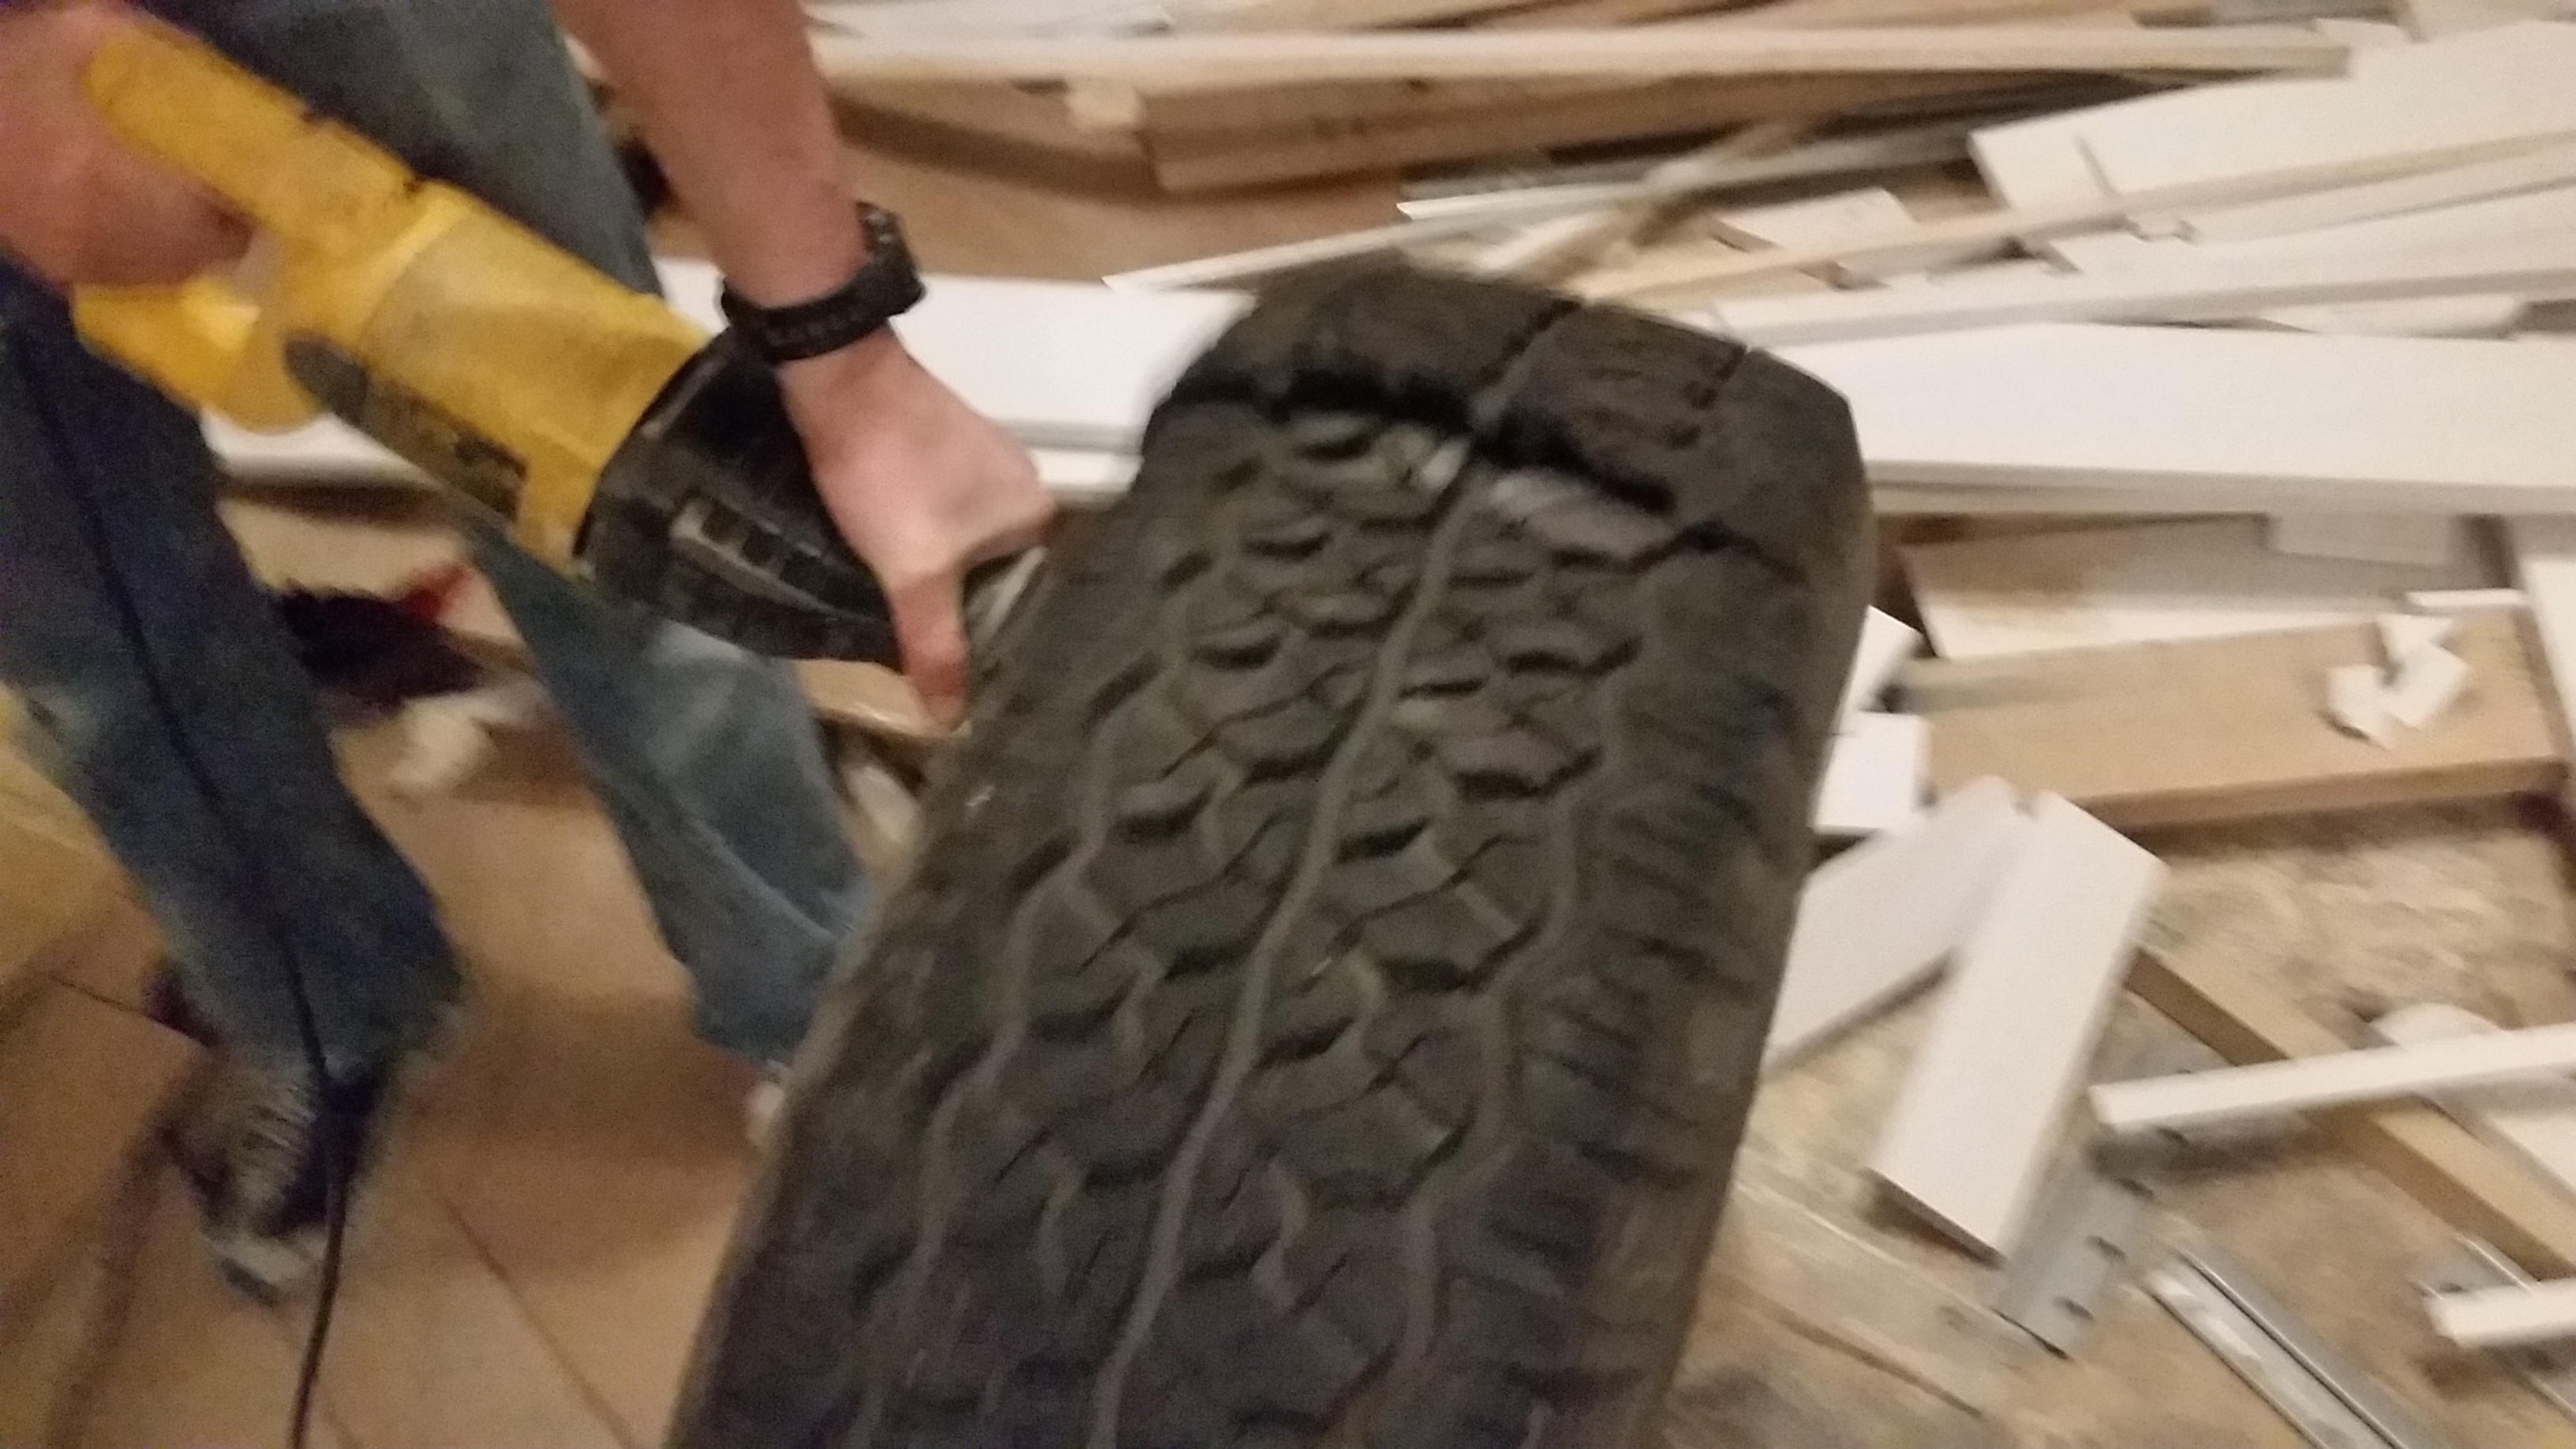
Cut it so that you have 2 halves. You can make 2 teeter totters out of one tire.
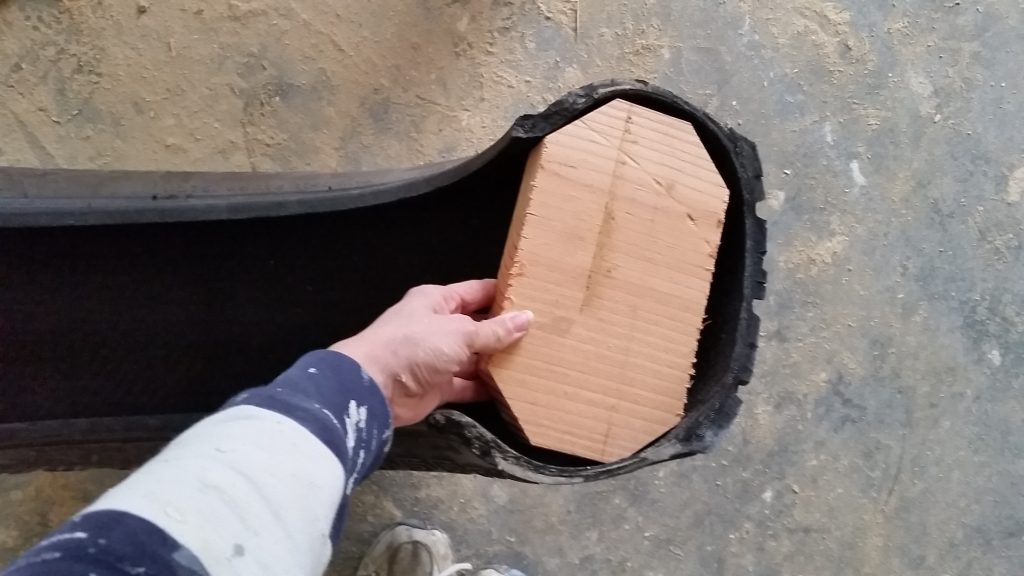
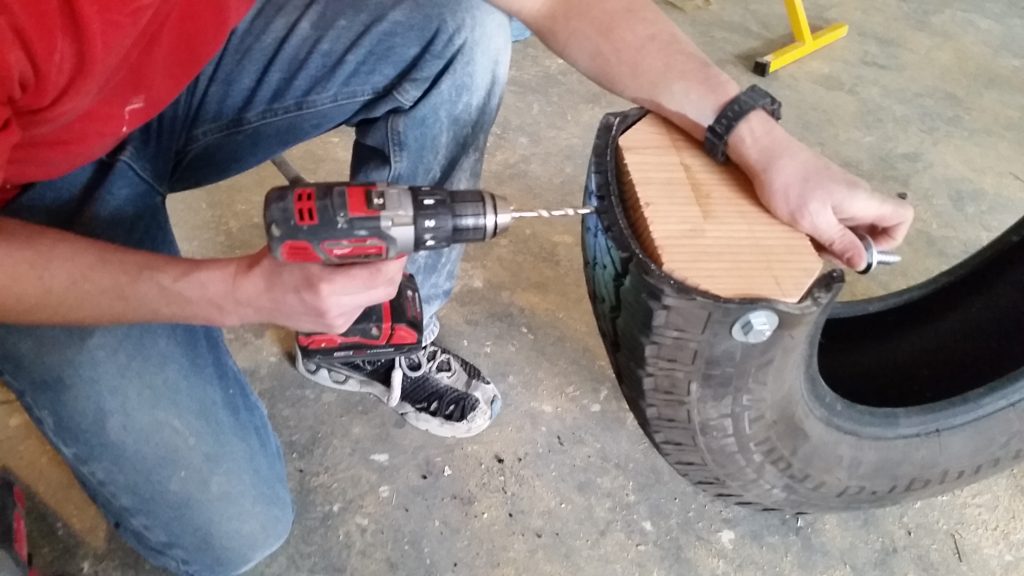
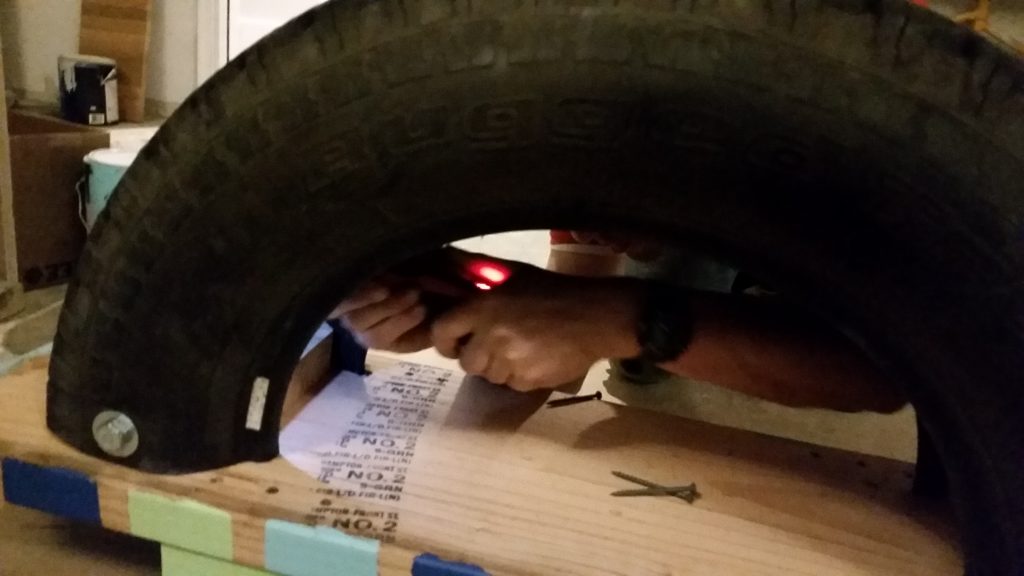
Next up is the tire blocking. When you cut the tire it looses some of it’s integrity and gets more flexible. Plus you need a spot to attach the seat, so blocking solves both those problems. Use a rectangular piece of wood that fits inside your tire like shown below. We cut the corners at an angle for a little better fit.
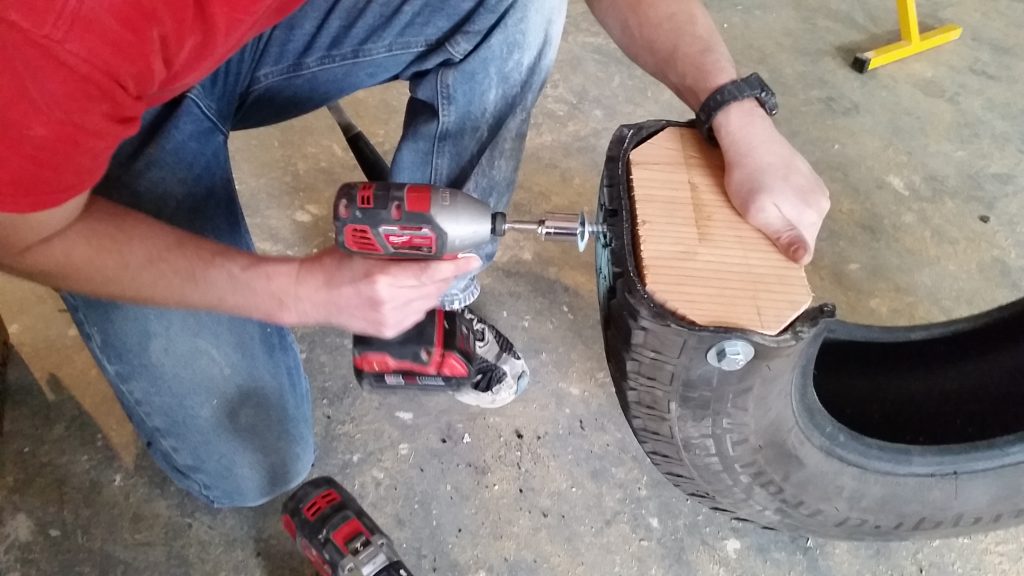
We used screw bolts to attach the tire blocking wood to the tire. one on each of the 3 sides. First we drilled a pilot hole through the tire and wood:
and then attached the bolts through those pilot holes, and then repeat that for the other side:
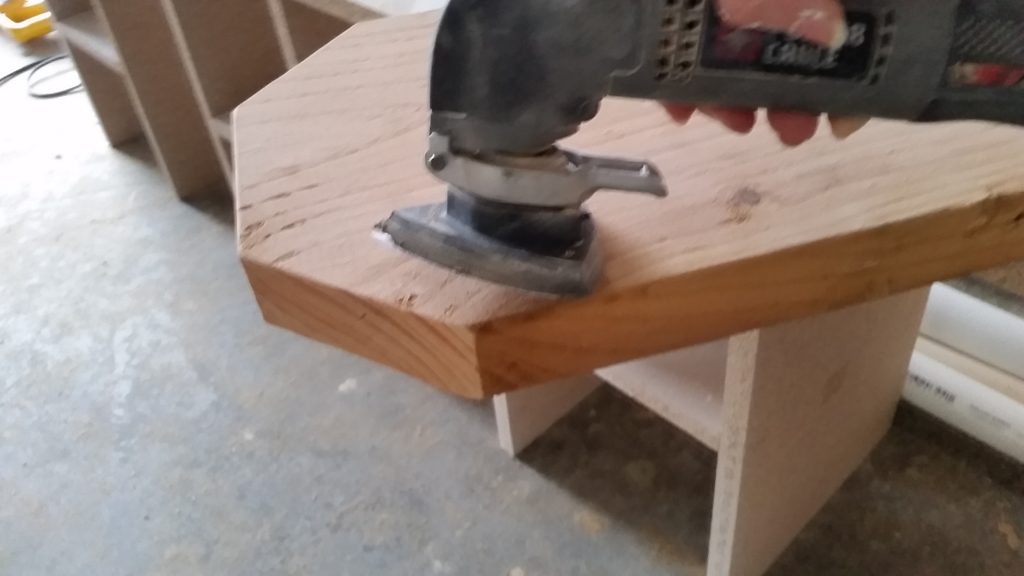
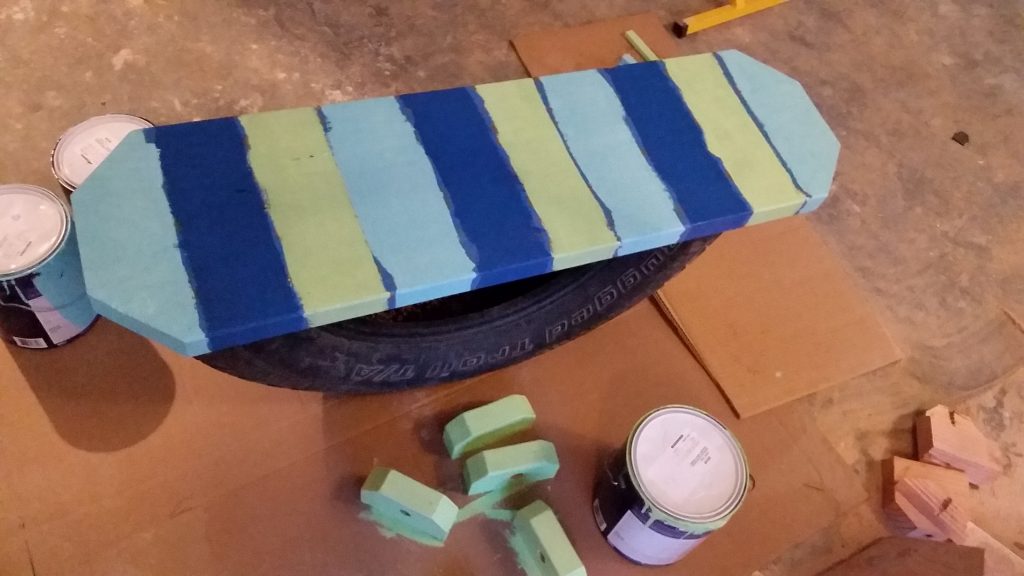
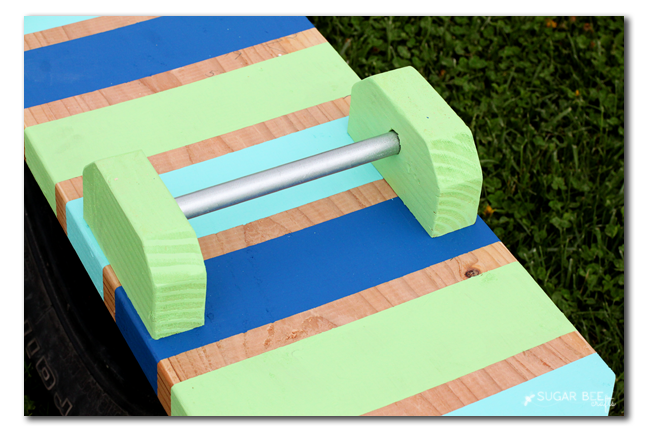
Next up, cut the board for your seat to length. We also cut off the corners so they wouldn’t be sharp for riders. Then I made sure to sand it really well. You can also cut the blocks for the handles while you’re in the cutting mode – you’ll need 4. And on the handles, drill out holes that the conduit will slide into.
I then taped off stripes and painted my seat, but that’s optional. You could leave it plain, or paint it solid, or really do whatever you’d like!
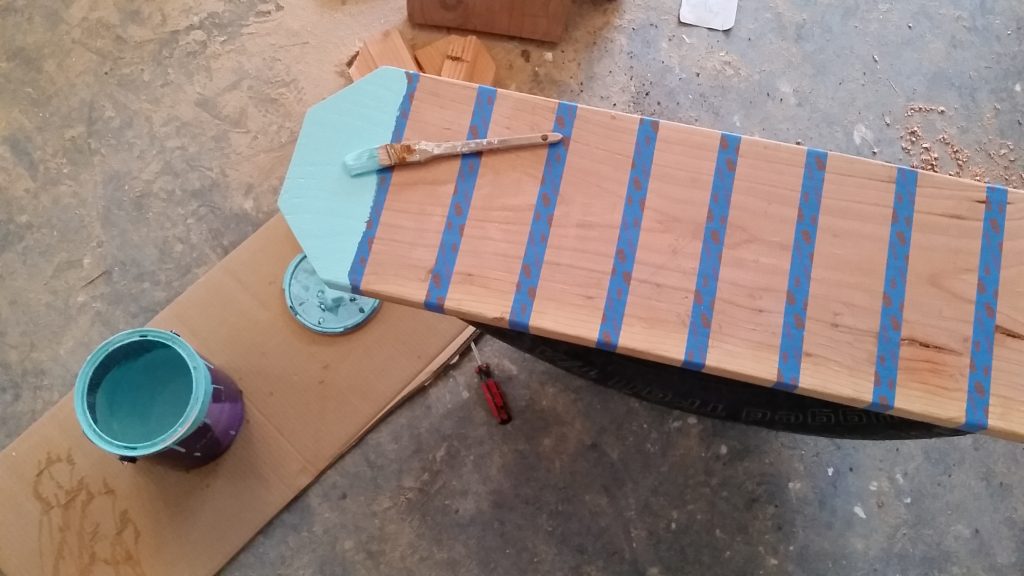
If you do stripes, just let it dry completely and then remove your tape lines.
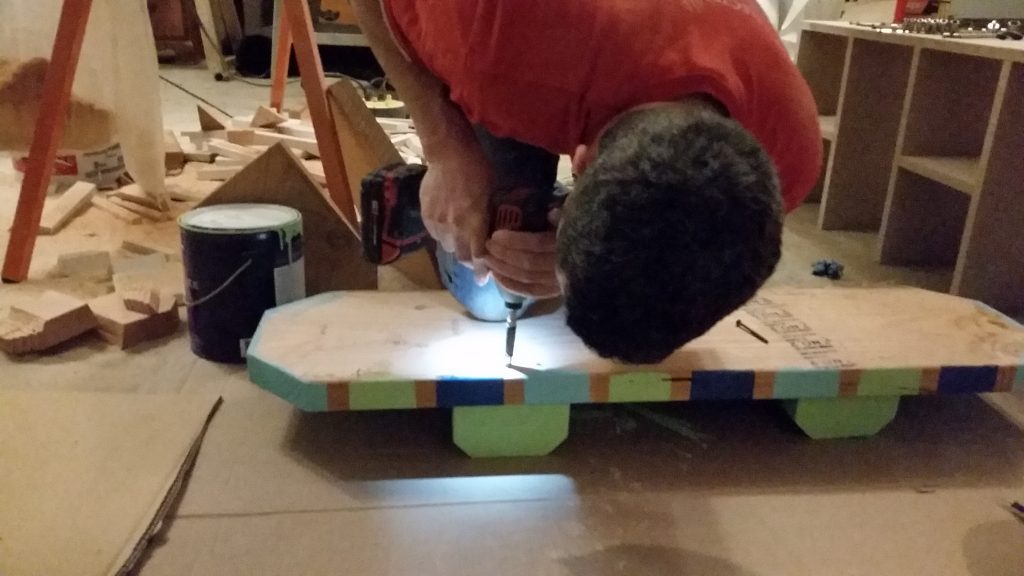
Alrighty, assembly time! Flip the handles upside down (with the conduit inserted into the holes already) and then flip the seat board upside on top of it and drill screws through the seat into the handles to attach them.
Then you’re going to flip the whole tire upside-down on top of the seat so you can attach it by screwing through the blocking into the seat.
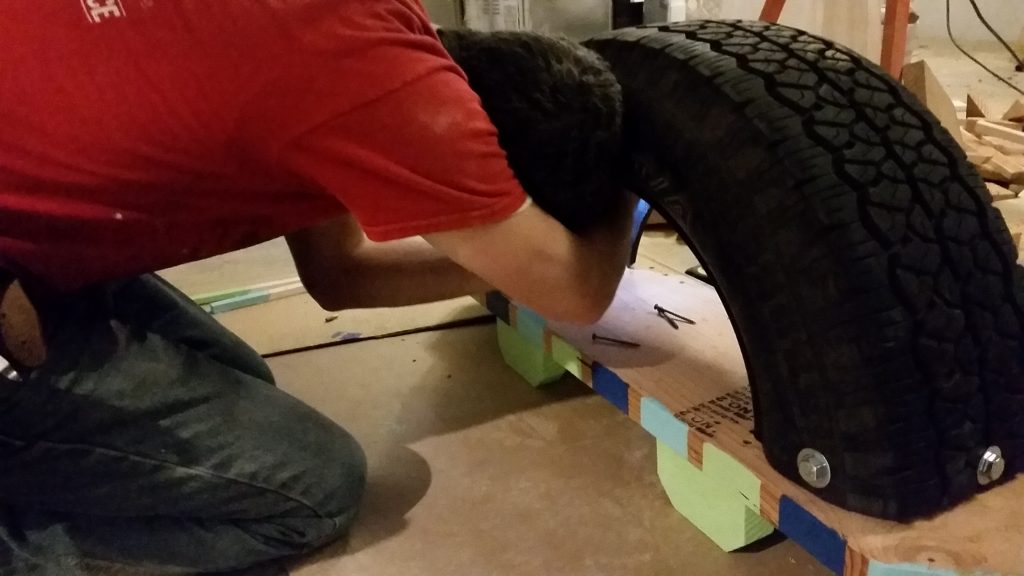
By attaching everything upside-down, you won’t have any screws exposed on the top-side of your teeter totter. An angled drill came in handy for that tight spot inside the tire.
Here’s a better view of how the handles came out. You want to be sure that the conduit is high enough that you can grab onto (wrap your hand all the way around) the pipe
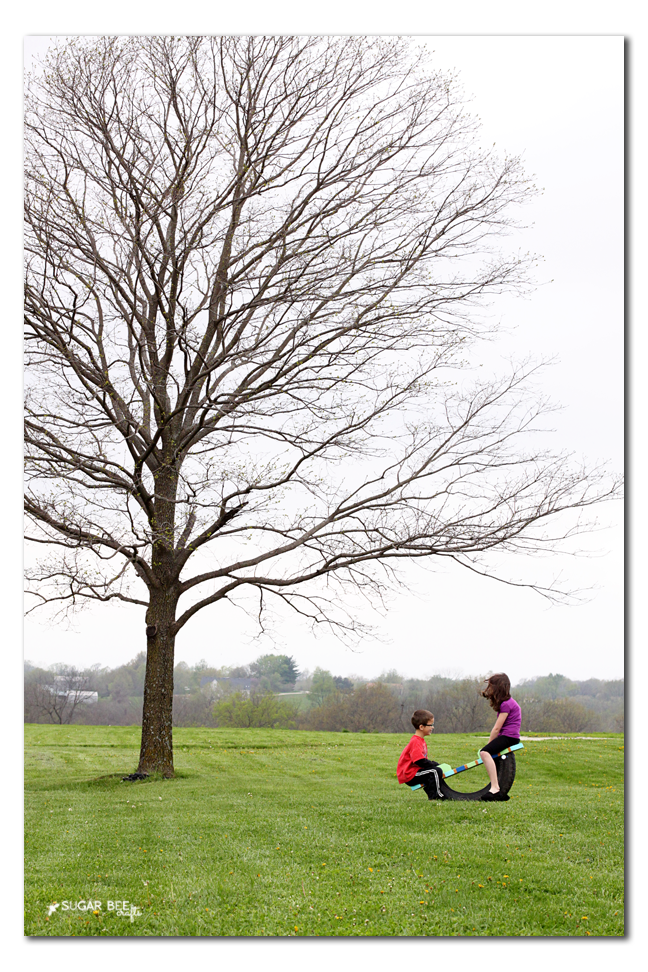
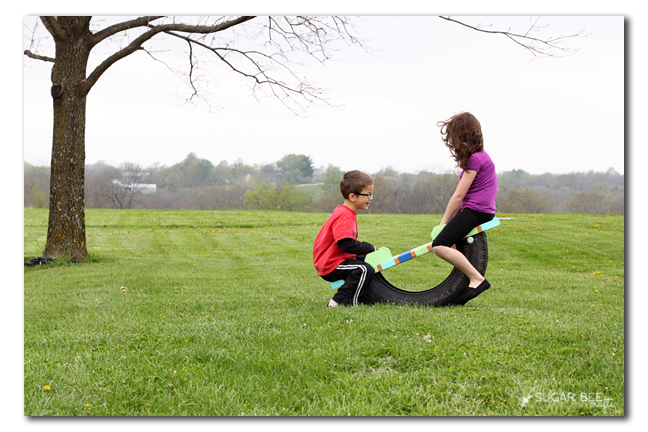
My kiddos are already having a blast with our Tire Teeter Totter – – I see lots more in our future!!
Fun DIY Projects to make For Kids
If you love making things, you might also like:
—Nightstands made out of crates
—Awesome Headband Organizer to make
Cute and the way you painted made it look so upscale!
Not discounting (pun) the effort to cut and attach the tire, it is pretty difficult so, props to the *muscle* too. 🙂
TwoPlusCute recently posted…Our Toy Kitchen and How to Choose the Right Play Kitchen
Oh my goodness, that looks like so much fun! And it turned out really cute too. What a great idea!
Carlee recently posted…TBT – Cracker Jax’s First Birthday Party
thanks so much!!
THis is so unbelievably awesome!!! You amaze me. Good to see you last week! Next time we need to get more chatting it though 🙂
marissa | rae gun ramblings recently posted…DIY Star Wars Crafts and Party Ideas
for sure!!
What a fun teeter totter! When my kids were little we built ours too but, not a cool tire one. Now my youngest is 13. Happy spring. Pinned for others.
Theresa @DearCreatives recently posted…Gift Ideas For Mother’s Day: Top Pick For Creative Moms!
This is a great idea! I’d love a giant size one for me! 🙂
Louise recently posted…Quilt as You Go Tablet Cover Tutorial
Look for a way to shape the ‘seat’ area where little legs meet the board. I will be more comfy and avoid any bruising that may occur with enthusiastic use.
A great-looking project!