

I know some of you might be into scary or gory Halloween decor, but I definitely tend towards the more cutesy side of things! These Cutesy Bats are everything – wouldn’t they be a fun make-and-take for a class party? Or a craft club? Fall crafting is in full force! I love being able to make fun holiday decor, and Halloween is no exception.
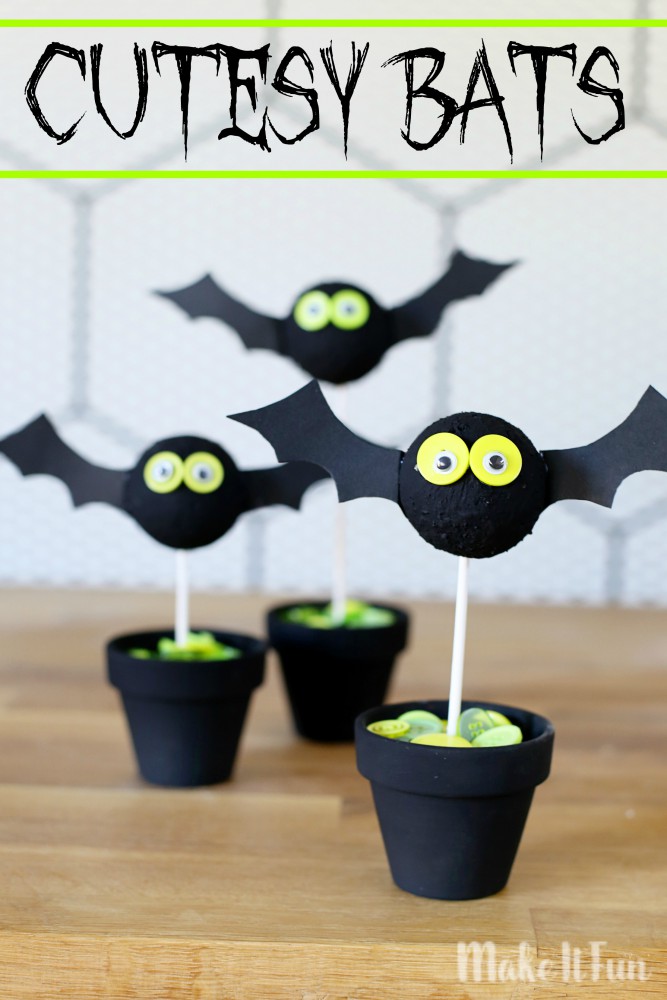
They look great grouped in a bunch or would be perfect as single bats for office desk decor, shelf displays, or even neighbor gifts! You’ll love how simple they are to make!
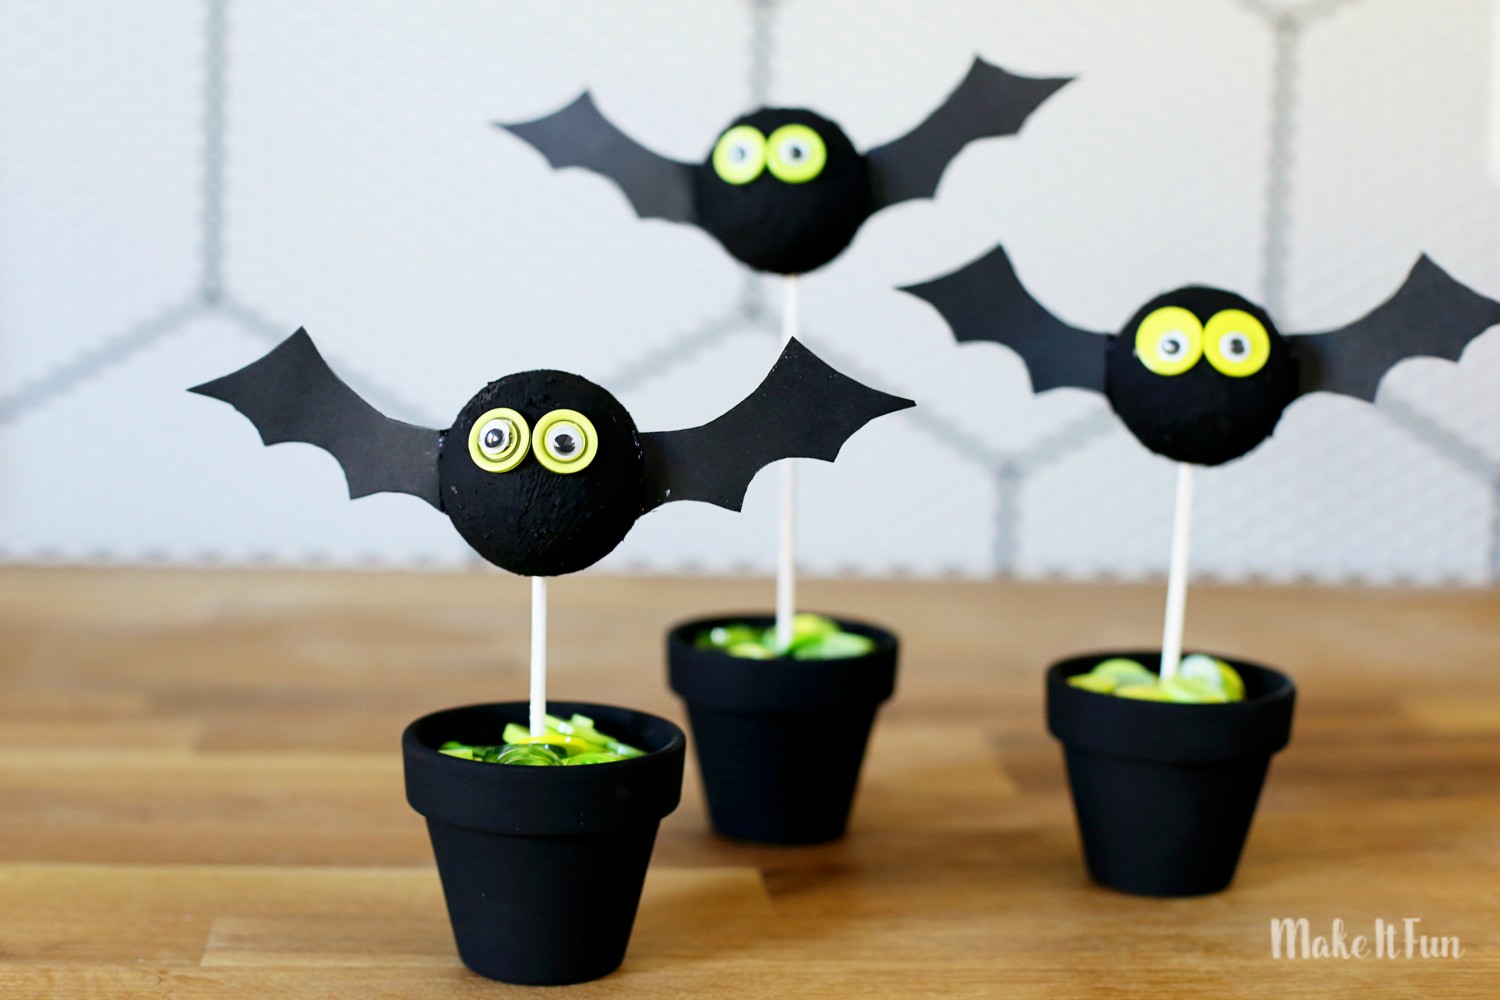
Cutesy Bats
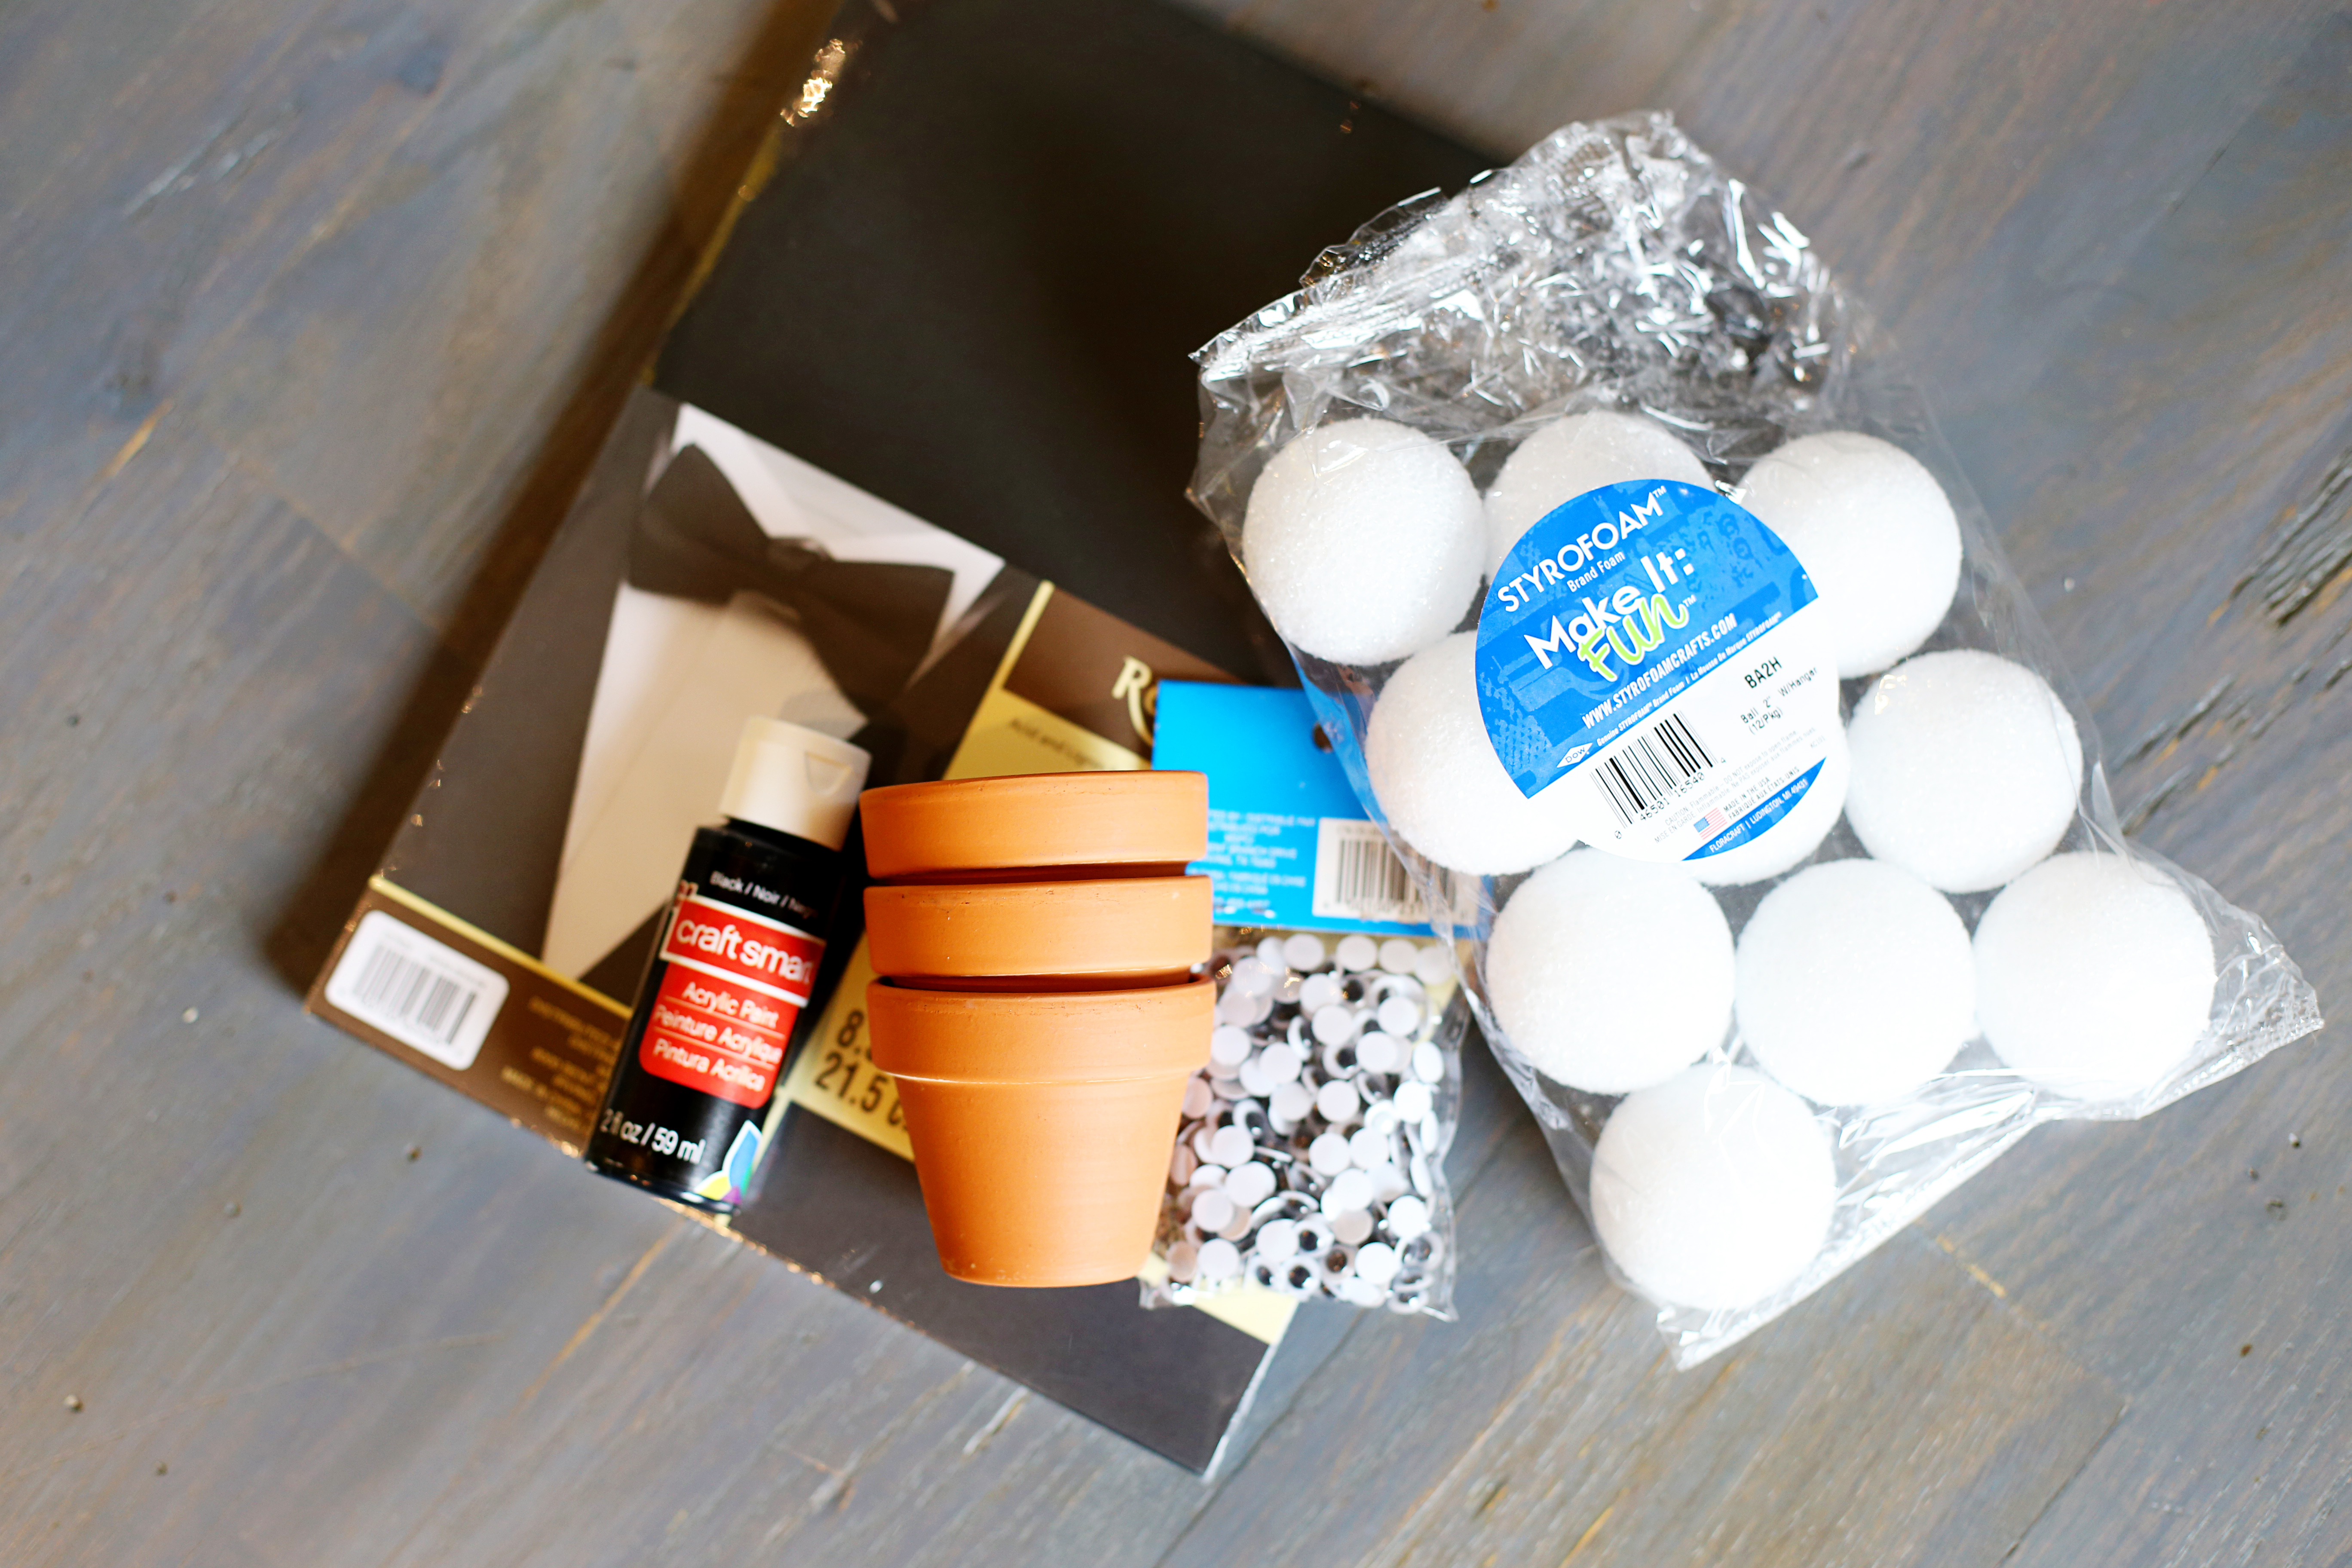
Supplies needed to make this project:
- FloraCraft® Make It: Fun® Foam: 2” Ball (or preferred size for your bats)
- FloraCraft® Make It: Fun® Smooth Finish
- Black Cardstock or Construction Paper
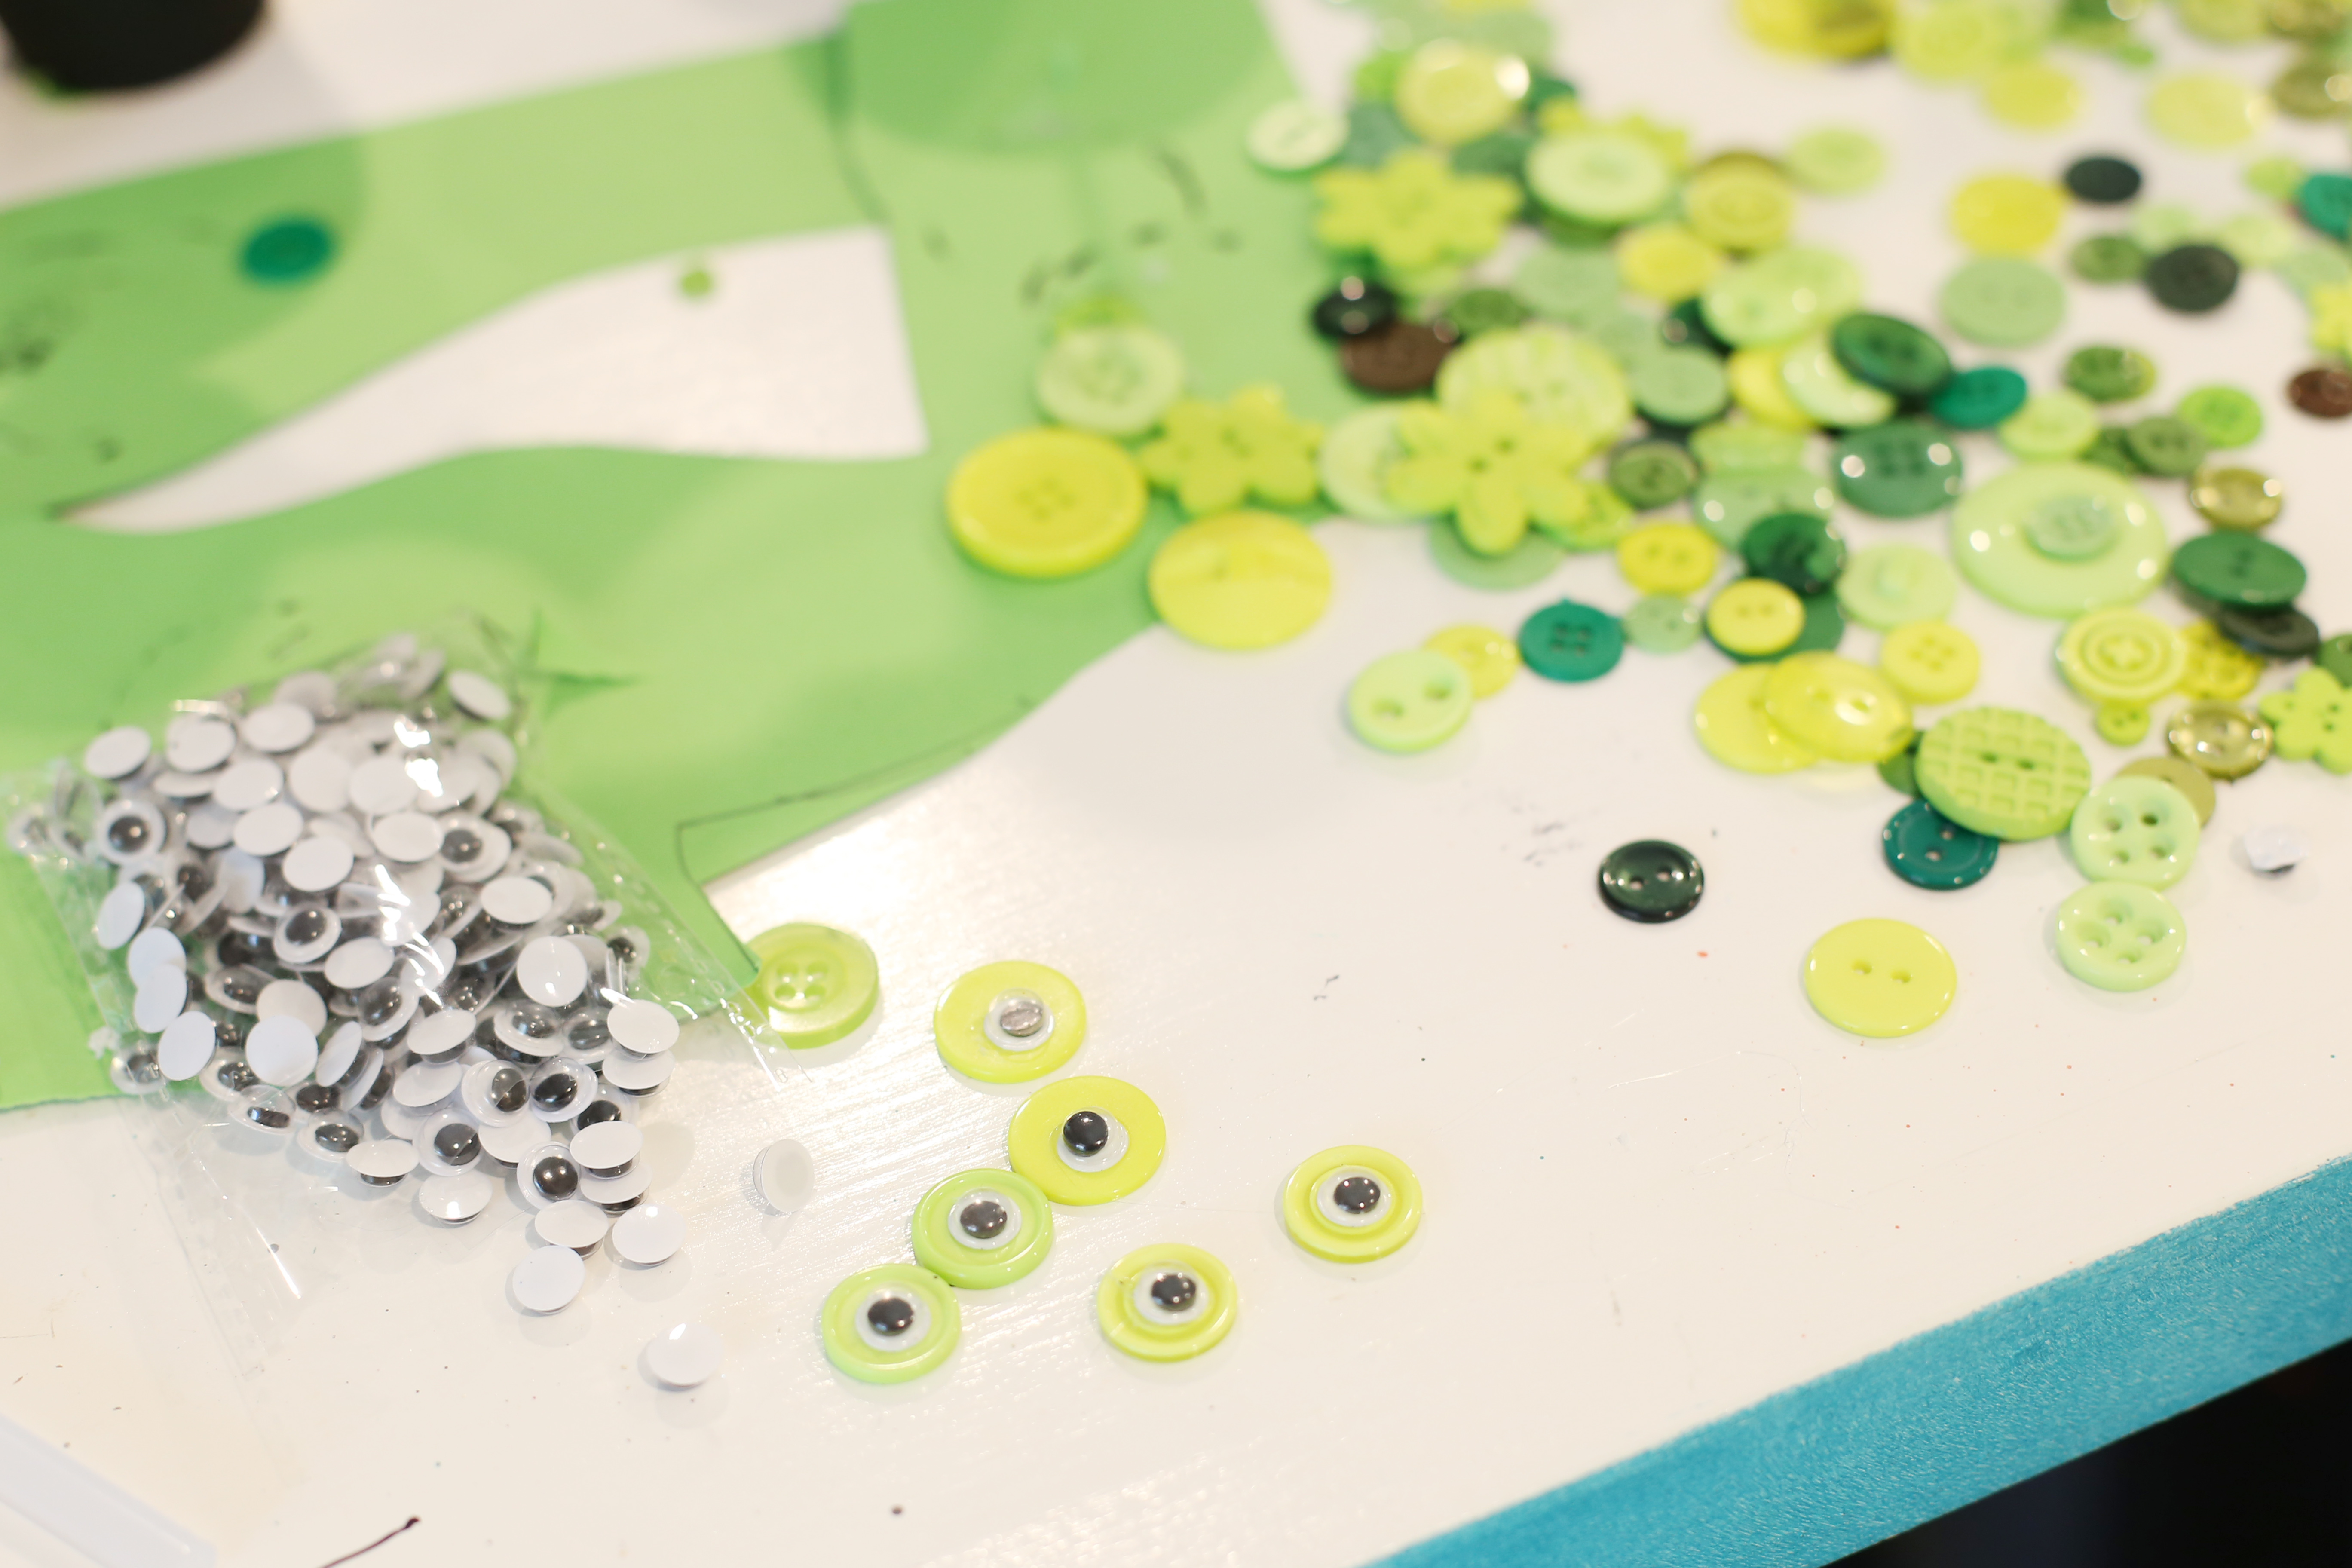
- Buttons and Googly Eyes
- Small Flower Pots
- Thin Dowel Rods
- Black Paint
- Low-Temp Glue Gun & Glue
Cutesy Bats Instructions for Tutorial
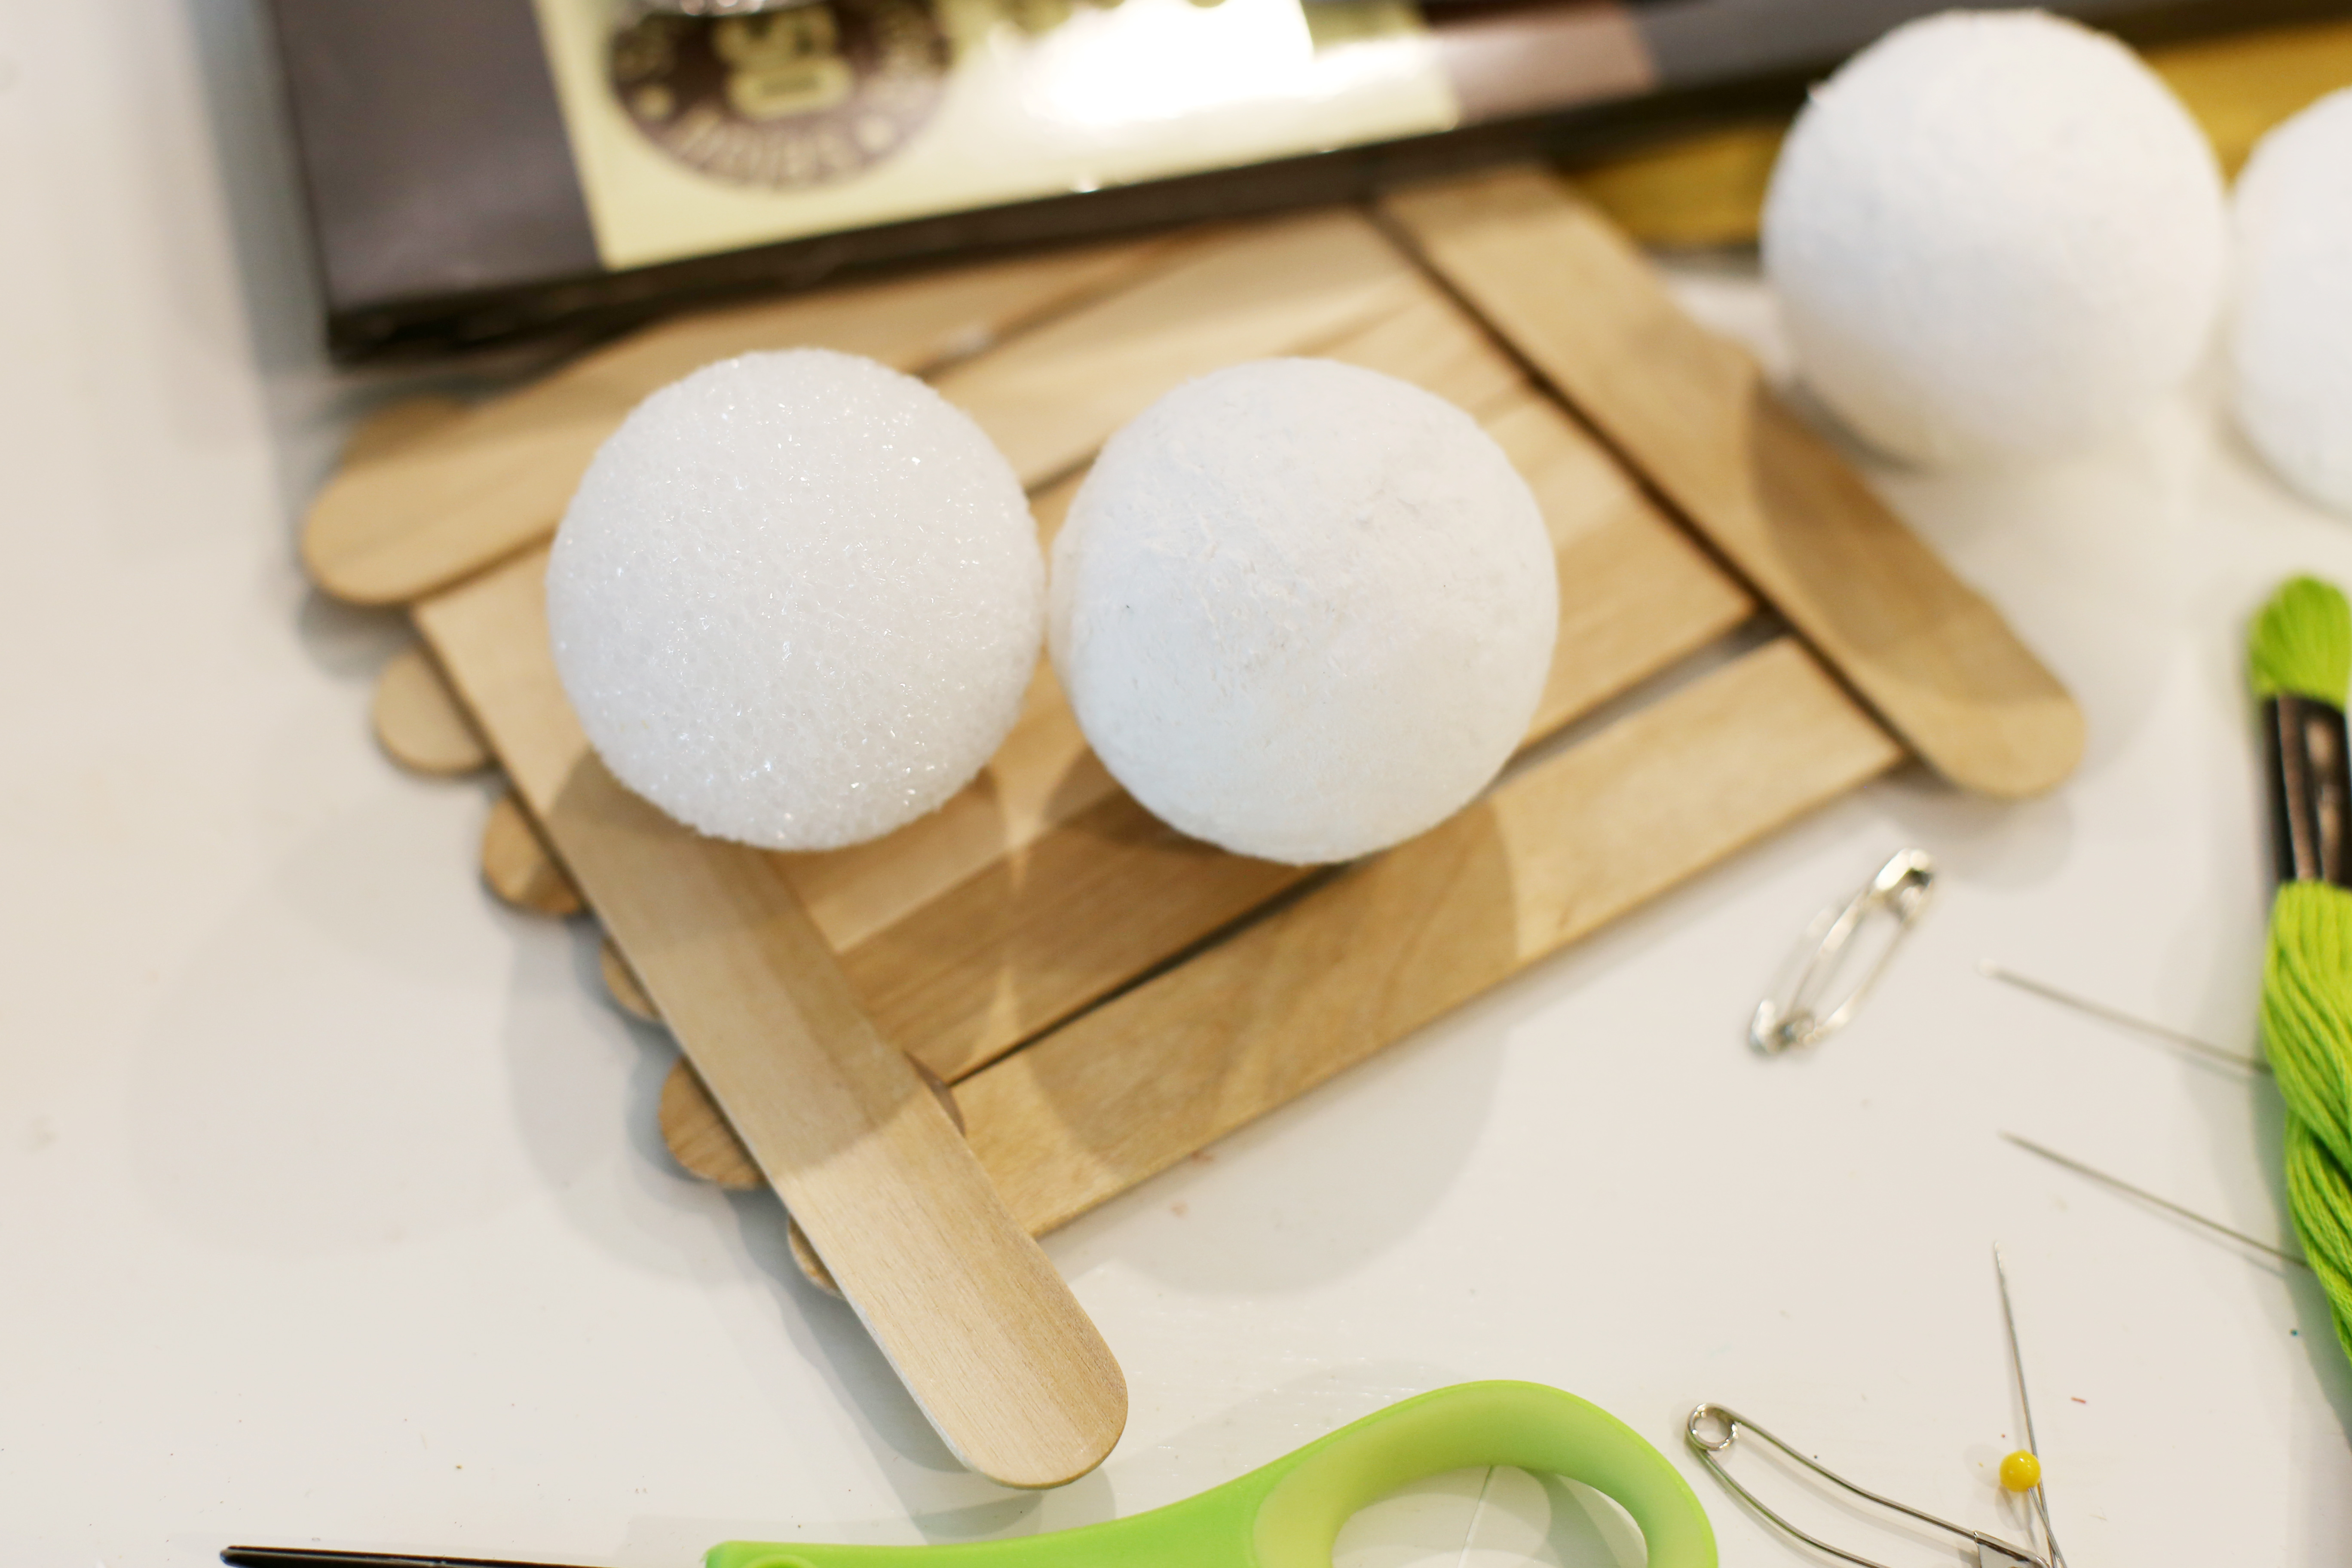
First, prepare your foam balls by covering them with Smooth Finish. I LOVE using Smooth Finish!! You can see the difference it makes here, one foam ball with it, one without. Let dry.
Next, paint the foam balls with black craft paint. Let dry. If needed, paint a second coat. Also paint the pots and let dry. If desired, paint dowel rod (mine are painted white).
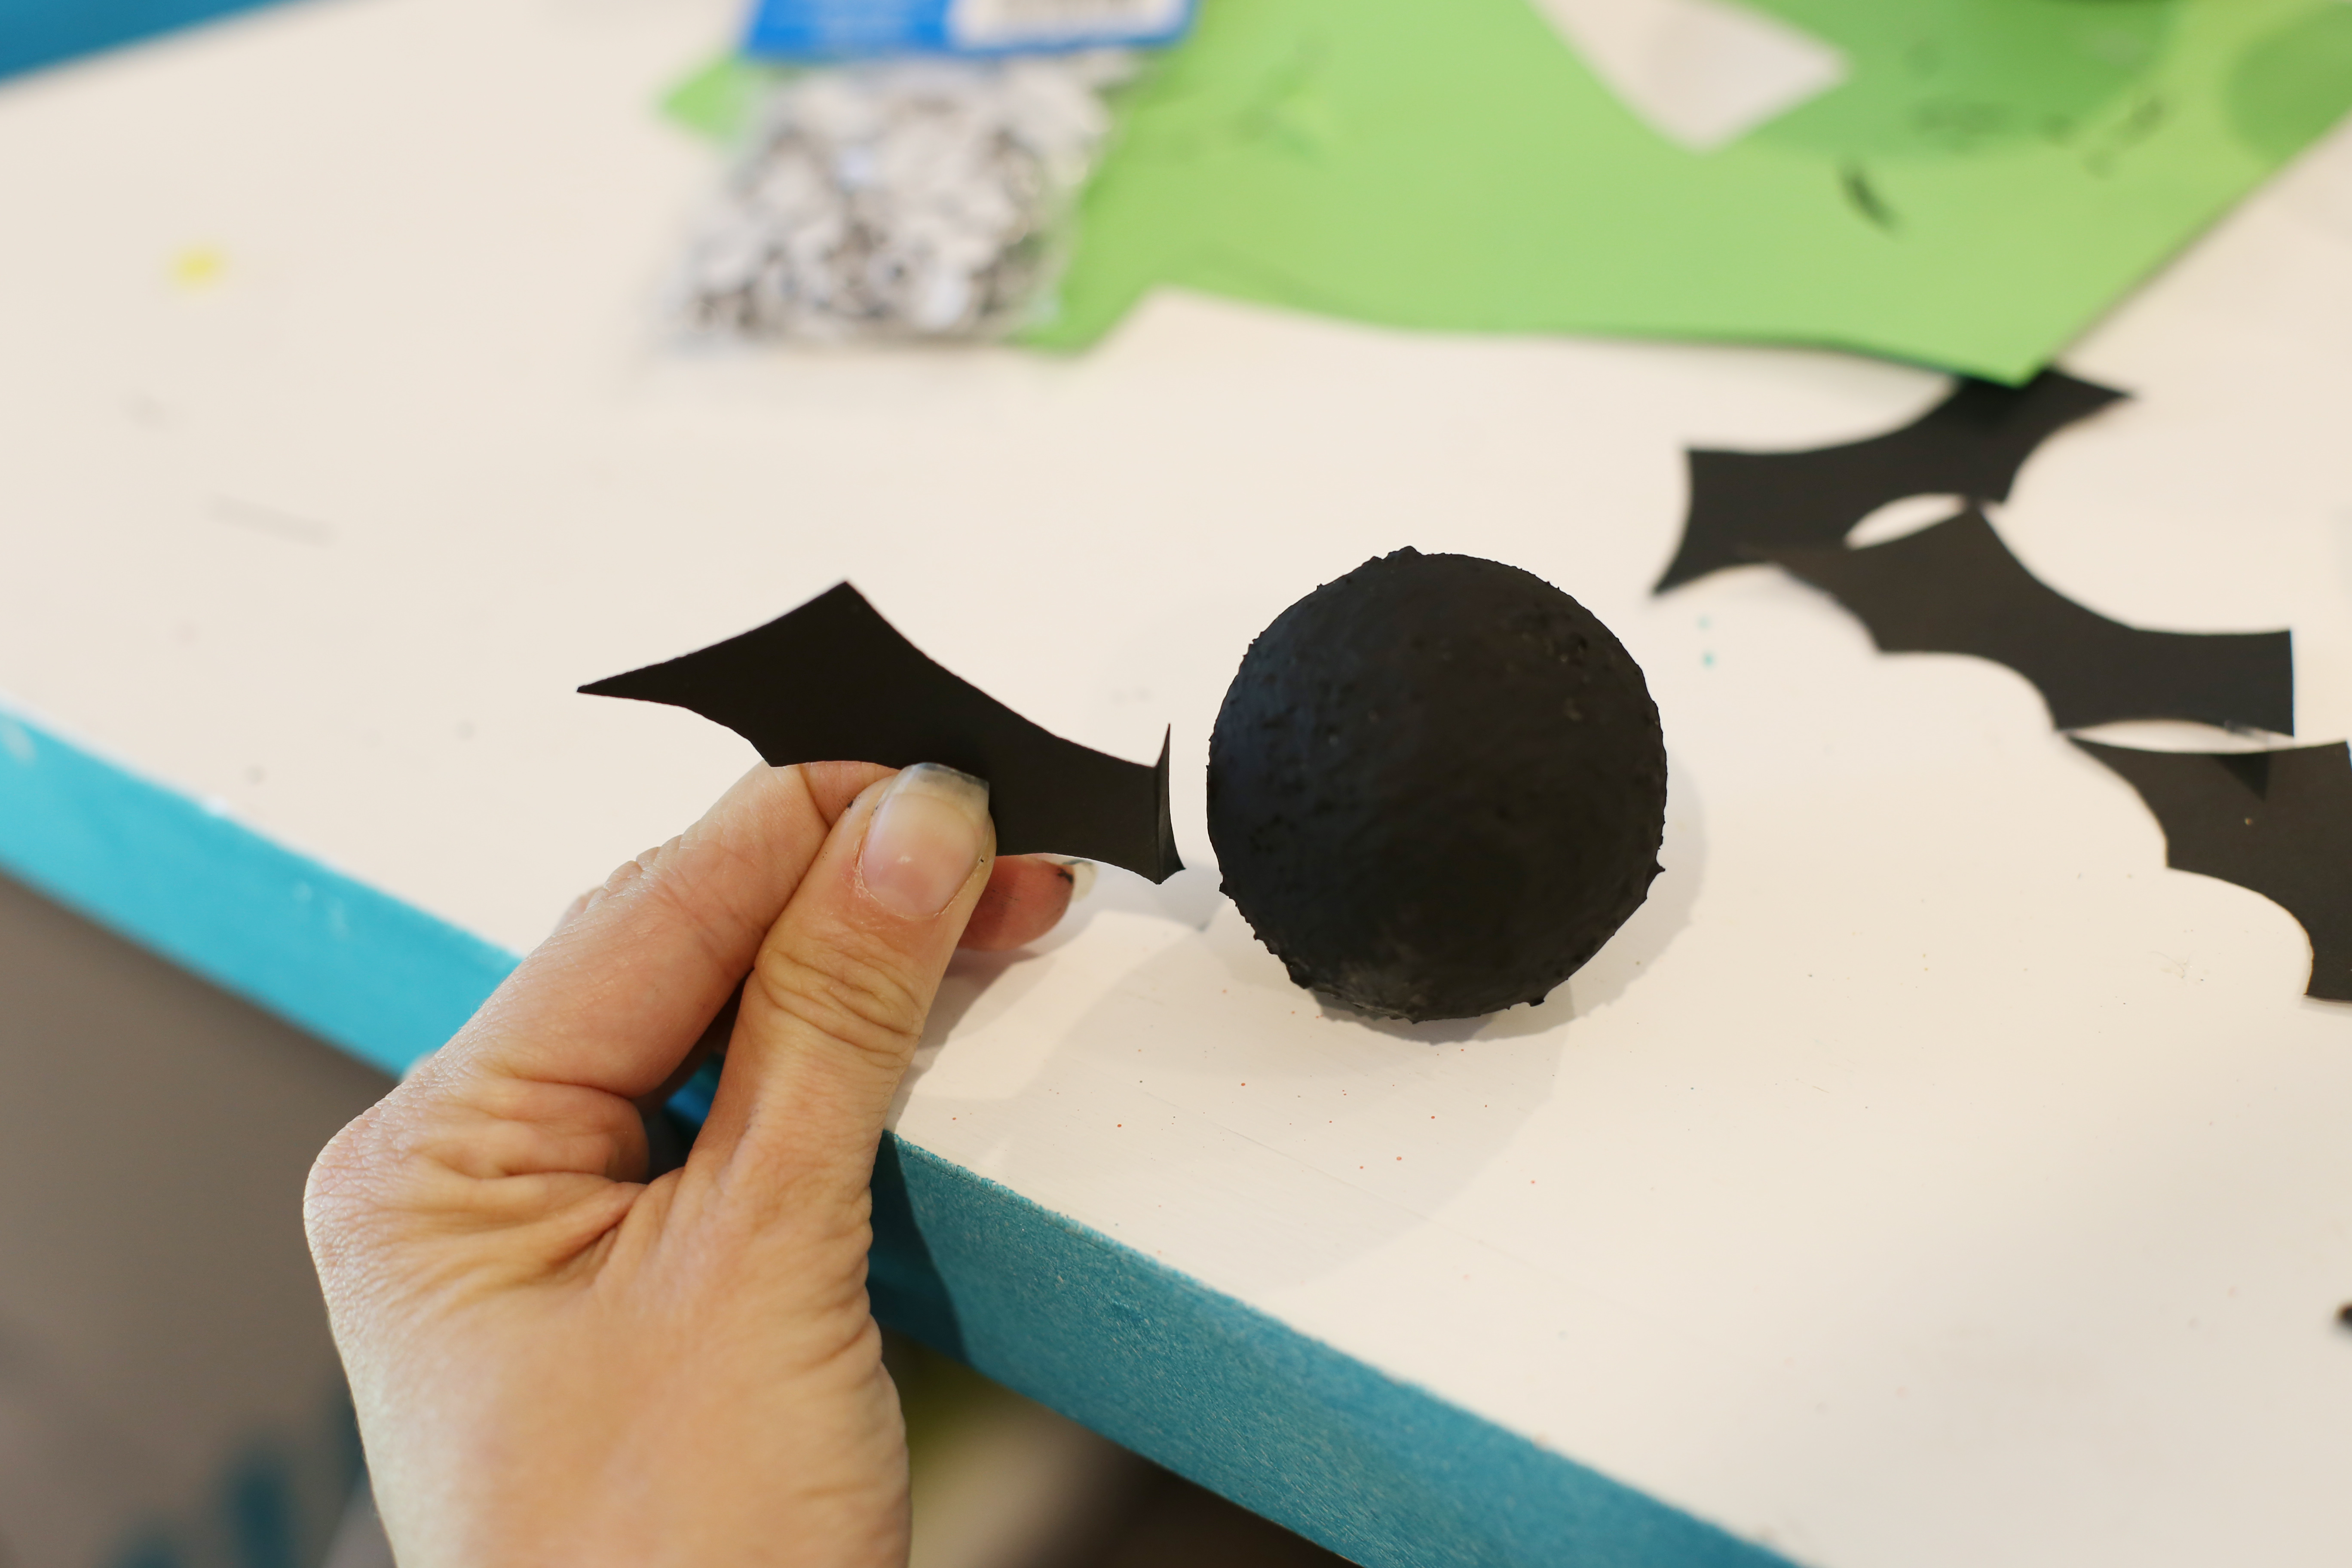
While waiting for paint to dry, cut bat wing shapes out of the cardstock.
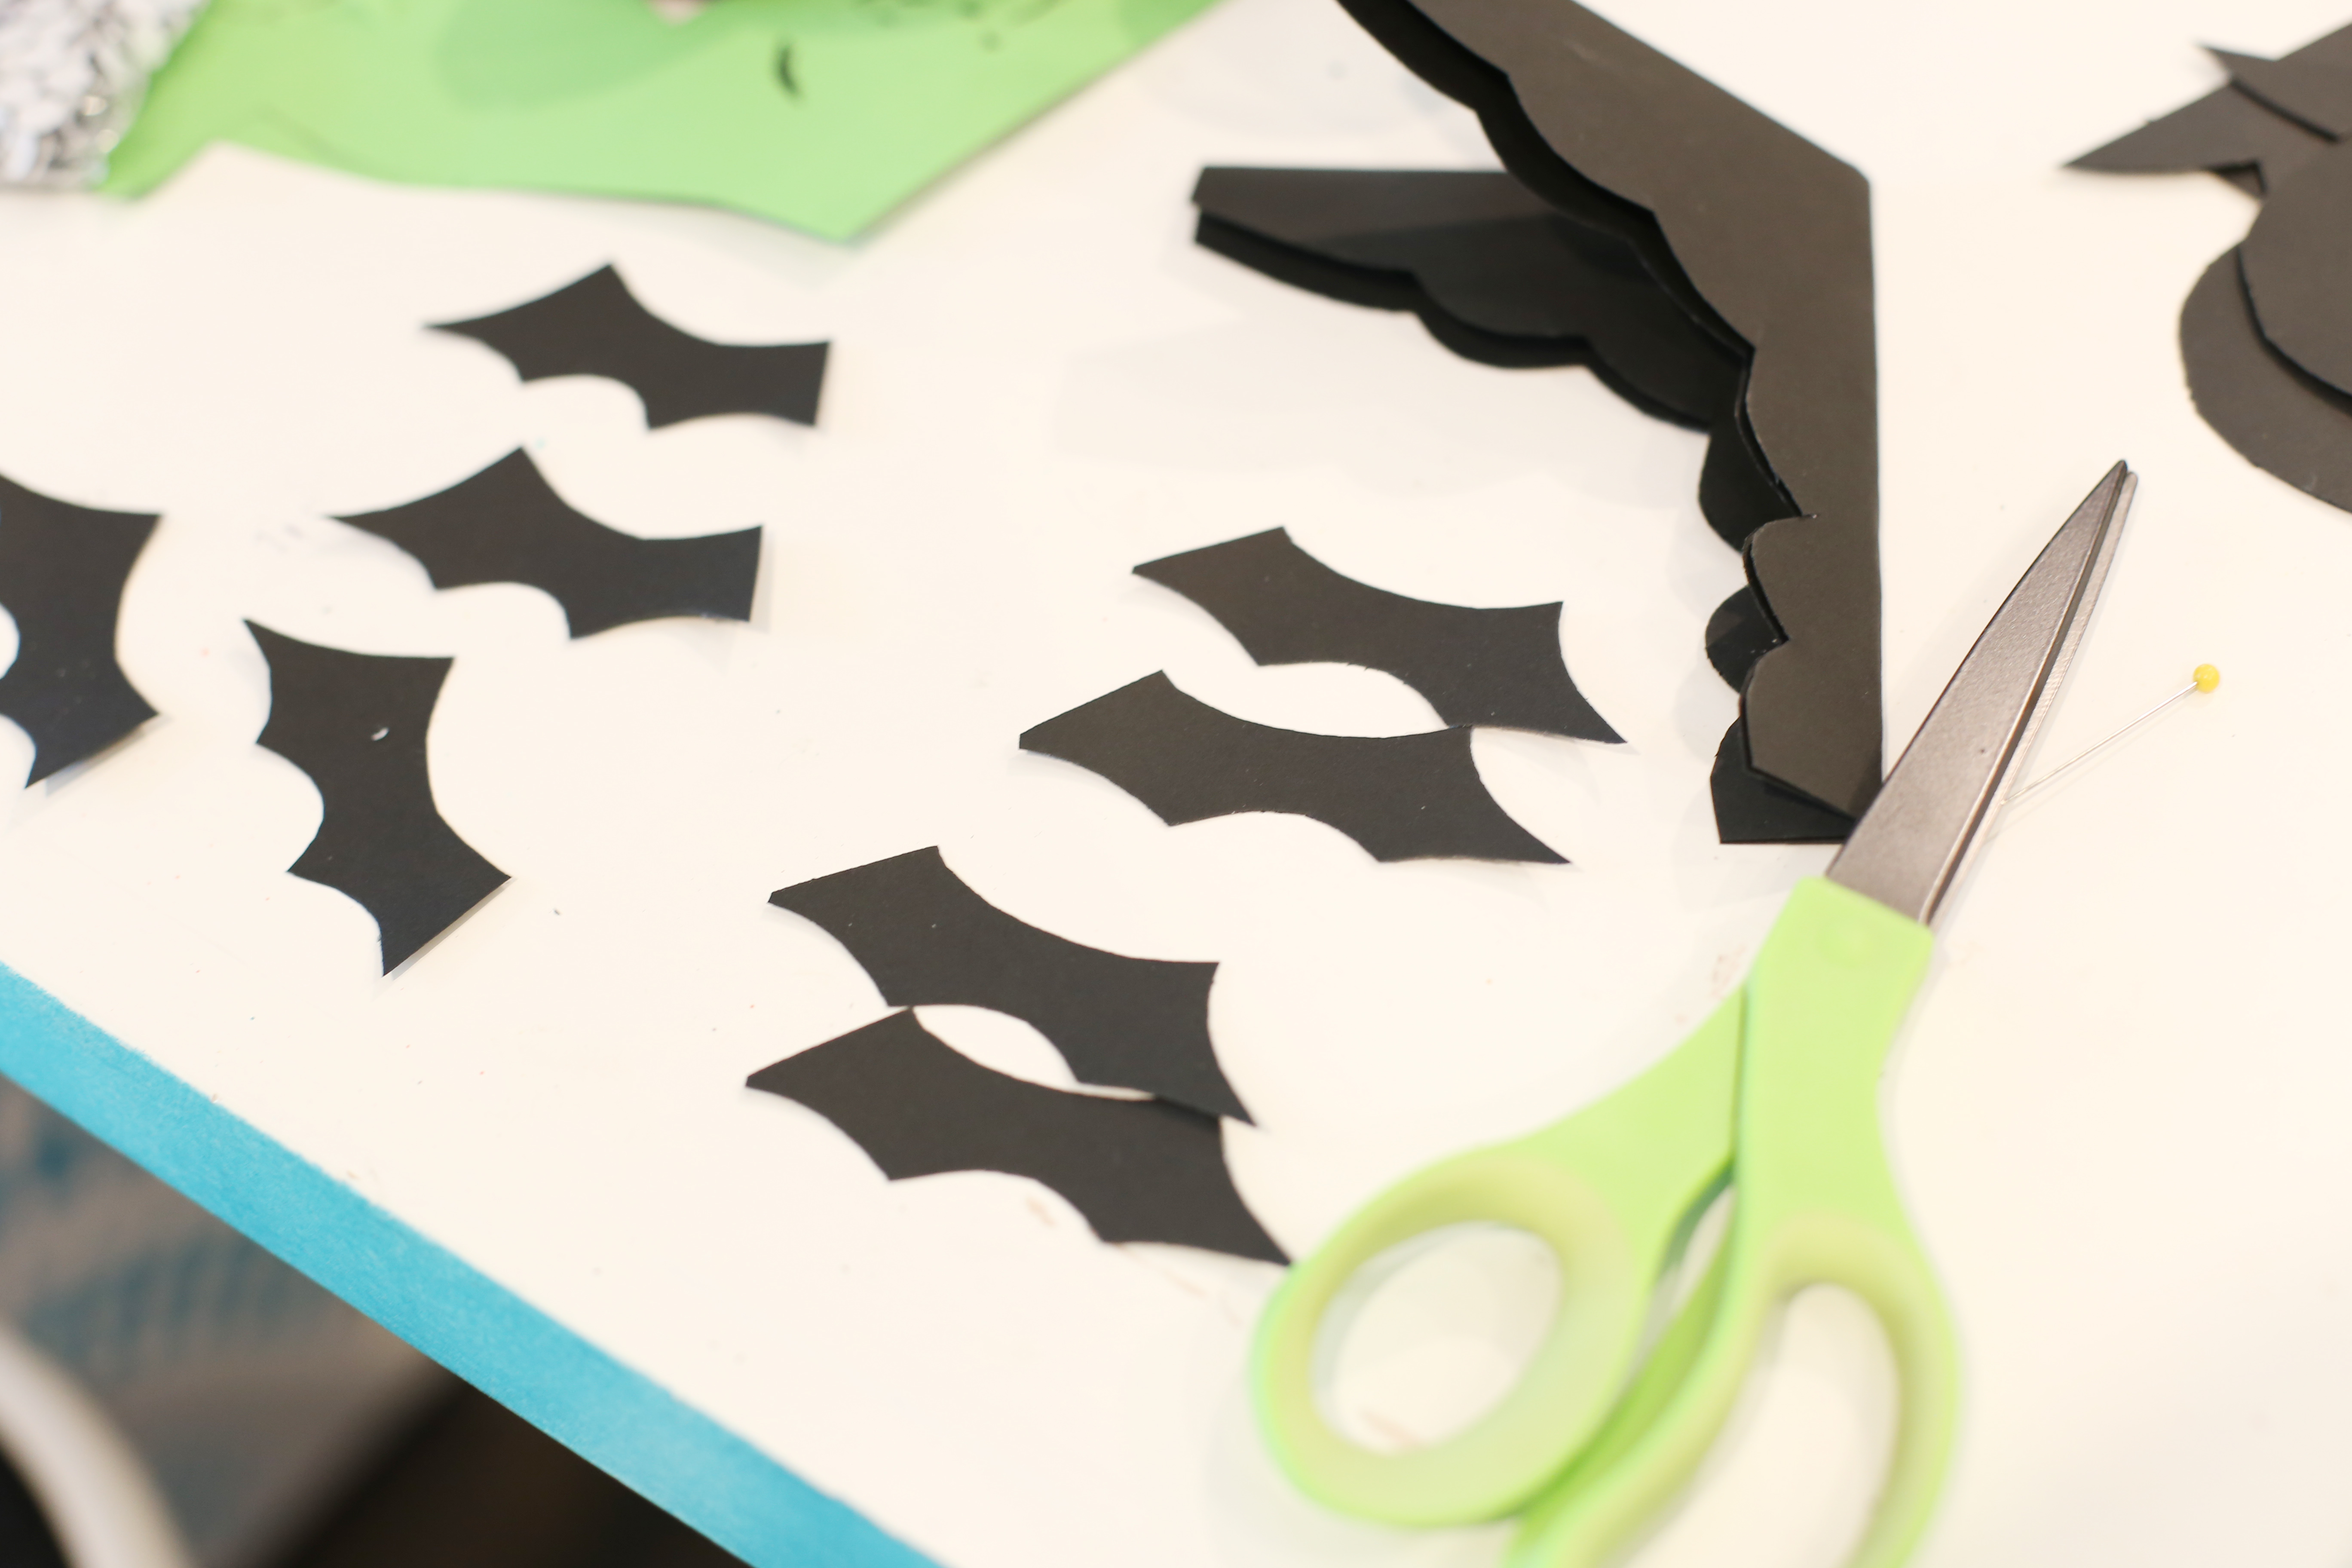
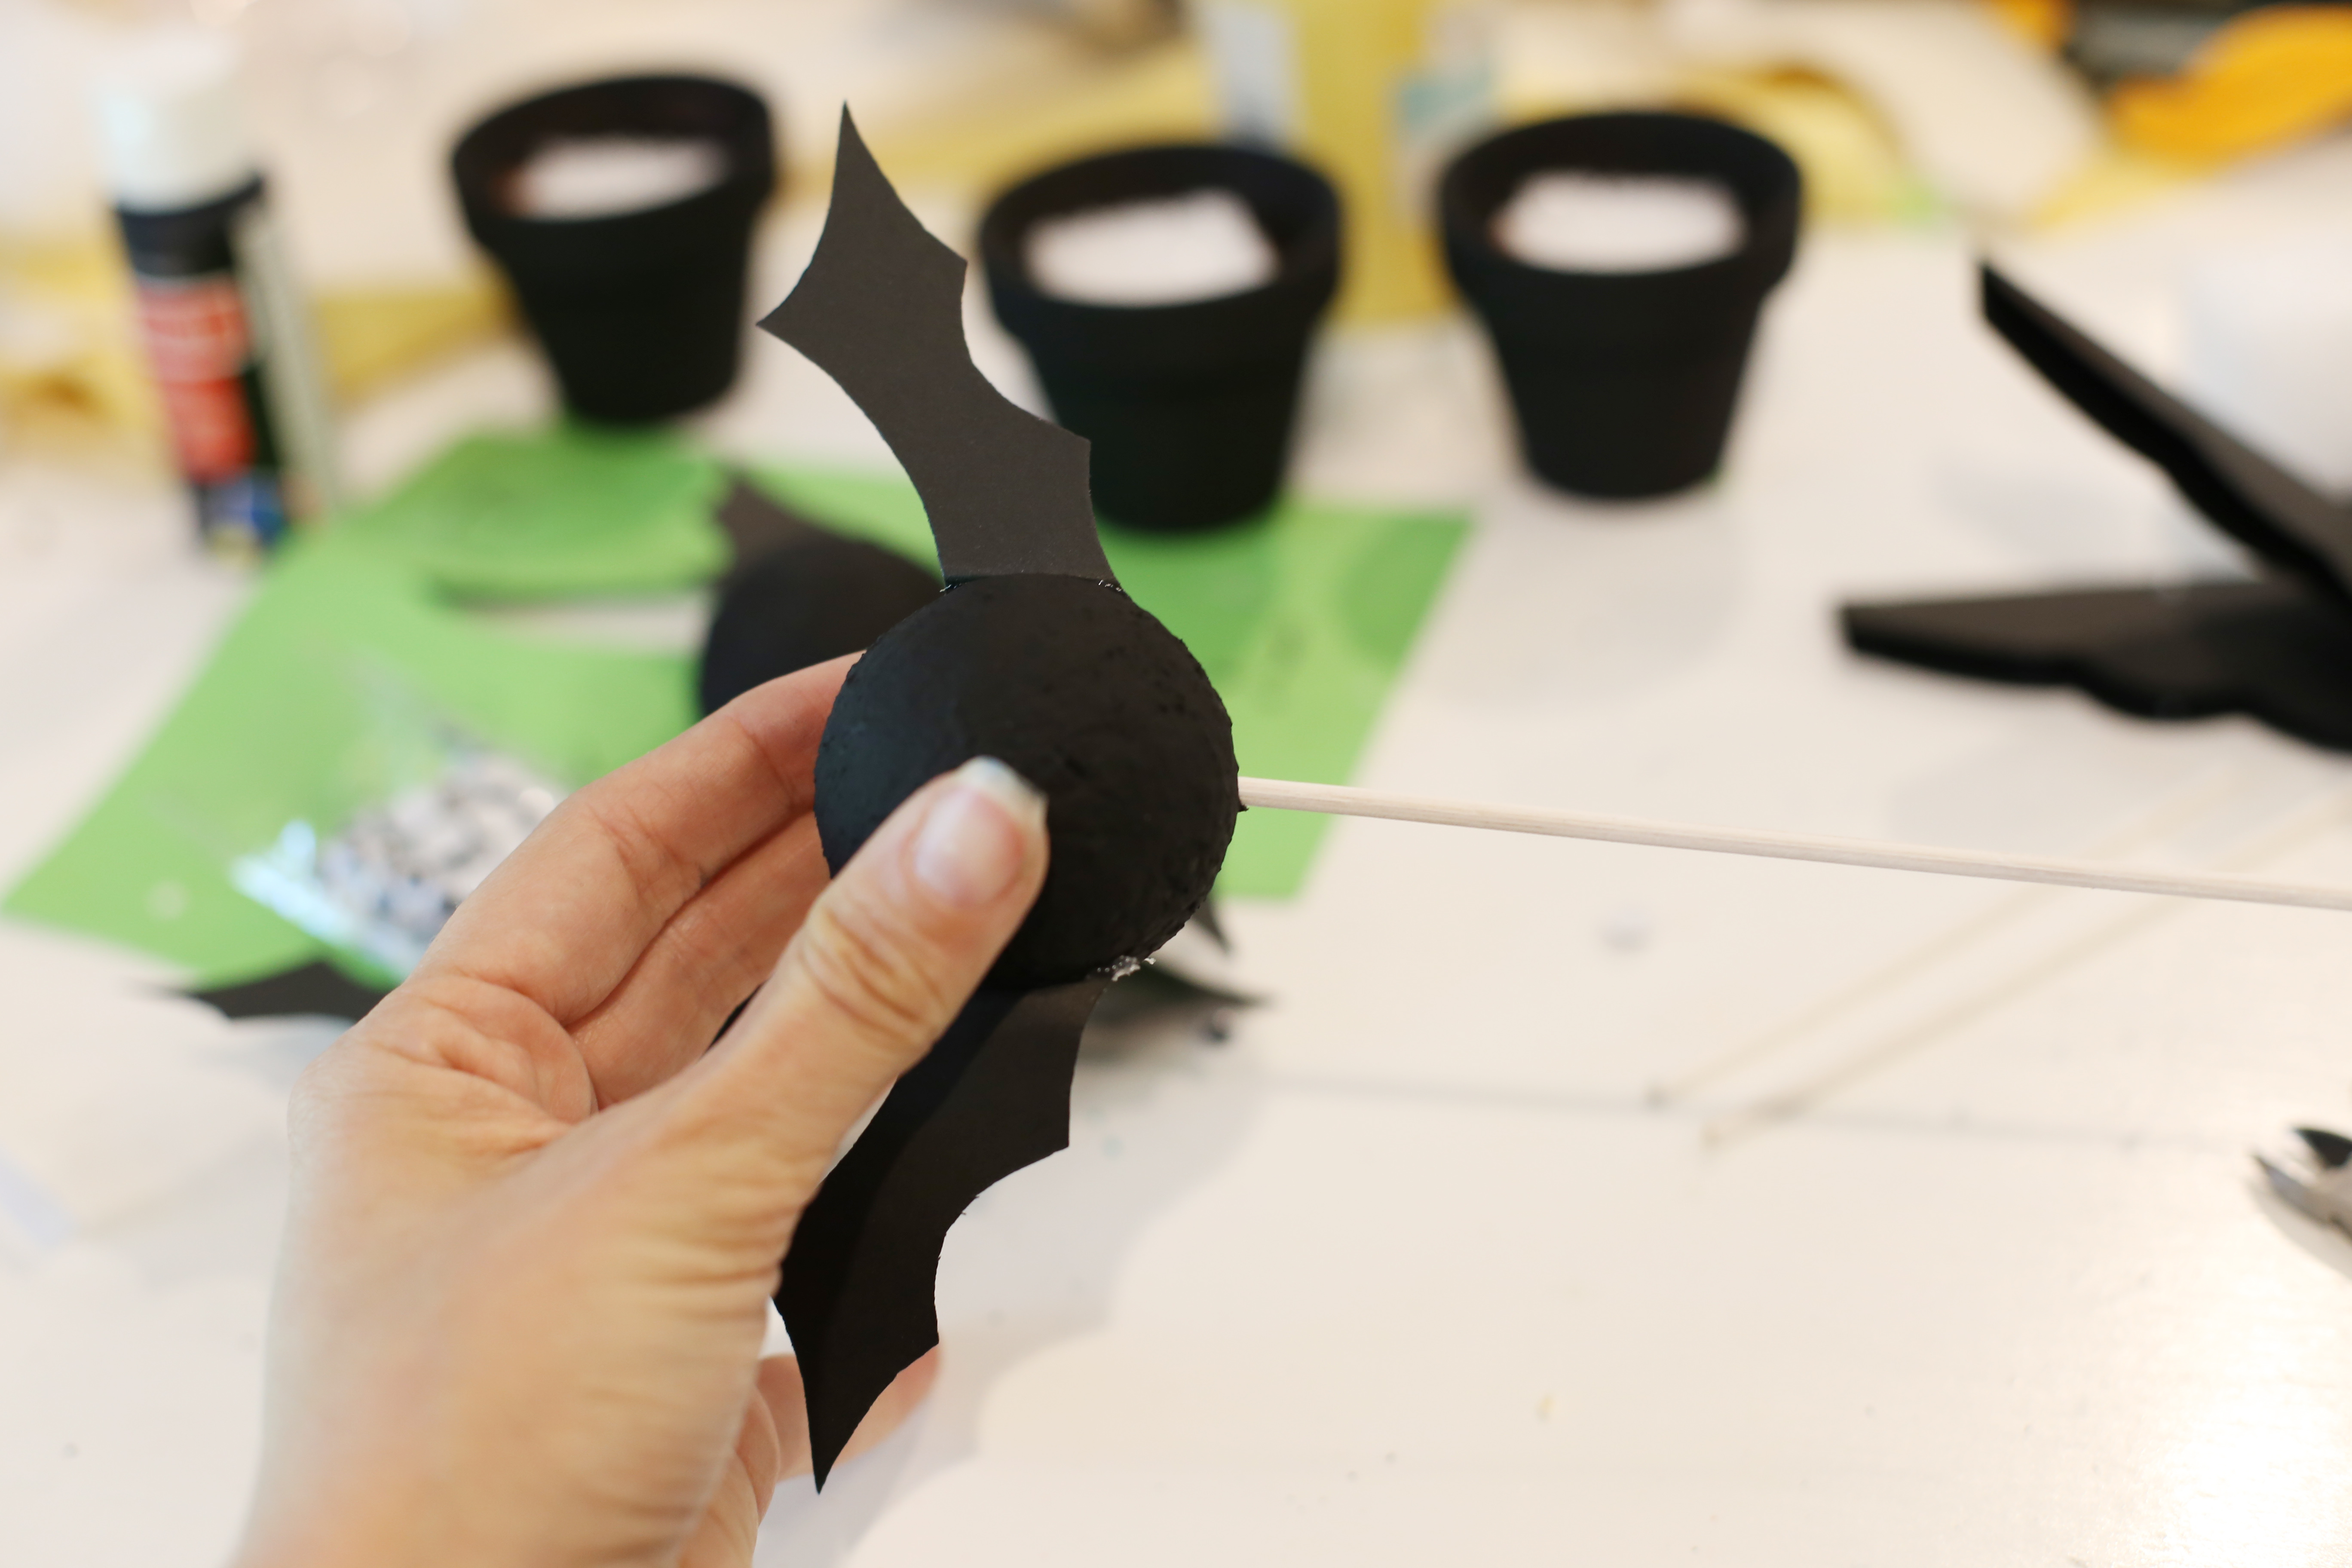
Fold 1/4 inch of the edge of the wing. When paint is dry, apply glue to folded edge and adhere it to the foam ball. Repeat for other wing.
Using low-temp glue, attach googly eyes to the center of green buttons. Attach those button eyes to the front of the foam balls using hot glue.
Place scrap foam or another foam ball into the pots (trim to fit, if needed). Push dowel rod into the bottom of the bat. Push bottom end of dowel rod into the foam inside the pot.
Cover the rest of the foam-filled pot with loose buttons.
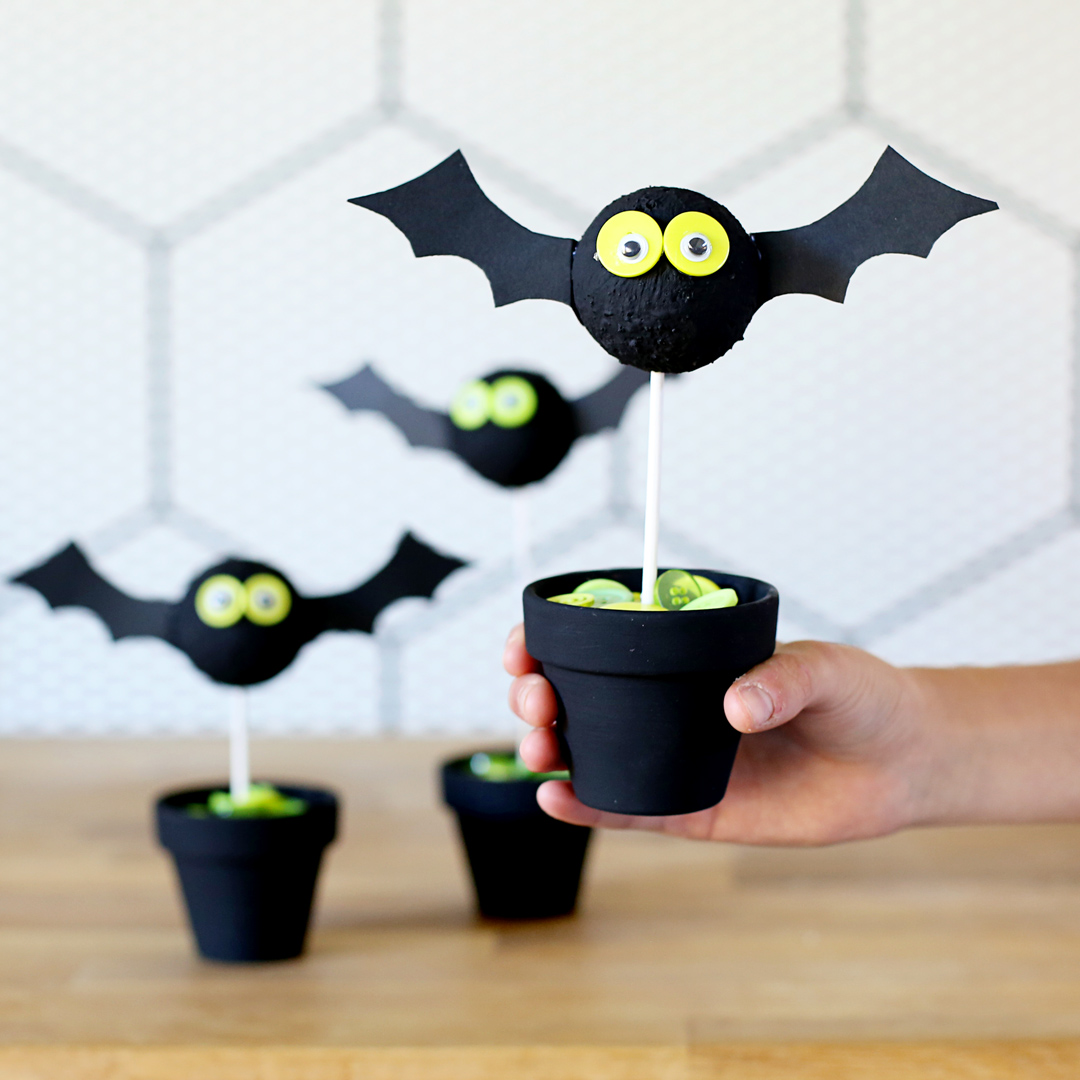
Display and enjoy!! Where will you put the Cutesy Bats that YOU make??